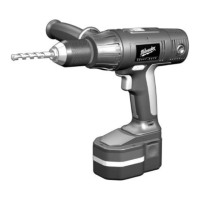
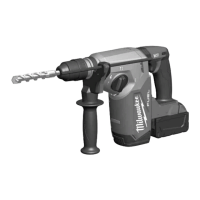
Installing extension shanks and drill bits
1. Clean dust and debris from the drill bit, connector, and extension before install-
ing. Dust and debris can prevent the connector from locking properly, causing
damage to the system.
WARNING READ AND SAVE ALL INSTRUCTIONS FOR FUTURE
USE. To reduce the risk of injury, read and understand these instruc-
tions, the tool's operator's manual, and all labels on the tool.
Use safety equipment. Everyone in the work area should wear safety
goggles or glasses with side shields complying with current safety
standards. Wear work gloves. Drill bits, connector, and extension may
be hot after use.
Keep hands and cord away from all cutting edges and moving parts.
Unplug tool before attaching or removing accessories or making adjust-
ments.
Check connector, drill bits, and extensions for cracks or excessive wear.
Ensure both ends of the connector are fully seated over the locking
groove before use.
Only attach SDS MAX extension shanks into the tool end
of the
connector. Only attach SDS MAX drill bits into the drill bit end
of
the connector.
Do not use more than one connector.
READ AND SAVE THESE
INSTRUCTIONS
MAX-LOK™ ROTARY HAMMER SDS MAX DRILL BIT CONNECTOR SYSTEM
SYSTÈME CONNECTEUR DE FORET SDS MAX POUR MARTEAU ROTATIF MAX-LOK™
SISTEMA CONECTOR MAX-LOK™ DE BROCAS SDS MAX PARA ROTOMARTILLO
Locking
Groove
Tool End Drill Bit End
Sliding
Sleeves
Locking
Groove
2. Insert the SDS MAX extension into the
tool end of the connector.
• Push the sliding sleeve out from the
locking groove and turn it as far as
it will go.
• Press the extension into the con-
nector and turn the extension 180°,
locking it into place. Do not use
excessive force. If the accessory
becomes jammed, insert an acces-
sory at the other end to loosen.
• Turn back the sliding sleeve and
lock it into the groove. The acces-
sory may slide back and forth in the
connector when properly installed.
3. Insert the SDS MAX drill bit into the drill
bit end
of the connector.
• Push the sliding sleeve out from the
locking groove and turn it as far as
it will go.
• Press the drill bit into the connector
and turn the drill bit 180°, locking it
into place. Do not use excessive
force. If the accessory becomes
jammed, insert an accessory at the
other end to loosen.
• Turn back the sliding sleeve and
lock it into the groove. The acces-
sory may slide back and forth in the
connector when properly installed.
4. To remove the extension or drill bit:
• Pull out the sliding sleeve of the connector from the locking groove and
turn it as far as it will go.
• Rotate the drill bit or extension 180° and remove it from the connector.
• Turn back the sliding sleeve and lock it into the groove.
Use and Care
• When drilling holes deeper than the length of the drill bit, the hole must be
greater than 1-1/4" diameter (32 mm) to allow for the connector to enter
the material.
• If there is little or no grease inside of the connector, or if the connector is
stored for a long period of time, apply a light amount of connector grease
49-08-5385 into both ends of the connector. Insert the drill bit and exten-
sion shanks and wipe away extra grease, as it will collect dust and debris
during use.
• Only drill in forward (clockwise) rotation. Drilling in reverse may cause the
connector to open and disengage the drill bit or extension.
• Always keep the drill bit, connector, extension and tool properly aligned.
Do not apply side pressure when drilling.
AVERTISSEMENT LIRE ET CONSERVER TOUTES LES
INSTRUCTIONS POUR UTILISATION ULTÉRIEURE. Pour réduire
le risque de blessures, lire et comprendre ces instructions, le manuel
d'utilisation de l'outil, et toutes les étiquettes sur l'outil.
-
une usure excessive.
foret du connecteur.
LIRE ET CONSERVER CES
INSTRUCTIONS
1. Nettoyez la poussière et les débris du foret, du connecteur, et de l'extension
avant l’installation. La poussière et les débris peuvent empêcher le connecteur
de se verrouiller correctement, ce qui peut endommager le système.
Rainure
autofreinante
outil
foret
Manchons
coulissants
Rainure
autofreinante
2. Insérez l'extension SDS MAX dans
l'extrémité outil du connecteur.
• Poussezlemanchoncoulissantà
partir de la rainure autofreinante et
tournez-lejusqu'àlabutée.
• Enfoncezl'extensiondanslecon-
necteuret tournez-laà180°pour
la verrouiller en place. N'appliquez
pas une force excessive. Si
l'accessoire est coincé, insérez un
accessoire dans l'autre extrémité
pour desserrer.
• Tournez le manchon coulissant
en arrière et verrouillez-le dans
la rainure. L'accessoire pourrait
glisser d'avant en arrière dans le
connecteur lorsqu'il est correcte-
ment installé.
3. Insérez le foret SDS MAX dans
l'extrémité foret du connecteur.
• Poussezlemanchoncoulissantà
partir de la rainure autofreinante et
tournez-lejusqu'àlabutée.
• Enfoncez le foret dans le con-
necteuret tournez-leà180°pour
le verrouiller en place. N'appliquez
pas une force excessive. Si
l'accessoire est coincé, insérez un
accessoire dans l'autre extrémité
pour desserrer.
• Tournezlemanchoncoulissanten
arrière et verrouillez-le dans la rain-
ure. L'accessoire pourrait glisser
d'avant en arrière dans le connecteur lorsqu'il est correctement installé.
4. Pour retirer l'extension ou le foret :
• Tirezlemanchoncoulissantduconnecteuràpartirdelarainureautofre-
inanteettournez-lejusqu'àlabutée.
• Tournezleforetoul'extensionà180°enarrièreetretirez-lesduconnecteur.
• Tournezlemanchoncoulissantenarrièreetverrouillez-ledanslarainure.