Do you have a question about the Milwaukee V28 and is the answer not in the manual?
Keep work area clean and well lit. Avoid explosive atmospheres. Keep bystanders away.
Use correct plugs, avoid grounded surfaces, protect from rain/wet, don't abuse cord, use outdoor extension cords.
Stay alert, use PPE, prevent unintentional starting, remove keys, don't overreach, dress properly.
Recharge with specified charger, use designated battery packs, keep packs away from metal.
Read all safety warnings, use correct accessories, match accessory speed, use proper guard.
Understand kickback, maintain firm grip, position body to resist forces, never place hand near rotating accessory.
Use recommended wheels, proper guard, correct flanges, avoid side force on cut-off wheels.
Don't jam wheel, don't restart cut, support workpiece, avoid blind areas.
Use correct disc size, follow recommendations, avoid oversized discs.
Use guard, don't overstress wires, check for loose/fatigued wires.
Maintain labels, be aware of dust hazards, use approved safety equipment.
Lists technical specifications like Cat. No., Volts, RPM, Spindle Thread Size, Wheel Size.
Identifies key parts of the tool such as spindle lock, switch, handles, and guard.
Push release buttons and pull battery pack away from the tool.
Slide battery pack onto tool body and ensure it latches securely.
Thread side handle into socket on gear case for desired side and tighten.
Proper guard installation is crucial for safety during grinding.
Use correct size, type, grit, and RPM rated accessories for the tool.
Choose appropriate wheel types (aluminum oxide, silicon carbide) for different materials.
Protect wheels from moisture, temperature changes, dropping, bumping, and store properly.
Test wheel, hold tool firmly, use 5°-15° angle, control pressure, stop tool properly.
Use Type "1" guard, grasp firmly, allow full speed, use wheel edge, control pressure.
Thread brush onto spindle, press lock button, tighten with wrench.
Test brush for balance, avoid over-stressing wires, check for damage.
Choose grit based on stock removal needs: 24/36 for heavy, 50-80 for medium, 120 for finishing.
Install backing pad, secure disc with nut, tighten using spindle lock.
Hold tool at 5°-15° angle, use long sweeping strokes, advance forward.
Sand at right angles to previous strokes for uniform finish and to remove marks.
Move constantly, work faster on curves, ease pressure on flat areas.
Unplug tool, remove battery pack before maintenance. Never disassemble tool, battery, or charger.
Clean vents, handles. Use mild soap and damp cloth; avoid solvents.
Return tool, battery pack, or charger to nearest service center for repairs.
Always remove battery pack before changing accessories. Only use recommended accessories.
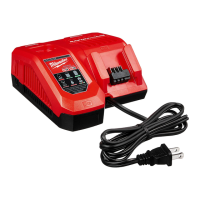
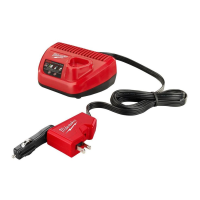
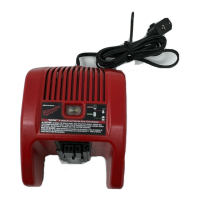
| Input Voltage | 120V AC |
|---|---|
| Output Voltage | 28V DC |
| Charging Time | 60 minutes |
| Charge Time | 60 minutes |
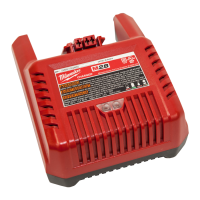
| Compatibility | Milwaukee V28 Batteries |
| Battery Type | Lithium-Ion (Li-Ion) |
| Compatible Battery Types | V28 Lithium-Ion Batteries |