7
PHASE 1: BABY
CARRYCOT
• Whenusingkobiforchildrenundertheageof6
months,werecommendusingthesuppliedcarrycot
unlthechildcansitunaided.
• Aachthecarrycottotheupperpartofthechassis,not
tothelowerpart.
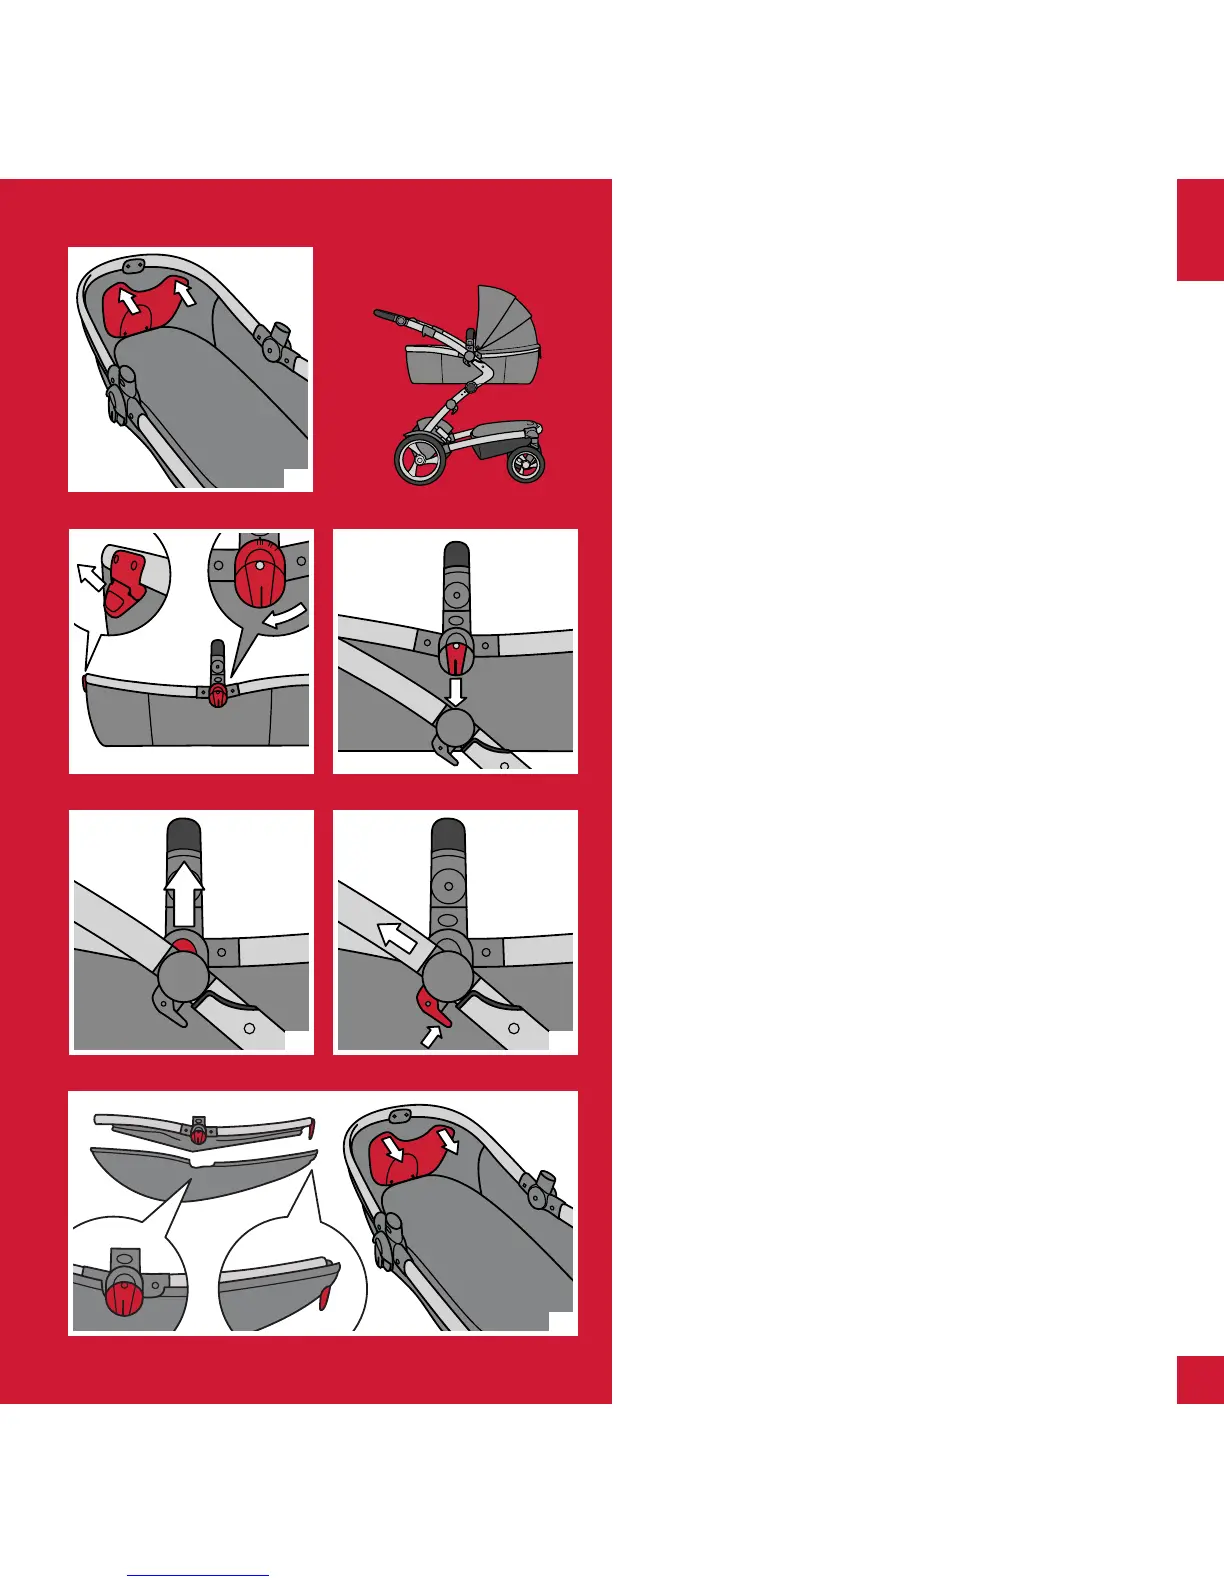
13. Set up carrycot
Zip open the seat and take out the carrycot.
Push the two aps underneath the carrycot tube.
Place the maress inside the carrycot and aach the
safety bar (see g 32).
14. Adjust carrycot angle
It is easier to t the carrycot onto the chassis if the
aachment brackets are in posion III, poinng straight
downwards. To achieve this pull the angle adjustment
lever and rotate the brackets by hand. The carrycot angle
can also be adjusted when ed to the chassis.
15. Aach carrycot
Posion the carrycot so that the angle adjustment lever
is at the front end of the stroller. Lower the carrycot onto
the chassis unl it clicks in place.
16. Remove carrycot
Press the two buons on both sides of the carrycot and
li it up.
17. Adjust height of carrycot
• Therearetwoheightposionsforthecarrycot.
Press the height adjustment buons on both sides of the
chassis and move the carrycot up or down.
18. Collapse carrycot
Remove the maress and the safety bar. Release the
sideaps from the carrycot frame. Open the seat and
posion the collapsed carrycot inside the seat. Align the
angle adjustment lever with the hole in the rear shell of
the seat. Make sure the seat brackets stay out of the seat.
14
15
16
17
ENG
13
18