29 + 30
PHASE 3: TODDLER + BABY
• Tousekobiforababyandatoddler,itisrequiredto
purchasethesecondseat.Thissecondseatdoesnot
haveacarrycotinside.
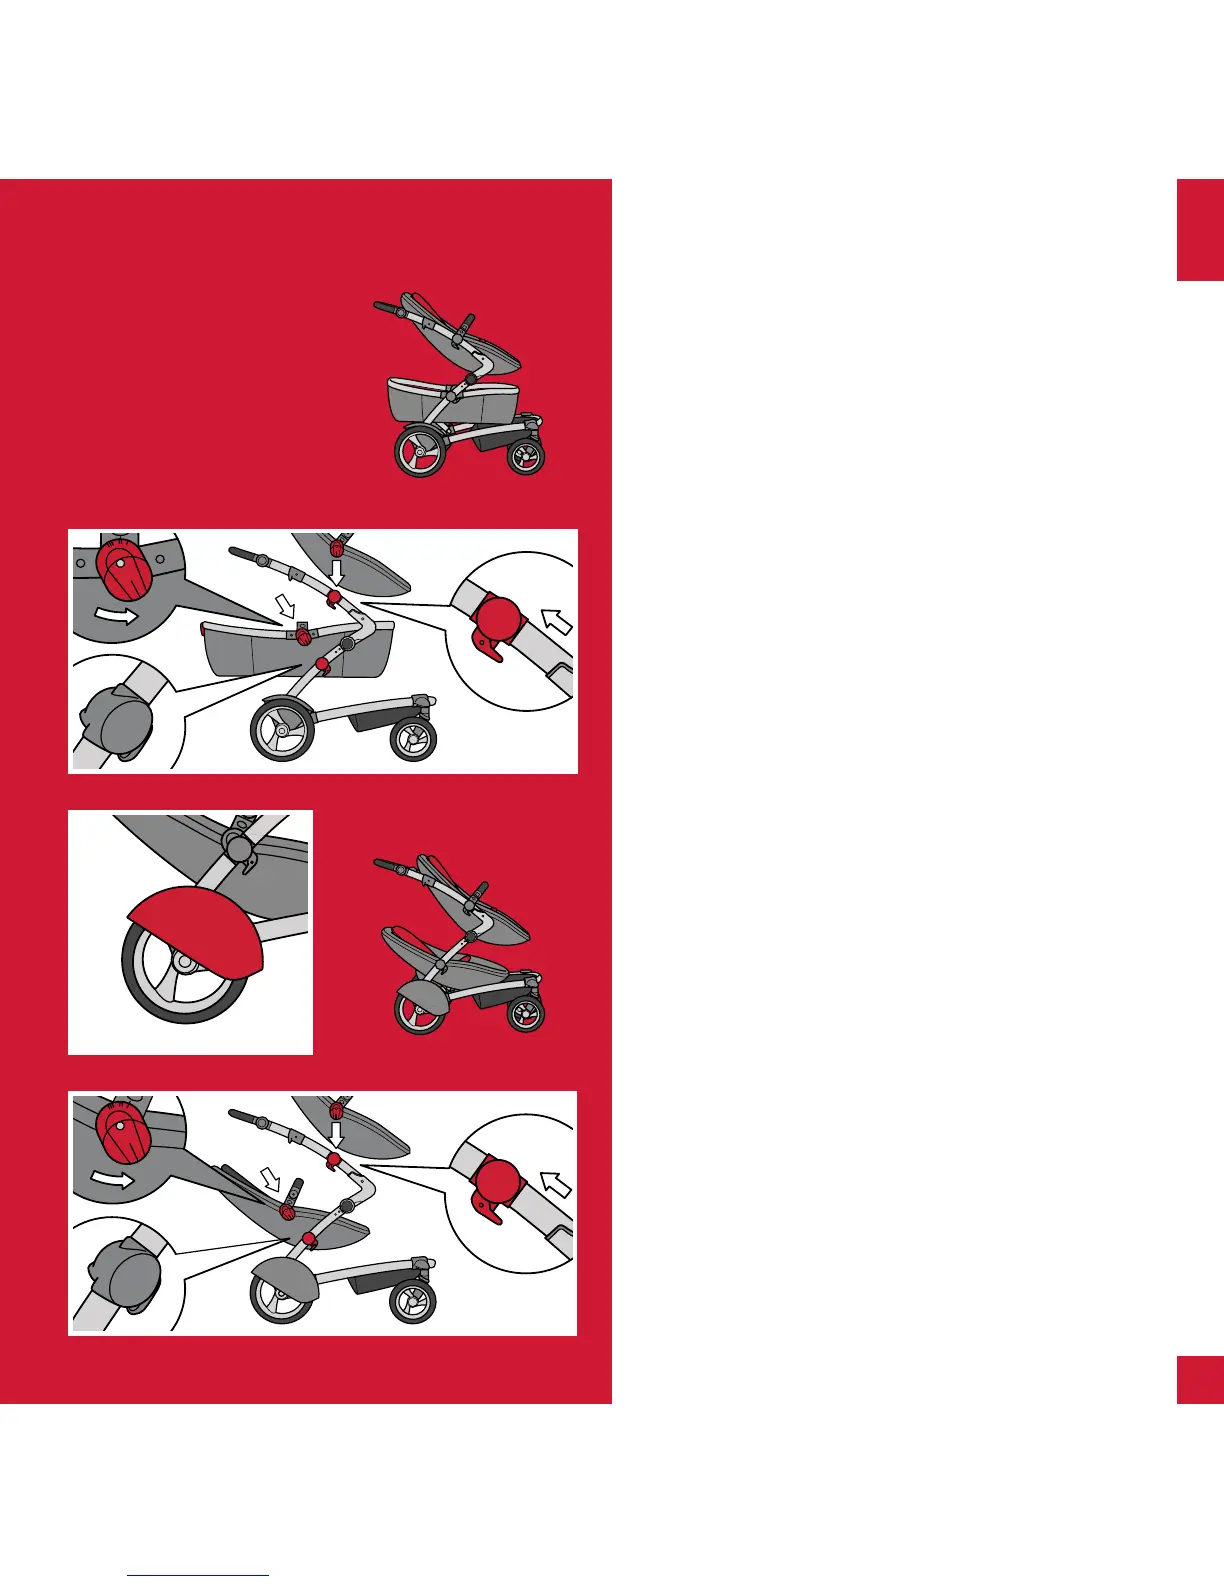
CARRYCOT + SEAT
• Setupthecarrycotasdescribedonpage7.
26. Aach carrycot
Make sure the rear seat xings on the chassis are in
posion 1. Posion the carrycot so that the angle
adjustment lever is facing backwards.
Rotate the brackets into posion II (see also g. 14).
Click the carrycot onto the lower part of the chassis.
27. Aach seat
Make sure the front seat xings on the chassis are in the
high posion. Posion the seat so that it is facing forward.
Click the seat onto the upper part of the chassis.
PHASE 4: TWO TODDLERS
• Tousekobifortwotoddlersitisrequiredtopurchase
thesecondtoddlerseat.Thissecondseatdoesnot
haveacarrycotinside.
• ThesecondseatcomeswithXLmudguards.Forthe
safetyofyourchildpleasemakesuretousetheseXL
mudguards.
• WARNING:Whenusingkobifortwotoddlers,
alwaysplacetheheavierchildinthefrontseat.
Neverplaceachildintherearseatwithoutachildin
thefrontseat.
TWO SEATS
28. Aach XL mudguards
Slide o the small mudguards (see g. 2) and replace
them with the XL mudguards.
29. Aach rear seat
Make sure the rear seat xings on the chassis are in
posion 2. Rotate the brackets into posion I (see g. 14).
Click the seat onto the lower part of the chassis.
30. Aach front seat
Click the seat onto the upper part of the chassis.
26 + 27
28
ENG