11
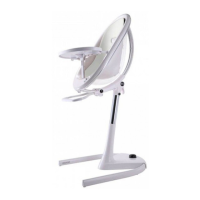
STAGE 3: JUNIOR CHAIR
JUNIOR CHAIR
• WARNING: Thejuniorchairhasbeendesignedfor
children aged 3 and over.
• The specially designed cushions should be used for the
seat(Soldseparately).
• Therecommendedmaximumweightis45Kg.
• Itmustbesettothelowestheight.
18. Removing the high chair seat
Press the buon at the boom of the seat to release the
high chair seat. Then li and remove it.
19. Seat recline posion adjustment
Adjust the angle of the seat to the almost upright sing
posion. It is more comfortable with the cushions when it
is slightly lted and not totally upright.
20. Adding the junior chair cushions to the seat
Place the cushions on the seat. The largest goes on the
base of the seat and the smaller at the back of the seat.
21. Height adjustment
Press the buon on the base of moon with your foot and
the seat will rise automacally. You may need to press the
chair down slightly to acvate the rising mechanism. Press
the buon on the base of moon with your foot and at the
same me push the seat downwards to lower it.
Lowering the seat is easier if you push down on the upper
middle part of it. Raise your foot when the seat is at the
desired height.
ACCESSORIES
We frequently update for moon accessories. For more
details please visit www.mimakids.com or contact your
retailer.
The following accessories are available to buy:
• Adjustablefootrest
• Juniorchaircushions
• Baby headrest
18
20
EN
19
21