Side marker lights
To replace these bulbs, contact a dealer’s serv‐
ice center or another qualified service center or
repair shop.
Tail lights, bulb replacement
Follow the general instructions on lamps and
bulbs, refer to page 239.
Turn signal: 21-watt bulb, PY 21 W
MINI Countryman
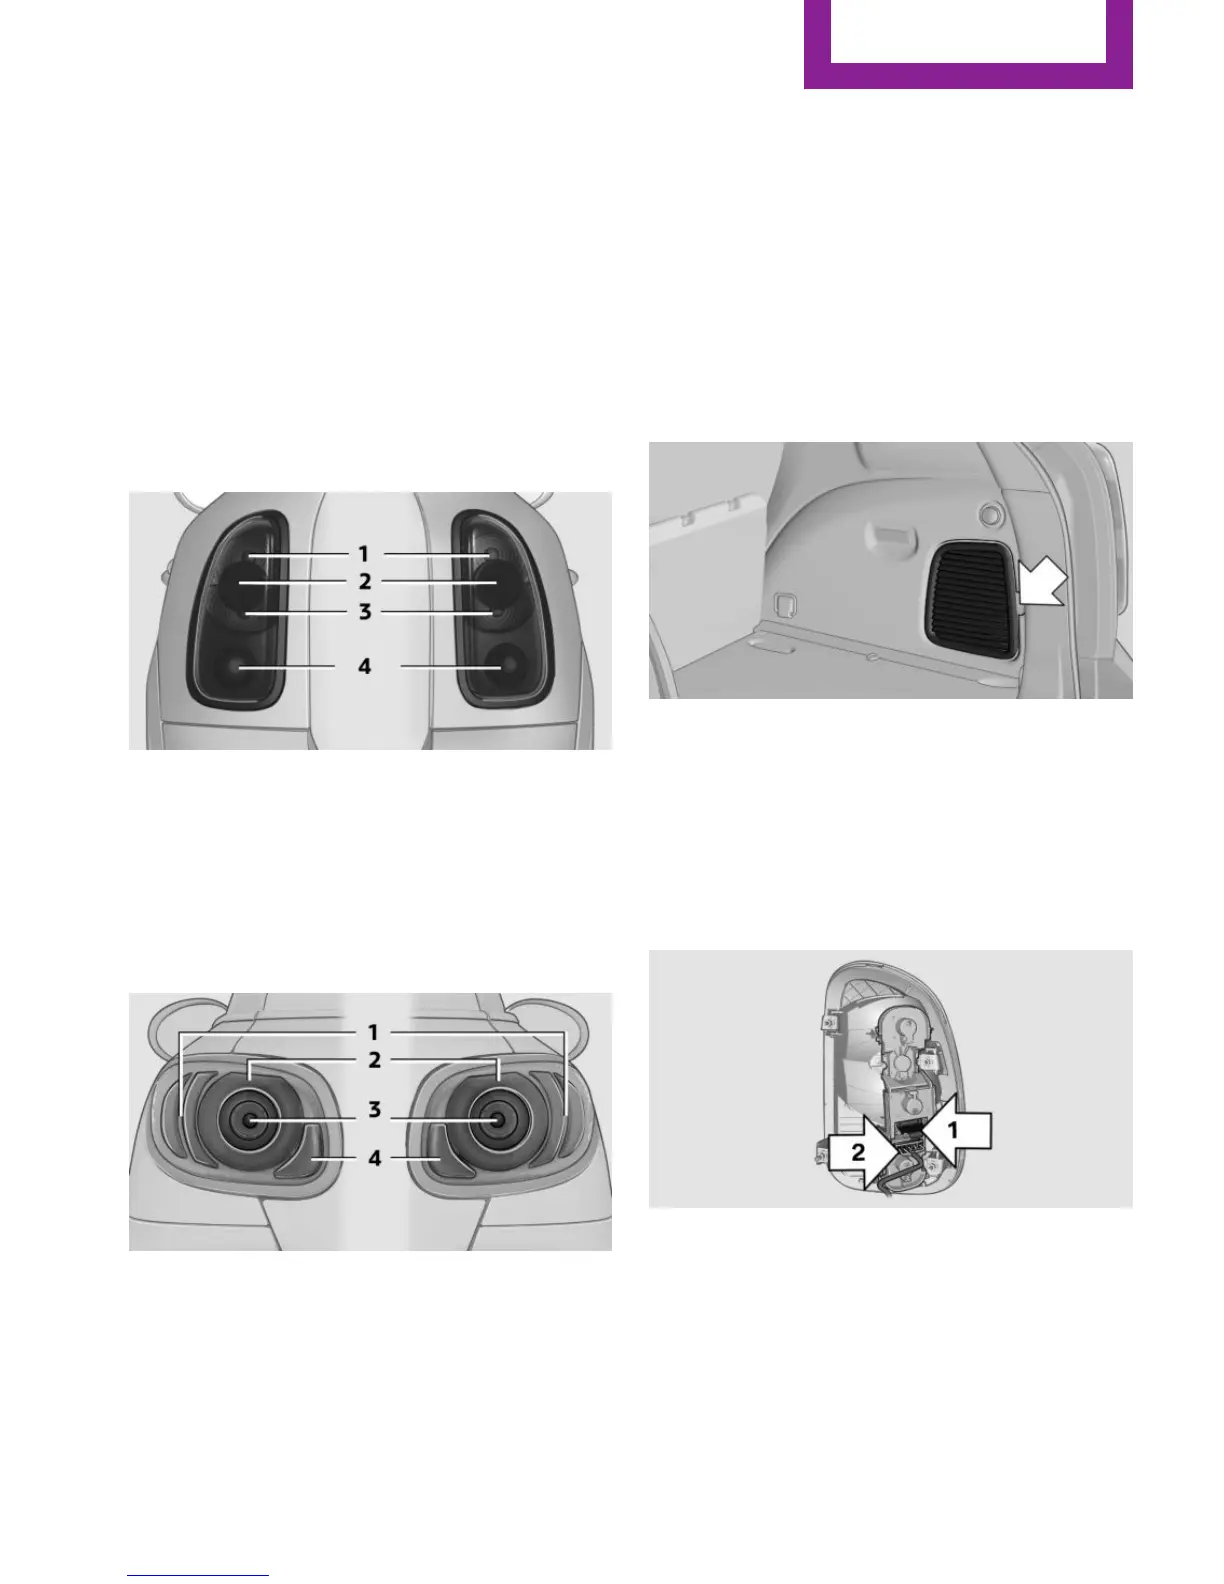
1 Brake/tail light
2 Turn signal
3 Brake/tail light
4 Backup light
MINI Paceman
1 Brake light
2 Tail light
3 Turn signal
4 Backup light
Replacing
All bulbs are integrated in a central bulb holder.
MINI Countryman
1. Switch off the lights and take the remote
control out of the ignition lock.
2. Open the tailgate.
3. Press the cover out of the cargo area side
panel at the rear and remove it.
4. Detach the emergency release of the fuel
filler flap, refer to page 214, and push it
aside with the foam insert.
Ensure that the emergency release is not
damaged.
5. Disengage the bulb holder by pushing
down the clip, arrow 1.
6. Take out the bulb holder and detach the
cable, arrow 2.
7. Apply gentle pressure to the bulb while
turning it to the left and remove it.
8. Insert the new bulb and mount the bulb
holder in reverse order. Ensure that the
bulb holder engages in all fasteners.
Seite 243
Replacing components
MOBILITY
243
Online Edition for Part no. 01 40 2 964 459 - VI/15