3
MINIMED™ 670G SYSTEM | MEDTRONIC EXTENDED INFUSION SET
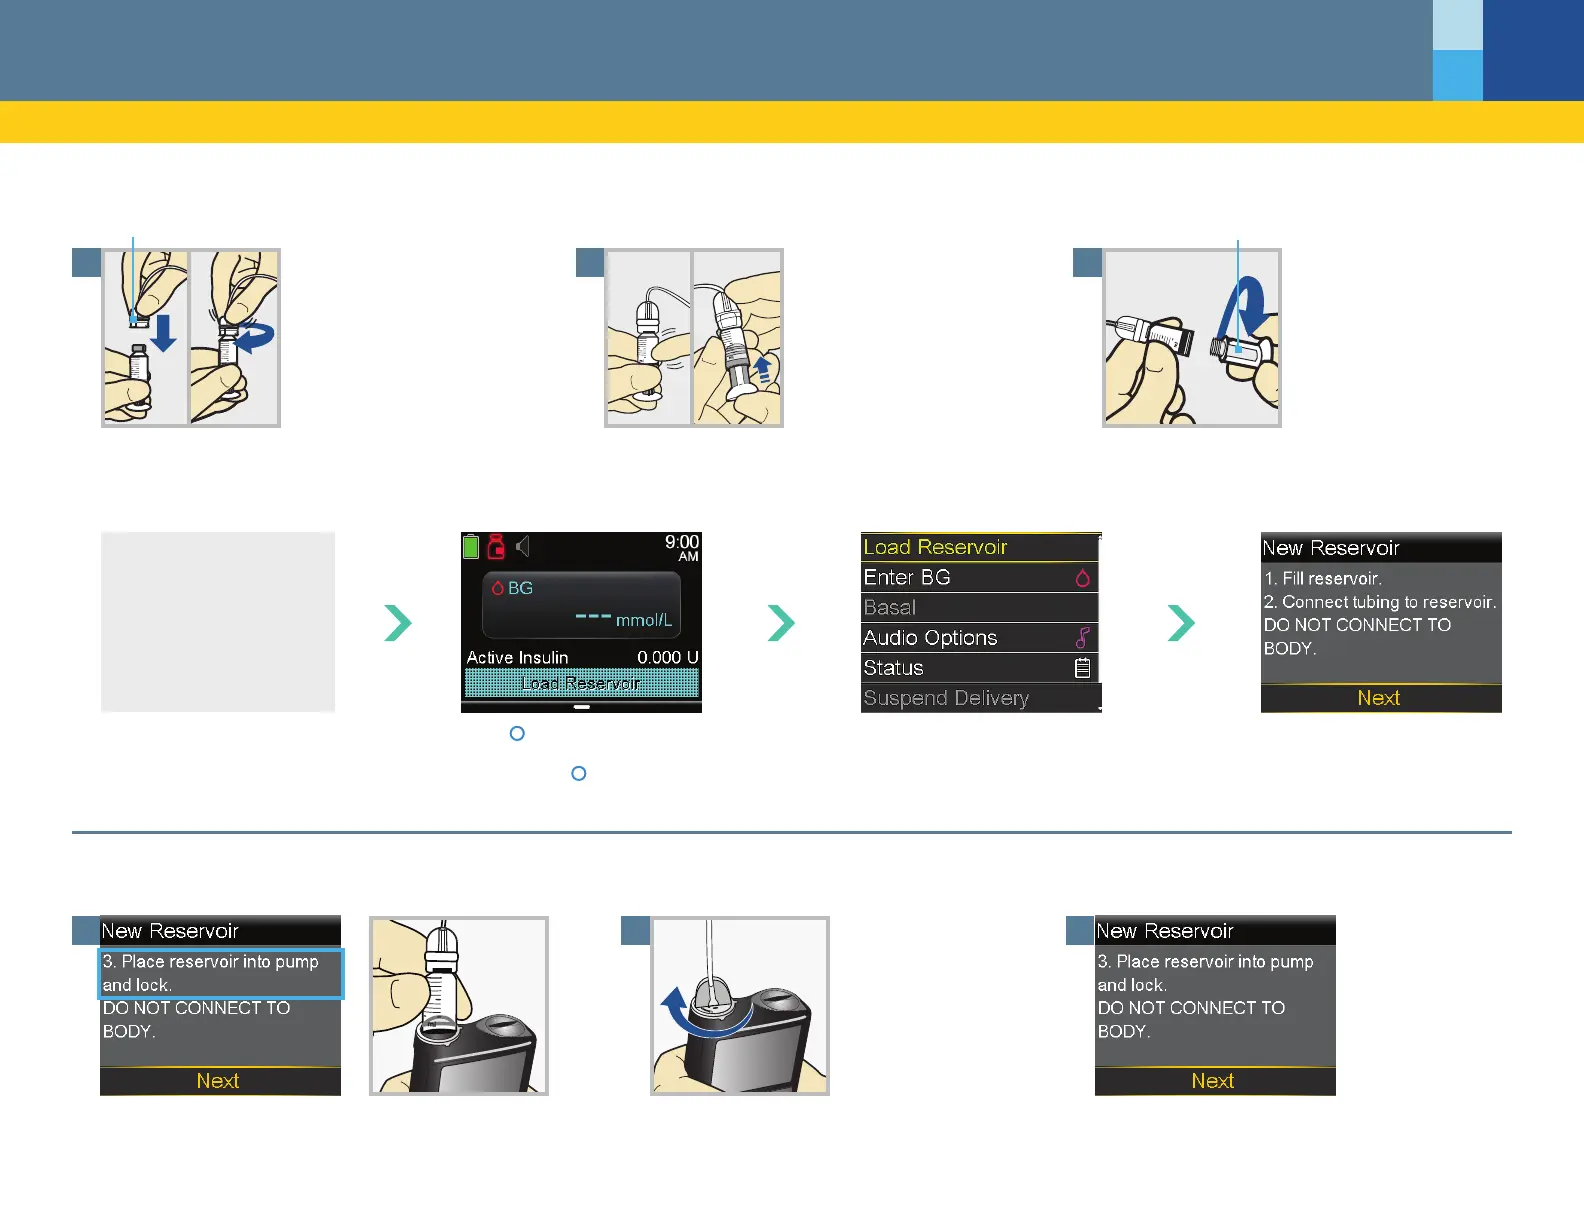
CHANGING THE RESERVOIR ONLY
Now you will place the tubing connector onto the lled reservoir.
CONNECT THE RESERVOIR TO THE INFUSION SET TUBING
3
Select Next.
2
Turn the reservoir clockwise until you feel it
lock into place.
1
Place the reservoir into the pump.
Next, you will place the lled reservoir into the reservoir compartment on the pump.
PLACE THE RESERVOIR INTO THE PUMP
2
If you see air bubbles, tap reservoir to move them to
top. Push plunger just a bit to move them into tubing.
1
Gently push the tubing connector onto the reservoir.
Turn the connector clockwise until locked. You will
hear a click.
Connector
Plunger
3
Twist plunger counter-clockwise to
loosen and remove.
The backlight may have
turned o.
Press any button to turn
the screen back on.
Select Next.
Press to open the menu. If the pump is
locked, you will need to unlock the pump
after pressing
.
Select Load Reservoir from the
menu.