Changing the MiniMed® Quick-set® Infusion Set for the MiniMed® 530G Insulin Pump
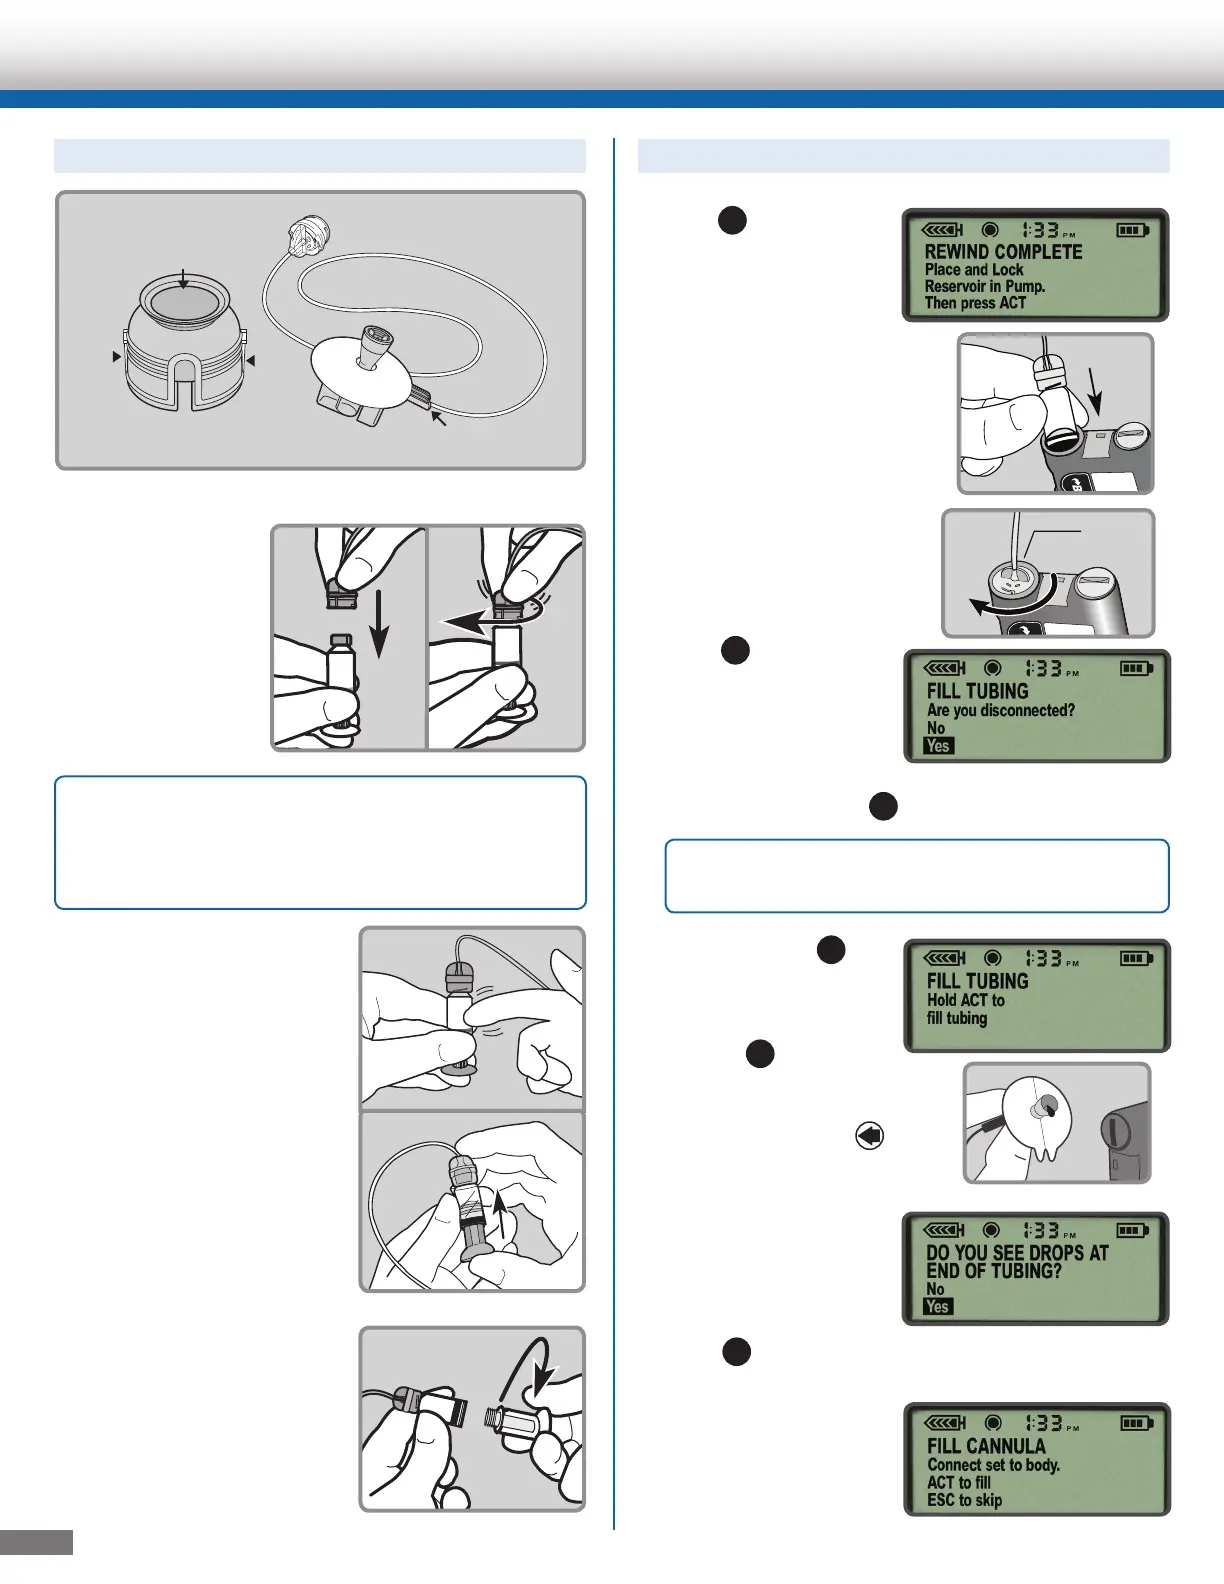
To Connect the Reservoir to the Tubing:
1. Remove the Quick-set from the package.
2. Make sure the
top of the
reservoir is dry.
Gently push the
tubing connector
onto the top of
the reservoir and
turn it clockwise
until it slides and
locks into place.
3. Tap the side of the
reservoir to force any
remaining air bubbles to
rise to the top. Push up
on the plunger until the
bubbles are out
and you see insulin in
the tubing.
4. Turn the plunger
counter-clockwise to
unscrew it from the
reservoir. Be careful not
to pull the plunger before
it is disconnected, or
insulin will spill out.
1. Press
ACT
so that
REWIND COMPLETE
appears. Insert the
newly filled reservoir
into the reservoir
compartment.
2. Turn the tubing
connector clockwise
until it locks into place.
3. Press
ACT
to go to
the FILL TUBING
screen. Be sure
the infusion set is
NOT connected to
your body. Then
select Yes and press
ACT
.
4. Press and hold
ACT
to fill the tubing.
The pump will beep
as the tubing fills.
Release
ACT
when
you see drops coming
out of the Quick-set
needle. Then press
ESC
.
5. If you see drops at the
end of the needle and
there are no air
bubbles in the tubing,
select Yes and
press
ACT
.
6. When the FILL
CANNULA screen
appears, you are ready
to insert the Quick-set
infusion set.
To Fill the Tubing:
Quick-serter
®
Tubing connector
Needle guard
Tubing slot
Blue hub
Quick-set
®
White
button
White
button
Blue
button
2
Note: If insulin or any other liquid has gotten
on the top of the reservoir or inside the tubing
connector, discard both and start over with a
new reservoir and Quick-set infusion set.
Hub handle
IMPORTANT: Never Fill Tubing while you are
connected to the pump.
 Loading...