4 | minnkotamotors.com
©2019 Johnson Outdoors Marine Electronics, Inc.
m. The Face Plate (Item #2) is designed to be keyed
with the Plug Receptacle. Turn the Face Plate
over and notice the notches along the Inner Circle.
These notches are keyed with the outer edge of
the Plug Receptacle when it sits flush on the
mounting surface. This allows the Face Plate or Plug
Receptacle to be rotated in 45 degree increments.
6
6m
6n
ITEM(S) NEEDED
#2 x 1 #C x 1 #A x 1
6o 6p
Inner Circle
Plug Receptacle
Face Plate
(back)
Face Plate
(back)
Plug
Receptacle
Plug
Receptacle
Threaded
Collar
Face Plate
(front)
Face Plate
(front)
Mounting Surface
Mounting
Surface
Plug Assembly
Loop
Dust Cover
Hook
5
k. Once the Splicers are secure on both wires, take the
Shrink Tubes and slide them over the Splicers. The
Shrink Tube should be centered over the Splicer and
completely cover the wire connections.
l. When satisfied with the position, secure the Shrink
Tubes in place with a Heat Gun. Ensure that there is
no opening around the Shrink Tubes when heated.
Push the wires and the Plug Receptacle into the
drilled hole until the Plug Receptacle sits against the
mounting surface.
5k
Shrink
Tubes
Plug Receptacle
NOTICE: The Shrink Tubes are meant to water
proof the connection between the Plug Receptacle
and the Boat Wires. Make sure there are no gaps
around the wires that would allow water to reach the
connection.
NOTICE: Tethering the Dust Cap to the Face Plate
during installation is optional. The Dust Cap can be
stowed away when the plug is in use and should be
replaced for storage or transport.
n. On the back side of the Face Plate, there is also
a hook to attached the Dust Cover (Item #C).
Determine if the Dust Cover will hang to the right or
the left and turn the hook on the Face Plate to the
appropriate direction.
o. Flip the Face Plate so the keys on the Inner Circle
are towards the mounting surface and place it over
the Plug Receptacle. It should be seated on the
mounting surface.
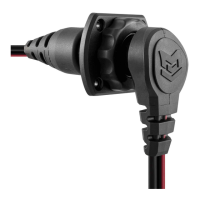
p. Take the Plug Assembly (Item #A) and plug it into
the Plug Receptacle. The Plug Assembly and Plug
Receptacle are also keyed with each other. Orientate
the Plug Assembly and Plug Receptacle so they can
be fully pushed together. The Threaded Collar on the
Plug Assembly does not have to be tightened.
NOTICE: Use the Dust Cap when plug is not in use to
insure optimal water tight protection to electrical contacts.

 Loading...