Note: The red activation LED will blink several seconds before the camera enters operational mode. When the LED stops
blinking, the camera is ready to record images and videos in accordance with your settings.
Night mode
For night-shots, the necessary lighting is provided by the infrared LEDs on the front of the camera. The maximum recording
distance in the dark is about 15 meters. Due to the nature of the infrared lighting, night-shots are in black and white.
Aligning the camera
The wide angle of the camera lens makes aligning your camera quite simple: a rough eye alignment is enough at first. Then
pay particular attention to the vertical tilt, i.e. the correct inclination of the camera. This is especially important when the
camera is not mounted on straight, vertical posts or surfaces. Once you have found a good position, switch the camera to
SETUP mode.
Move from one side to the other in front of the camera. The red LED should flash to show that you have been detected by
the motion sensor. This should help you decide roughly where to direct the camera lens. Such a general orientation is
usually sufficient.
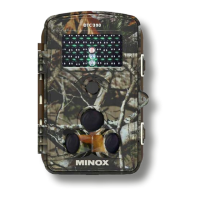
Note: The colored LEDs light up only when in TEST mode. When the main switch has been moved to ON, the LEDs do not
light up anymore. If you wish to fine-tune the alignment of your camera, set the camera to ON mode and enter the
camera’s field of view from different directions. Go to TEST mode and push the REPLAY button to view your results. If
necessary, you can correct the alignment and repeat the procedure. If the alignment of the camera is to your satisfaction,
the camera can be switched to ON.
Note: To avoid undesired images or videos, do not set the camera up in sunny areas. Make sure that branches do not move
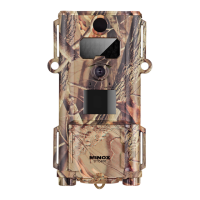
in front of the camera. The MINOX DTC 460 is dustproof and splashproof and fulfils the IP 54 protection classification. It is
suitable for outdoor use in all weather conditions.
6. Image playback
Once your camera has recorded images, you can view these using the “Playback” option. You will first need to set the
camera to “SETUP” mode. Now press the “Replay” button and you’ll be able to view the photos and videos that your
camera has recorded. You can browse through these using the arrow buttons. Press the “OK” button to start and stop
playback of videos.
Press the “Menu” button during “Playback” mode if you wish to delete selected photos or videos. You also have the option
of deleting all recorded photos and videos at once. For safeguarding purposes, it will be necessary for you to select these
options again before they become effective. Press the “Replay” button to stop playback.
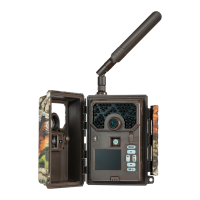
7. Connecting the camera to a computer
Your MINOX DTC 460 saves your photos and videos to a folder named “DCIM/100Media” on your SD card. Photos have the
file ending “.jpg” and videos “.avi”. There are two possibilities to transfer the files to your PC: either you remove the SD card
and insert it into a card reader or you connect the DTC 460 to your PC with the USB cable included in the scope of delivery.
Transferring your files via USB cable
Always ensure that the camera is switched off before connecting it to a computer. Connect your camera to the computer
using the USB cable (included in delivery) via the USB port. Switch the camera to TEST mode (main switch in the middle).
The camera will now be recognized as a removable storage device. Your photos and videos can now be copied to a folder
on your PC.
Transferring your files via SD card
Always ensure that the camera is switched off before the SD card is removed from the camera, otherwise the files on your
memory card could be damaged. Remove the memory card from the slot and insert it into the card reader connected to
your computer. Some computers also have an internal slot for SD cards - in this case, insert the SD card directly into the slot
on your computer. Your photos and videos can now be copied to a folder on your PC.
 Loading...