6
Fig.7 Fig.8
Fig.9 Fig.9
SEWING
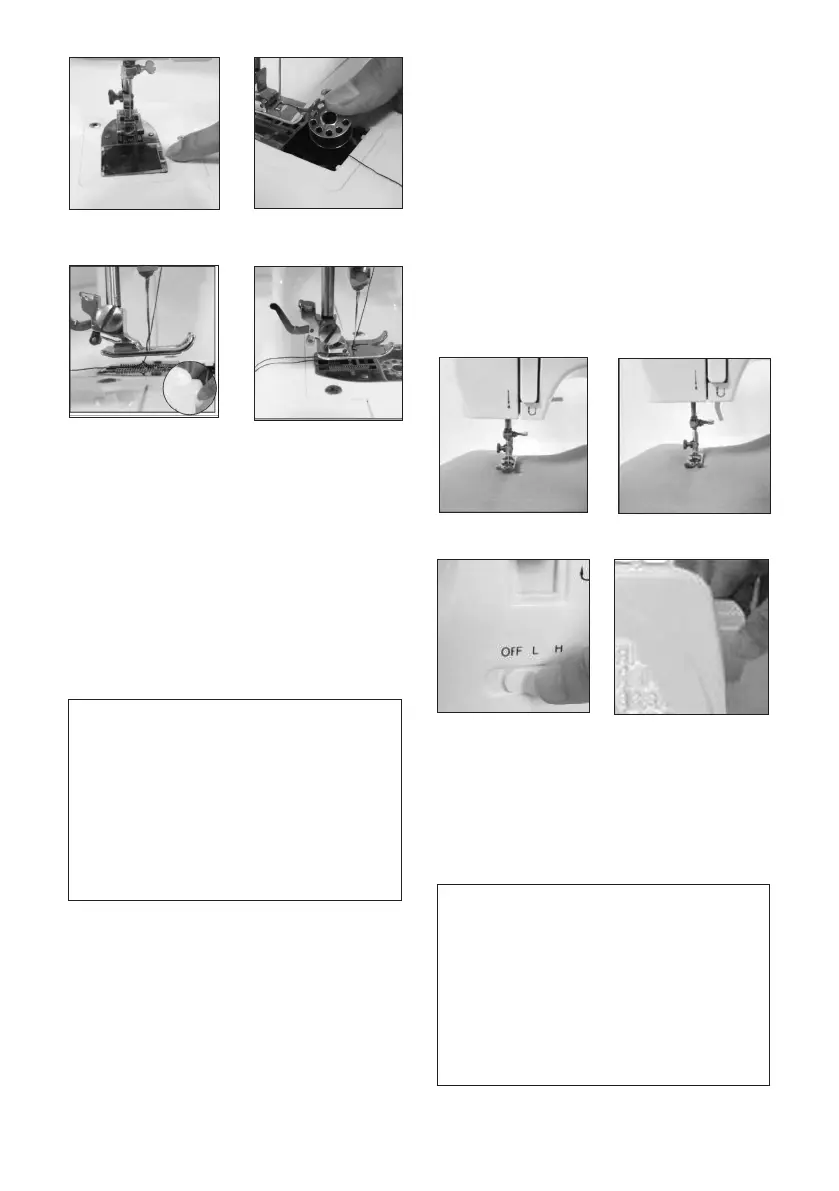
1. Turn the hand wheel counterclockwise to
raise the needle to its highest position.
2. Raise the presser foot lifter and place the
fabricyouwanttosewunderthepresserfoot
(Fig.11).
3. Lowerthepresserfoot.(Fig.12).
4. Rotate the pattern selection dial to select the
stitch pattern you want.
Caution:
• Before you change the stitch pattern,
please turn off the switch and turn the
hand wheel to raise the needle all the
way up so it doesn’t get stuck and
bent.
• Changing the stitch pattern is not
allowed when the machine is running,
otherwise the needle and/or machine
may damage.
5. Turn the hand wheel several times to make
sure there is no jamming in the stitches.
6. Slidethepowerswitchtotheposition“L”
(meaninglowspeed)or“H”(meaninghigh
speed), and the machine will automatically
startsewing.Werecommendthelowspeed
forbeginners(Fig.13).
7. Whenyounishthesewing,turnoffthe
switch, unplug the adapter, turn the hand
wheel to raise the needle all the way up, lift
the presser foot, and then gently remove the
fabricfromthesewingmachine,andcutthe
thread with the thread cutter (Fig.14).
Tips:
• Pleaseturnthehandwheelifitisdifcult
toremovethefabric,andthenpulloutthe
fabricgently.
• If the thread has tangled or jammed, please
turn the hand wheel and simultaneously
pull the thread slightly to release the thread.
Bottombobbinmechanismisamoreprecise
part, inappropriate actions may damage it.
Pleasetonotpushorpullitbyngerorany
tools.
Fig.11
Fig.13
Fig.14
Fig.12
FEATURES
1. Selection of stitch pattern
Rotate the pattern selection dial to select one
pattern you want from the 16 stitch patterns.
There are pattern illustrations on the surface of
machinebodyforyourreference.
Caution:
• Before you change the stitch pattern,
please turn off the switch and turn the
hand wheel to raise the needle all the
way up so it doesn’t get stuck and
bent.
• Changing the stitch pattern is not
allowed when the machine is running,
otherwise the needle and/or machine
may damage.
 Loading...