8
8. Drawer
This drawer is an accessory storage
compartment,whichcanbeslidoutandyou
canstoresparebobbins,needles,etc.init.It
islocatedatthebottomsidebelowthehand
wheel.
WINDING THE BOBBIN
1. Putaspoolofthreadonspoolpin.(Fig.20)
2. Guidethethreadthroughthebobbin
winder tension disk on the upper side of the
machine. (Fig.21)
3. Putthebobbinonthebobbinwinderpin,
windthreadclockwisearoundbobbinseveral
times. (Fig.22)
4. Pushbobbintotheleft.(Fig.23)
5. Switch on the machine to start winding.
(Fig.24)
6. Switch off the machine to stop winding after
appropriatevolumeofthreadyouhadbeen
windedonbobbin.
7. Pushbobbinawayfrombobbinwinderstop,
takebobbinoffthepinandcutthethread.
(Fig.25)
Caution: Before winding the bobbin,
raise the presser foot, take out the
bottom bobbin and the upper thread.
Fig.20
Fig.23 Fig.24 Fig.25
Fig.21 Fig.22
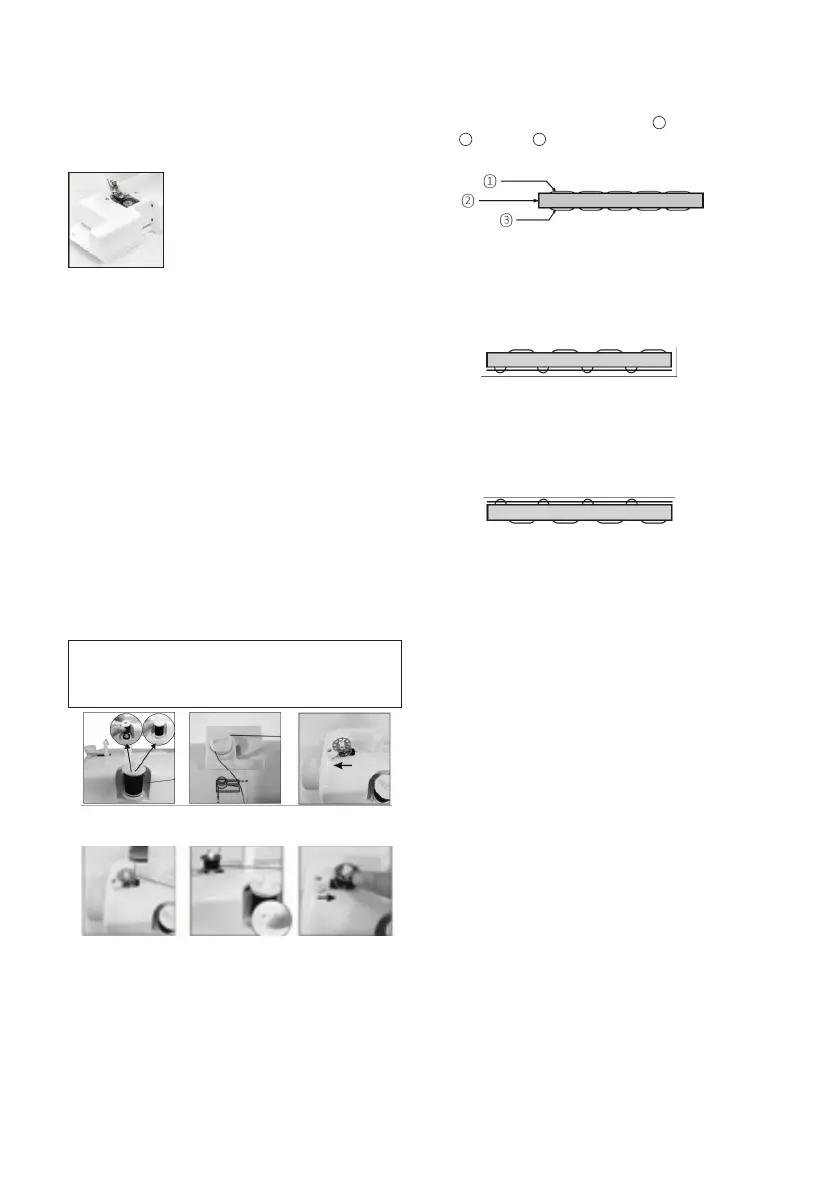
ADJUSTING STITCHING
1. AsshownintheFig.A,normalstitchingshall
havetopandbottomthreadingevenly,
neither over tight nor loose. (
1
= Top thread;
2
=Cloth;
3
=Bottomthread)
Fig.A
2. Ifthebottomthreadinglookslikeastraight
line(Fig.B),whichindicatesthetopthreadis
tooloose.Pleaseturnupperthreadtension
dialtodirectionwithbiggernumberto
increase pressure until the stitching returns to
normal.
Fig.B
3. If the top thread looks like a straight line
(Fig.C),whichindicatesanover-tighttop
thread.Pleaseturntheupperthreadtension
dialtothedirectionwithsmallernumberto
reducepressureuntilthestitchingbackto
normal.
Fig.C