14 15
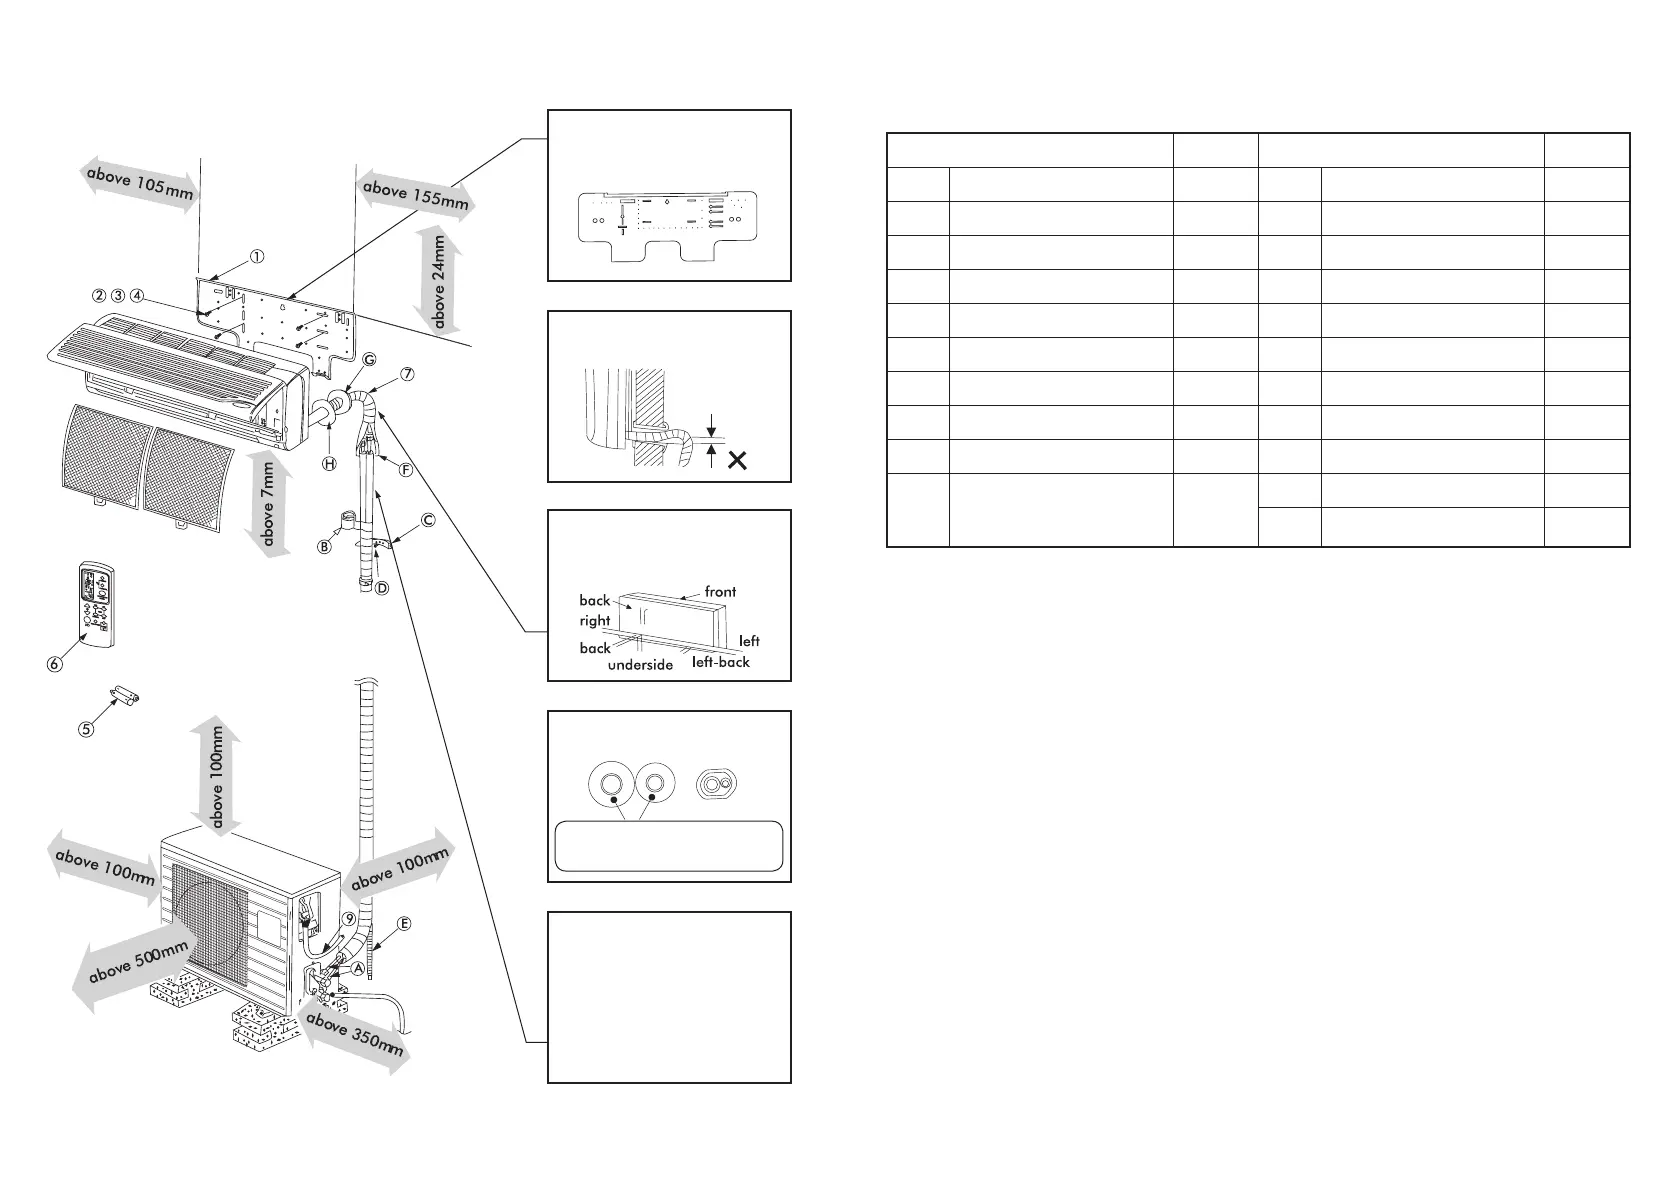
Installation Sketch
Conrm installation position
with the marker of indoor
unit installation board.
Notice: Do not put the drain
hose higher than the outlet.
The pipe can be congured for
installation to the back, right,
underside, or left-back side
Cover connecting pipe with
heat-isolating material.
The thickness of heat-isolating
material should be 8mm.
When installing connecting
pipe on a wall that is metallic
mesh or thin armour plate,
place a wooden block with
a thickness over 20mm
between the wall and
connecting pipe with 7 or 8
layers of bonding tape.
Installation Accessories
Before installation, inspect the following accessories:
Indoor unit accessories Quantity Installation accessories Quantity
1 Mounting plate 1 A Connecting pipe 1
2 Tapping screw ST4 x 25 5 B Bonding tape 1
3 Expansion rubber plug 5 C Clamp 3
4 Expansion bolt 2 D Cement nail 5
5 Battery 2 E Drain hose 1
6 Remote controller 1 F Opening cap 1
7 Felt 1 G Wall-hole cover 1
8 Adiabatic underlay 1 H Indoor wall-hole cover 1
9 connecting cable 1 I putty 1
10
Drain joint
(supplied by customer)
1
J Air sealing oil 1
K
Shockproof rubber cushion
(supplied by customer)
4
Installation Instructions
1 Location of indoor unit
• Cooled or heated air should be blown to
every part of the room.
• Maximum distance between indoor/outdoor
units is 5m.
• Mount on rm wall to avoid any vibration.
• Avoid direct sunshine.
• Easy drain for condensation water.
• Avoid any interference caused
by a uorescent lamp to the remote
control's signal.
• Minimum distance between air conditioner
and home appliance (TV/Radio, etc.) is 1m.
2 Location of outdoor unit
• Airow cannot be blocked.
• Good ventilation, low dust, avoid rain or
direct sunshine.
• Ensure operational noise of air blowing out of
unit does not affect neighbour's comfort.
• Firmly mount on rack, to reduce noise
and vibration.
• Avoid places close to inammable gas leakage.
• Unit must be mounted rmly when installed
high up.
• Avoid exposure to strong wind.
 Loading...