Page 25
25 Adjusting the motor limit switch.
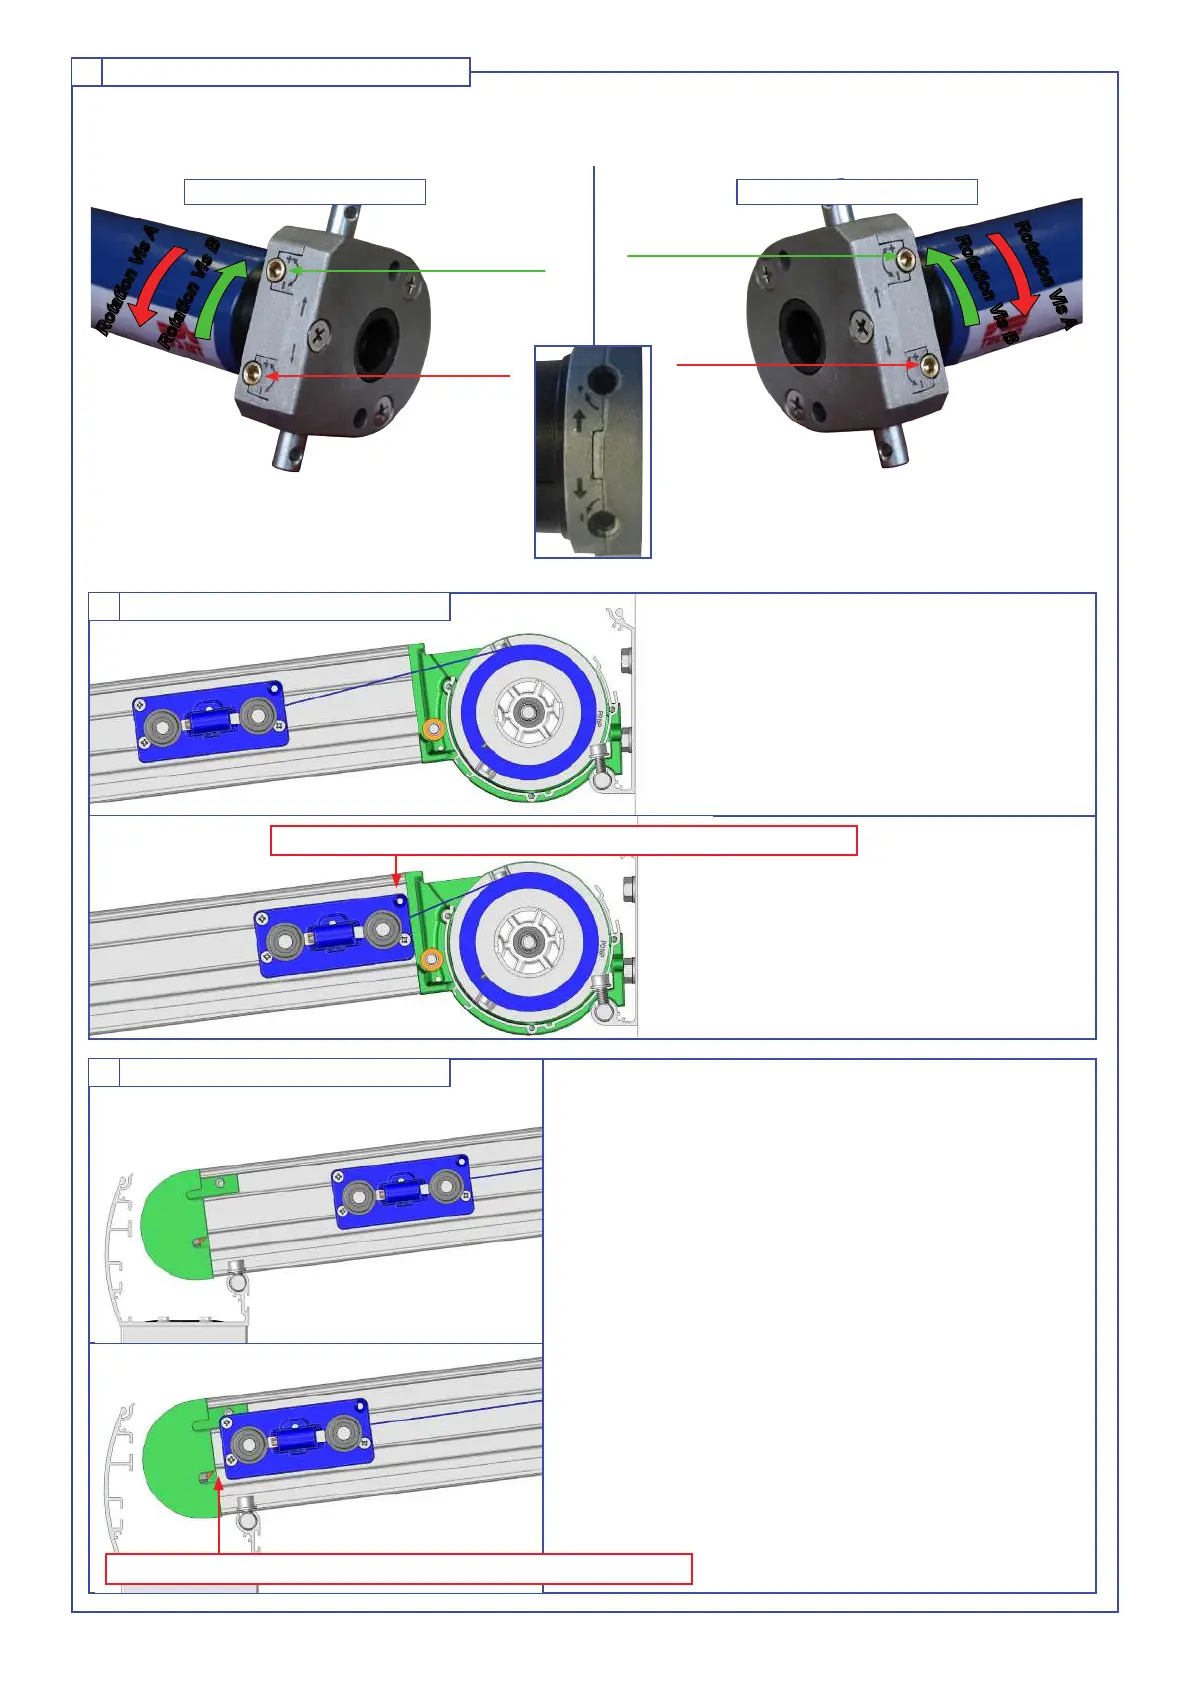
Right motor Left motor
screw A
screw B
Limit switch: turn the screw towards «+» for more
closing or opening, towards «-» for less closing or
opening.
Perform a test to validate the stop.
Rotation Vis A
Rotation Vis B
Rotation Vis A
Rotation Vis B
Limit switch: turn the screw towards «+» for more
closing or opening, towards «-» for less closing or
opening.
Perform a test to validate the stop.
A Fin de course de fermeture.
1 - Close the fabric to the closing stop
preset in the factory.
Final position
2 - Activate the closing limit switch
screw according to your conguration
to place the sliding load bar in the
nal position.
To make the correct adjustment, locate your motor (right or left) and determine the direction of the roll of your fabric.
The limit switch will be adjusted with the motor running. The fabric unrolls or rolls up 2 cm each time the key is turned.
Factory limit switch.
B Opening limit switch.
A Closing limit switch.
1 - Open the fabric. If the sliding load bar does not stop
on its own, stop it before reaching the front load bar.
2 - Reassemble the sliding load bar by 100mm.
3 - Activate the opening limit switch screw according to
your setting to reduce the opening limit switch.
4 - Open the tarp again. If the sliding load bar stops be-
fore reaching the load bar, go to step 5; otherwise, stop
it and repeat operations 2 and 3 until the sliding load bar
stops on its own.
5 - Activate the opening limit switch screw according to
your settings to adjust the opening of the curtain. In the
nal position, the sliding load bar should enter the front
load bar.
CAUTION, the carriage must not protrude from the guide.
CAUTION, the carriage must not protrude from the guide.
The load bar stops.
Final position
screw A
screw B
 Loading...