75
DISASSEMBLY PROCEDURE
PHOTOS/ FIGURES
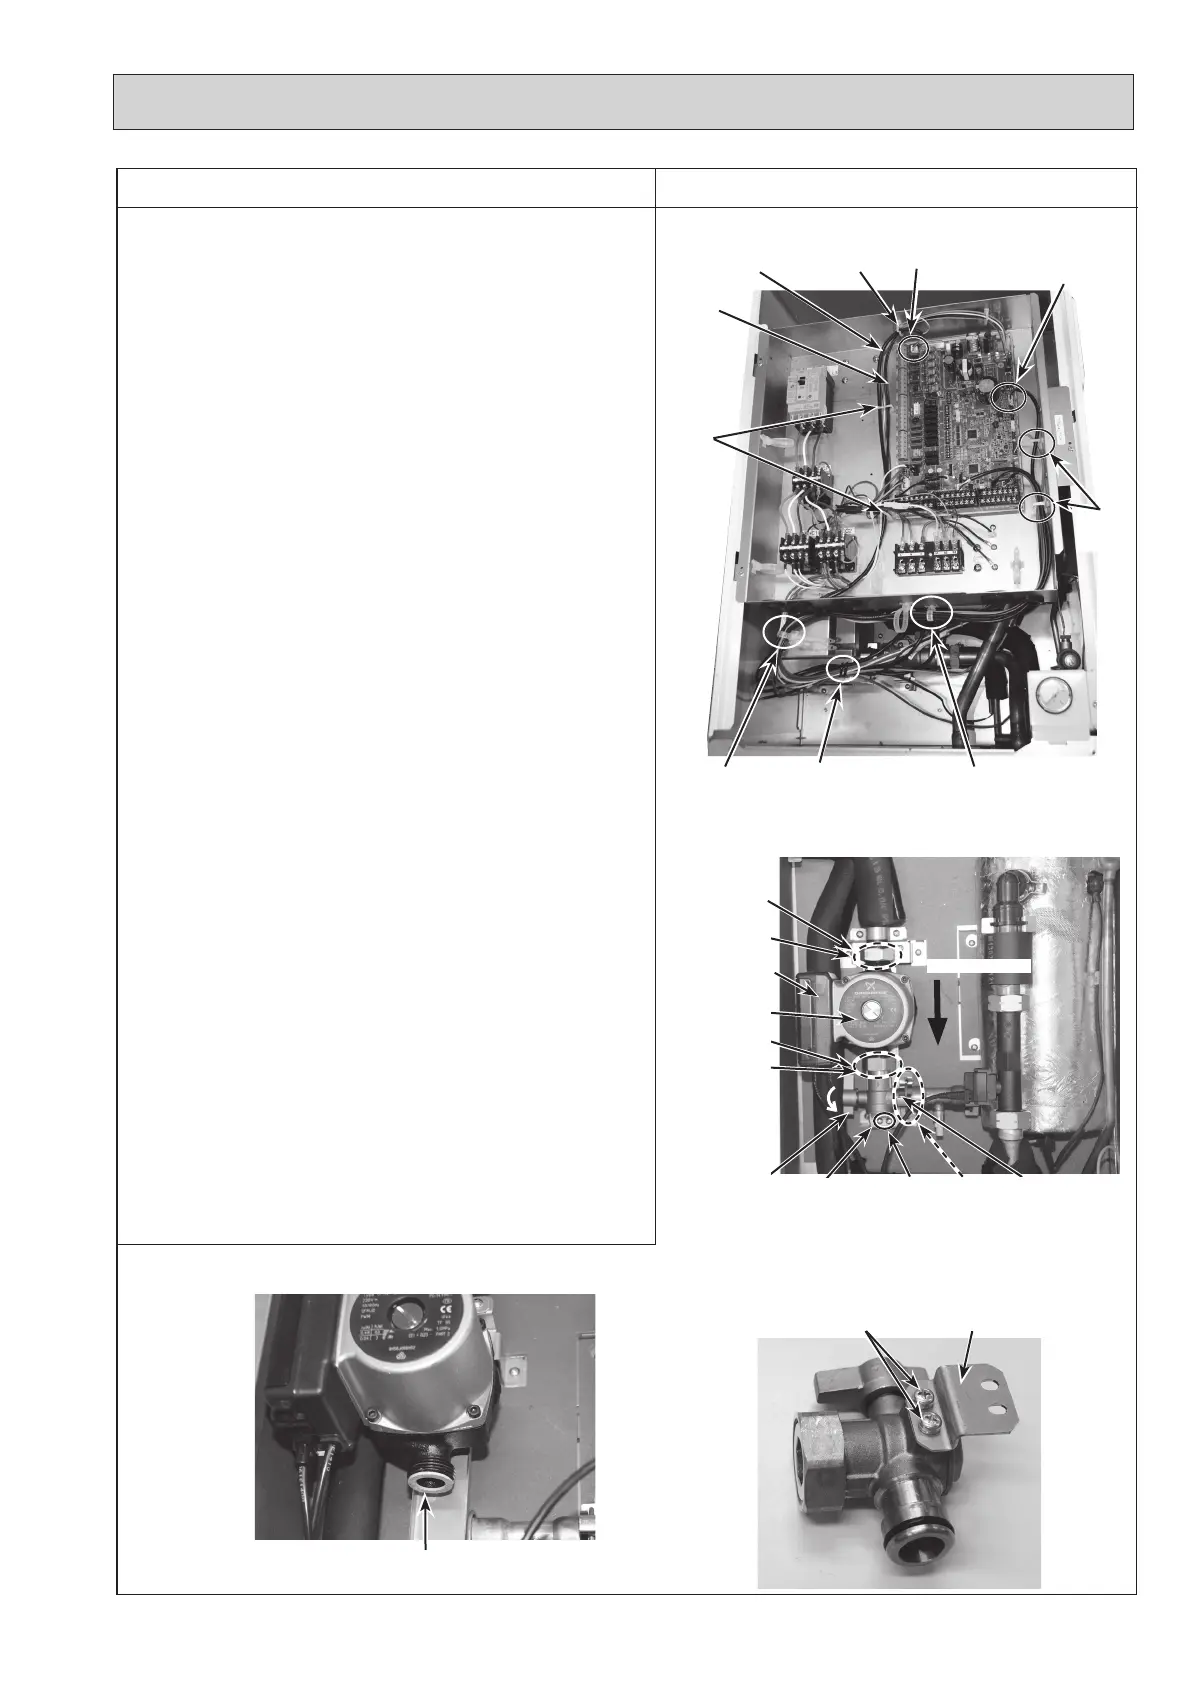
Photo 5-1
5. How to remove water pump/ pump valve
E*S* series
<Water pump>
Close the pump valve (OFF) before removing the water pump,
and open the valves (ON) after reinstalling the water pump.
(1) Remove the front panel. (Refer to Procedure 1.)
(2) Disconnect the CNP1 connector, the earth cable, and the
CNPWM connector in the control box. (Photo 5-1)
(3) Release the water pump lead wire from the 5 cable
clamps, the 2 cable straps, the coated clamp and feed
the lead wire out the control box without putting strain on
the CNP1 connector. (Photo 5-1)
(4)
Swing the control box to the front. (Refer to Procedure 4.)
(5) Close (OFF) the pump valve and remove the G1" nuts
using 2 spanners: one to hold the G1" nut and the other
to turn the other side of G1" nut.
Remove the water pump by sliding it horizontally. (Photo
5-2)
• When the pump valve handle is stiff, turn the handle 90
degrees clockwise mainly by using a spanner.
• When reinstalling the G1" nuts, use new G1" gaskets.
(Photo 5-3)
• Set the water pump in the way that the die stamped
arrow facing down, and the terminal box facing to the
left. (Photo 5-2)
• When opening or closing the pump valve, ensure to do
so fully, not halfway.
<Pump valve>
(6) Remove the screws fixing the pump valve stay. (Photo
5-2)
(7) Remove the pump valve by detaching the quick connec-
tion. (Photo 5-2)
• When reinstalling the quick connection, use new O-ring.
• When the pump valve handle is stiff, turn the handle 90
degrees clockwise mainly by using a spanner. (Photo
5-4)
• When reinstalling the pump valve, place the handle to
the left hand side of the pump valve.
• When opening or closing the pump valve, ensure to do
so fully, not halfway.
• Reuse the removed pump valve stay and the pump
valve stay xing screws. (Photo 5-4)
• Refer to page 90 for how to attach and detach the quick
connection.
Note: Skip Steps (2) and (3) above when replacing the
pump valves only.
Photo 5-2(E*S* series)
Photo 5-3
(E*S* series)
Pump valve
Water pump
connector (CNP1)
Earth cable
Cable
clamps
Cable strapCable strap Coated clamp
Lead
wire
O-ring
Photo 5-4(E*S* series)
CNPWM
connector
Water pump
Nut (G1")
Nut (G1")
Gasket G1"
Screws
Gasket (G1")
Terminal box
Gasket (G1")
Pump valve
stay
Quick
connection
Screws
Pump valve
stay
Flow direction
Cable
clamps
Cable
clamp
OCH571D
 Loading...