Do you have a question about the Mitsubishi Electric HC6000 and is the answer not in the manual?
Lists provided accessories like cables, power supply, remote control, filters, and other items.
Step-by-step guide on how to insert batteries correctly into the remote control.
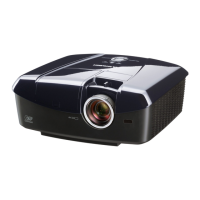
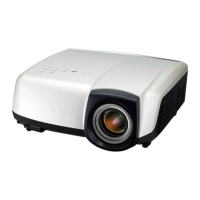
Identifies and describes the main physical parts, controls, and terminal panel of the projector.
Explains remote control functions and how to use picture quality adjustment buttons.
Specifies the recommended distance and conditions for effective remote control operation.
Details the vertical and horizontal angles within which the remote control sensor can receive signals.
Instructions on positioning the screen and projector for optimal image display.
Guidance on projector distance, lens shift adjustment, and projection angle.
How to correct trapezoidal image distortion using the keystone adjustment feature.
Provides charts for determining screen size and projection distance for various aspect ratios.
Guidelines for mounting the projector on a ceiling or for rear projection setups.
Explains the purpose and usage of the trigger terminal for external device control.
Provides general guidelines and diagrams for connecting various video sources to the projector.
Details on connecting video players using standard composite video or S-video cables.
Instructions for connecting DVD players or HDTV decoders using component video cables.
Steps and considerations for connecting devices via HDMI for high-quality image projection.
Proper procedure for plugging in and securing the projector's power cord.
Steps to start the projector, adjust focus, and select input sources for image display.
Fine-tuning image size (zoom) and position (lens shift) for optimal viewing.
Steps to safely turn off the projector and unplug the power cord.
Explains how to change and select different aspect ratios for optimal image display.
Provides instructions for changing aspect ratio via the remote control or the menu system.
Steps for connecting the projector to a computer using RGB cables.
Steps to start projection, adjust focus, and select computer input.
How to adjust image position, size, and use auto-positioning for computer input.
Controls for image quality like contrast, brightness, color, sharpness, and screen size.
Configuration options for projector mounting, lamp, and lens settings.
Options for aspect ratio, password, video signal, and language selection.
Adjustments for image position, flicker, and computer input signal types.
In-depth explanation of specific settings within the IMAGE menu, like GAMMA MODE and CONTRAST.
Specific options within the INSTALLATION menu, such as KEYSTONE, LAMP MODE, and IMAGE REVERSE.
Specific settings within the FEATURE menu, including ASPECT, PASSWORD FUNCTION, and VIDEO SIGNAL.
Specific settings within the SIGNAL menu for position, tracking, and computer input.
Advanced settings in the USER menu for image correction and display features.
Explains the items displayed in the INFORMATION menu, such as lamp time and input status.
How to save and recall image quality settings using AV memory slots.
How to use the menu to modify the image's contrast and brightness levels.
Procedures for adjusting the image's color intensity and tint using the menu.
How to use the menu to increase or decrease the sharpness of the projected image.
Selecting preset color temperatures or customizing them for the desired white balance.
Using the AUTO IRIS function to automatically adjust image brightness by controlling the aperture.
Selecting predefined gamma modes or customizing them for specific image characteristics.
How to use TRNR, MNR, and BAR functions to reduce image noise and artifacts.
Troubleshooting steps for common computer image display issues using the SIGNAL menu.
Quick methods for adjusting horizontal and vertical image placement.
How to enable, set, and cancel a password for projector operation and menu access.
Information on using the Kensington Security Standard connector for physical security.
Information on when to replace the lamp and important safety warnings during the process.
Detailed step-by-step instructions for physically replacing the projector lamp.
Procedure to reset the lamp timer after replacement.
Instructions on how to clean the projector's air filter to ensure proper ventilation.
Guidelines for cleaning the exterior surfaces and the projection lens.
How to attach and clean the optional accessory air filter for dust protection.
Solutions for problems related to the projector not turning on or turning off unexpectedly.
Steps to diagnose and resolve issues where no image is projected on the screen.
Solutions for various image display issues including no signal, distortion, color problems, and noise.
Addresses problems like abnormal temperature, remote control malfunction, menu issues, and operating noises.
Explains the meaning of the STATUS and POWER indicators and their normal/abnormal operating conditions.
A comprehensive list of the projector's technical details, including display, lens, lamp, resolution, and connectivity.
Details supported RGB signal modes, resolutions, frequencies, and normal mode outputs.
Pinout details for Serial, Computer/Component, and HDMI connectors.
| Display Technology | 3 x 0.74 inch D-ILA |
|---|---|
| Native Resolution | 1920 x 1080 |
| Lamp Life | 2000 hours (High Mode) |
| Brightness | 1500 ANSI Lumens |
| Contrast Ratio | 32000:1 |
| Dimensions | 18.4 x 7.0 x 18.5 inches |
| Weight | 27.5 lbs |
| Video Inputs | Component, Composite, S-Video |
| Inputs | HDMI x 2, Component, S-Video, Composite |