Do you have a question about the Mitsubishi Electric LDT32IV (BH548) and is the answer not in the manual?
| Screen Size | 32 inches |
|---|---|
| Aspect Ratio | 16:9 |
| Brightness | 450 cd/m² |
| Response Time | 8 ms |
| Viewing Angle | 178°/178° |
| Display Resolution | 1920 x 1080 pixels |
| Input Connectors | HDMI, DVI-D |
States compliance with FCC and Canadian regulations.
Critical safety warnings to prevent fire or shock hazards.
Important safety precautions for users regarding electrical shock.
Manufacturer's certification of compliance with EU directives.
Guidelines for optimal performance during setup and use.
Actions to take when the monitor experiences issues like damage or spills.
Advice for best viewing experience and eye comfort.
Recommendations for ergonomic setup for user comfort and health.
Identification and function of buttons and indicators on the monitor's control panel.
Guidance on choosing a suitable and safe location for the monitor.
Instructions for inserting batteries into the remote control.
Instructions for connecting other devices to the monitor.
Steps for connecting the monitor to a power source.
Sequence for powering on connected devices.
How to display signals from connected devices.
Guidance on adjusting audio levels.
Instructions for adjusting screen display position and distortion.
Instructions for adjusting image settings like brightness and contrast.
General recommendations for image adjustments.
Steps for attaching and detaching the monitor stand.
How to secure the main power switch using a cover.
Describes mounting the monitor in an upright orientation.
Details how to safely lay the monitor face down for mounting.
Specifies clearance needed for heat dissipation when enclosed.
Instructions for securing the monitor to prevent it from falling.
Visual representation of how to connect various devices.
Detailed steps for connecting a PC to the monitor via RGB and audio.
Instructions for connecting a computer using a digital DVI-D interface.
Steps for connecting a DVD player using component video and audio inputs.
Instructions for connecting the monitor's audio output to a stereo amplifier.
Explains the different ways to power the monitor on and off.
Describes the meaning of different LED indicator states.
How the monitor uses power saving features.
How to choose which input signal to display.
Options for adjusting the display aspect ratio.
Different preset modes for image appearance.
Displays current input, audio, and size settings.
Adjusts image properties like brightness, contrast, and sharpness.
Adjusts the color tint of the displayed image.
Adjusts the depth and saturation of colors.
Selects predefined color temperature settings.
Allows individual adjustment of Red, Green, and Blue levels.
Resets all PICTURE settings to factory defaults.
Modifies screen display properties such as position and clock.
Adjusts the horizontal position of the image.
Adjusts the vertical position of the image.
Adjusts the horizontal size of the image.
Improves focus and stability of the image.
Options for scaling the image to fit the screen.
Allows custom scaling of horizontal and vertical image sizes.
Adjusts the horizontal resolution or size.
Adjusts the vertical resolution or size.
Resets all SCREEN settings to factory defaults.
Configures audio properties like balance, treble, and bass.
Adjusts the stereo sound balance between left and right speakers.
Adjusts the high-frequency sound levels.
Adjusts the low-frequency sound levels.
Resets all AUDIO settings to factory defaults.
Manages Picture-in-Picture display options.
Adjusts the size of the secondary PIP window.
Selects the audio source for the PIP window.
Resets all PIP settings to factory defaults.
Controls auto setup, power save, and language options.
Automatically adjusts screen position, size, and clock.
Enables/disables automatic adjustment of timing and position.
Configures power management modes for energy saving.
Selects the OSD menu language.
Settings to prevent image persistence.
Selects color system based on video input format.
Sets the color of side borders for 4:3 images.
Resets configuration settings to factory defaults.
Resets all major settings to factory defaults.
Manages OSD display duration and monitor information.
Sets the duration the OSD menu remains visible.
Controls the display of status information on screen.
Sets an automatic power-off timer for the monitor.
Adjusts the horizontal position of the OSD menu.
Adjusts the vertical position of the OSD menu.
Displays monitor model and serial number.
Accesses advanced settings like resolution and scan modes.
Selects the input signal resolution.
Adjusts the black level for video signals.
Selects the display gamma curve.
Adjusts the display area for different scan modes.
Converts interlaced signals to progressive.
Optimizes display for movie content.
Configures the remote control mode (normal/lock).
Settings for creating multi-screen displays.
Displays information on cooling fan, brightness, and temperature.
Sets the delay time before the monitor powers on.
Sets the internal clock for scheduling.
Programs automatic power on/off times and input sources.
Selects the DVI-D equipment type.
Resets advanced options to factory defaults.
Detailed guide on setting up the schedule function.
Table showing signal input compatibility for PIP/POP modes.
Steps to resolve issues where the screen remains blank.
Solutions for when the power button is unresponsive.
Explains image persistence and how to mitigate it.
Troubleshooting steps for display instability or focus issues.
Addresses color cast issues with component signals.
Checks for power and standby status when the LED is off.
Guidance for when the monitor's LED indicates a failure.
How to fix images that are not displayed at the correct size.
Steps to ensure the correct resolution is displayed.
Solutions for audio output issues.
Troubleshooting for remote control connectivity problems.
Addresses issues with scheduling and auto-off timer functions.
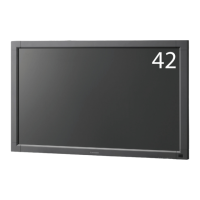
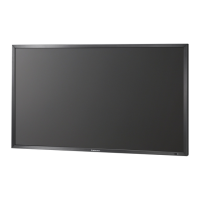
Detailed technical specifications for the LDT321V model.
Pin assignment details for analog RGB input.
Pin assignment details for S-Video input.
Pin assignment details for digital RGB DVI-D input.
Pin assignment details for RS-232C serial input.
Contact details for Mitsubishi Electric in North America.
Contact details for Mitsubishi Electric in Europe.
Contact details for Mitsubishi Electric in Russia.