EasyManua.ls Logo

Mitsubishi Electric Melservo MR-J3-40B User Manual

Mitsubishi Electric Melservo MR-J3-40B
590 pages
To Next Page IconTo Next Page
Page #1 background imageLoading...
Page #1 background image
J3
TransitionfromMELSERVO-J3/J3W
SeriestoJ4SeriesHandbook
Existing manufacturing assets are completely utilizable.
MELSERVO-J3/J3W to MELSERVO-J4

Table of Contents

Question and Answer IconNeed help?

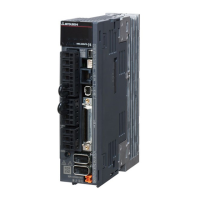
Do you have a question about the Mitsubishi Electric Melservo MR-J3-40B and is the answer not in the manual?

Mitsubishi Electric Melservo MR-J3-40B Specifications

General IconGeneral
BrandMitsubishi Electric
ModelMelservo MR-J3-40B
CategoryServo Drives
LanguageEnglish

Summary

Transition from MELSERVO-J3/J3W Series to J4 Series Handbook

Existing manufacturing assets are completely utilizable.

Highlights the benefit of utilizing existing manufacturing assets with the new series.

SAFETY INSTRUCTIONS

WARNING

Indicates hazardous conditions resulting in death or severe injury.

CAUTION

Indicates hazardous conditions resulting in medium or slight injury to personnel or physical damage.

Diagrammatic Symbols

Explains prohibition and obligation symbols used in the manual.

POINT

Classifies instructions that do not cause physical damage or are for other functions.

1. To prevent electric shock, note the following

2. To prevent fire, note the following

3. Injury prevention

4. Additional instructions

(1) Transportation/installation

Provides instructions for safe transportation and installation of equipment.

(2) Wiring

CAUTION

Highlights precautions related to wiring to prevent malfunctions, fire, or electric shock.

(3) Trial run/adjustment

(4) Usage

(5) Corrective actions

(6) Maintenance, inspection and parts replacement

(7) General precautions

Disposal of Waste

Measures against servo amplifier harmonics

EEP-ROM life

STO function of the servo amplifier

Dealing with overseas standards

About the manual

Relevant manuals

Lists related manuals necessary for initial servo setup and safe operation.

Cables used for wiring

Provides information on wiring cable selection based on ambient temperature.

U.S. customary units

Presents a table for converting SI units to U.S. customary units.

Part 1: Summary of MR-J3/MR-J3W Replacement

1. SUMMARY OF MR-J3/MR-J3W REPLACEMENT

Explains the flow of replacement from MR-J3/MR-J3W series to MR-J4 series.

2. MAJOR REPLACEMENT TARGET MODEL

Identifies the target models for replacement of servo amplifiers and servo motors.

3. FLOW OF REPLACEMENT

3.1 Summary

Describes the flow of replacement from MR-J3/MR-J3W series to MR-J4 series.

3.1.1 Flow of Review on Replacement

Details the step-by-step process for reviewing replacement procedures.

3.1.2 Configuration diagram

Options and Peripheral equipment

Illustrates the configuration including options and peripheral equipment.

3.1.3 Changes from MR-J3 series to MR-J4 series

POINT

Summarizes changes from MR-J3 series to MR-J4 series for servo amplifiers and peripherals.

3.1.4 Changes from MR-J3W series to MR-J4 series

POINT

Summarizes changes from MR-J3W series to MR-J4 series for servo amplifiers and peripherals.

3.2 Review on replacement

3.2.1 Checking the system prior to replacement

Checks the system components prior to replacement.

3.2.2 Determination of base replacement model

Determines base replacement models for MR-J3 series servo amplifiers and servo motors.

Part 2: Review on Replacement of MR-J3-_A_ with MR-J4-_A_

1. SUMMARY

Describes the changes to be made when replacing a system using MR-J3-_A_ with MR-J4-_A_.

2. CASE STUDY ON REPLACEMENT OF MR-J3-_A_

Presents case studies on replacing MR-J3-_A_ systems.

2.2 Replacement Method

(1) Simultaneous replacement with MR-J4-_A_ and an HG motor

Details the simultaneous replacement procedure with MR-J4-_A_ and HG motor.

(2) Separate repair of servo amplifiers and servo motors

Discusses the separate repair process for servo amplifiers and servo motors.

3. DIFFERENCES BETWEEN MR-J3-_A_ AND MR-J4-_A_

3.1 Function Comparison Table

Provides a comparative table of functions between MR-J3-_A_ and MR-J4-_A_ series.

(1) 200 V class

3.2 Comparison of Standard Connection Diagrams

(1) Position control mode

Illustrates standard connection diagrams for position control mode.

(2) Speed control mode

(3) Torque control mode

3.3 List of Corresponding Connectors and Terminal Blocks

(1) Connector comparison table

Compares connectors between MR-J3-_A_ and MR-J4-_A_ servo amplifiers.

(3) Comparison of signals

(a) CN1

Details and compares signals for the CN1 connector.

2) Speed control mode

3) Torque control mode

3.5 Comparison of Parameters

3.5.1 Setting requisite parameters upon replacement

Lists essential parameters to set for successful replacement.

(1) Parameters common to position control mode, speed control mode, and torque control mode

3.5.2 Parameter comparison list

3.5.3 Comparison of parameter details

3.6 Important Points for Replacement

1. SUMMARY

Summarizes precautions for setting parameters during replacement.

2. Precautions

Provides essential precautions for parameter setting and tool usage.

Part 3: Review on Replacement of MR-J3-_B_ with MR-J4-_B_

1. SUMMARY

Summarizes changes for replacing MR-J3-_B_ systems with MR-J4-_B_.

2. CASE STUDY ON REPLACEMENT OF MR-J3-_B_

Reviews the replacement method for MR-J3-_B_ systems.

2.2 Replacement Method

(1) For simultaneous replacement

Details simultaneous replacement scenarios.

(2) For replacement of only a controller and an amplifier

Describes replacement of only the controller and amplifier.

(3) Gradual replacement of MR-J3-_B_ with MR-J4-_B_

1: Current system

Refers to the current system configuration.

2: Only one axis replaced

Refers to the replacement of a single axis.

3: All axes replaced

Refers to the replacement of all axes.

4: Replacement of a controller (Note 2)

Refers to the replacement of a controller.

(4) For separate repair (Note)

(a) Replacement of servo amplifier

Details the process for replacing the servo amplifier.

(b) Replacement of servo motor

Explains the procedure for replacing the servo motor.

3. DIFFERENCES BETWEEN MR-J3-_B_ AND MR-J4-_B_

3.1 Function Comparison Table

Compares functions between MR-J3-_B_ and MR-J4-_B_ series.

(1) 400 V Class

3.2 Comparison of Networks

POINT

Refers to Part 6 Common Reference Material for network applications.

3.3 Comparison of Standard Connection Diagrams

(1) Comparison of connectors (7 kW or less)

Compares connectors for MR-J3-_B_ and MR-J4-_B_ (7 kW or less).

(2) List of connector and terminal block correspondence (7 kW or less)

(3) Comparison of signals

(a) CN1

Compares signals for the CN1 connector.

2) Speed control mode

3) Torque control mode

3.5 Comparison of Parameters

3.5.1 Setting requisite parameters upon replacement

Lists essential parameters to set for replacement.

(1) Parameters common to position control mode, speed control mode, and torque control mode

3.5.2 Parameter comparison list

3.5.3 Comparison of parameter details

3.6 Important Points for Replacement

1. SUMMARY

Summarizes precautions for parameter setting during replacement.

2. Precautions

Provides essential precautions for parameter setting and tool usage.

Part 4: Replacement of MR-J3W-_B with MR-J4W2-_B

1. SUMMARY

Summarizes changes for replacing MR-J3W-_B with MR-J4W2-_B systems.

2. CASE STUDY ON REPLACEMENT OF MR-J3W-_B

Reviews the replacement method for MR-J3W-_B systems.

2.2 Servo Amplifier Replacement Model

2.3 Replacement Method

(1) For simultaneous replacement

Details simultaneous replacement scenarios.

(2) For replacement of controller and amplifier only

Describes replacement of only the controller and amplifier.

(3) Gradual replacement of MR-J3W-_B with MR-J4W2-_B

POINT

Highlights motor compatibility and replacement considerations.

(4) Separate repair

(a) Replacement of servo amplifier

Details the process for replacing the servo amplifier.

(b) Replacement of servo motor

Explains the procedure for replacing the servo motor.

3. DIFFERENCES BETWEEN MR-J3W-_B AND MR-J4W2-_B

3.1 Function Comparison Table

Compares functions between MR-J3W-_B and MR-J4W2-_B series.

(1) MR-J3W-_B/MR-J4W2-_B 200 V class

3.2 Configuration including auxiliary equipment

(1) MR-J3W-_B

Shows the configuration diagram for MR-J3W-_B with auxiliary equipment.

(2) MR-J4W2-_B

Diagram for MR-J4W2-_B

Shows the configuration diagram for MR-J4W2-_B with auxiliary equipment.

3.3 Comparison of Networks

POINT

Refers to Part 6 Common Reference Material for network applications.

3.4 List of Corresponding Connectors and Terminal Blocks

(1) Comparison of connectors (7 kW or less)

Compares connectors for MR-J3W-_B and MR-J4W2-_B (7 kW or less).

(2) List of connector and terminal block correspondence (7 kW or less)

(3) Comparison of signals

Signals unique to MR-J4W2-_B are in parentheses.

Details signals unique to MR-J4W2-_B, indicated in parentheses.

3.5 Comparison of Peripheral Equipment

POINT

Refers to Part 8 for optional peripheral equipment.

3.6 Comparison of Parameters

CAUTION

Warns against extreme parameter adjustments and unauthorized changes.

3.7.1 Setting requisite parameters upon replacement

3.7.2 Parameter comparison list

3.7.3 Comparison of parameter details

Part 5: Review on Replacement of MR-J3-DU_ with MR-J4-DU_

1. SUMMARY

Explains changes when replacing large capacity MR-J3-DU_ with MR-J4-DU_.

2. FUNCTIONS AND CONFIGURATION

Details differences in functions and configuration between MR-J3-DU_ and MR-J4-DU_.

2.1 Differences between MR-J3-DU_ and MR-J4-DU_

Converter unit

Compares converter units for MR-J3-DU_ and MR-J4-DU_.

Drive Unit

Compares drive units for MR-J3-DU_ and MR-J4-DU_.

Installation

Compares installation requirements.

Protection coordination connector

Discusses the protection coordination connector.

Power consumption display

Compares power consumption display features.

SEMI-F47 function selection

Compares SEMI-F47 function selection.

Regenerative resistor

Compares regenerative resistor compatibility.

Dynamic brakes

Compares dynamic brake compatibility.

2.2 Combination of converter unit, drive unit, and servo motor

POINT

Notes motor compatibility and amplifier capacity changes for HG motors.

(2) MR-J4 series

(a) 200 V class

Lists combinations for MR-J4 series, 200 V class.

2.3 Configuration including peripheral equipment

(1) MR-J3-DU_

Shows the configuration diagram for MR-J3-DU_ with auxiliary equipment.

(2) MR-J4-DU_

Diagram for MR-J4-DU_

Shows the configuration diagram for MR-J4-DU_ with auxiliary equipment.

3. INSTALLATION

3.1 Installation direction and clearances

Guides on proper installation direction and clearances for the equipment.

4. SIGNALS AND WIRING

4.1 Comparison of standard connection diagrams

Compares standard wiring and connection diagrams.

4.1.1 When magnetic contactor drive output is enabled (factory setting)

Describes the power-on sequence when magnetic contactor drive output is enabled.

5. PARAMETER

CAUTION

Warns against drastic parameter adjustments that may cause unstable operation.

POINT

Refers to Part 6 for parameter converter function and details.

5.1 Converter unit

5.1.1 Converter unit parameter comparison list

Lists and compares parameters for converter units.

5.1.2 Converter unit comparison of parameter details

POINT

Highlights parameters requiring specific setting digits.

5.2 Drive unit

5.2.1 Drive unit comparison of parameter details

Compares specific parameters for drive units.

6. CHARACTERISTICS

6.1 Overload protection characteristics

Explains overload protection characteristics for servo amplifiers and motors.

7. OPTIONS AND PERIPHERAL EQUIPMENT

1. COMPARISON TABLE OF REGENERATIVE OPTION COMBINATIONS

Compares regenerative option combinations for MR-J3 and MR-J4 series.

1.1 Regenerative Options 200 V class /100 V class

1.1.1 Combination and regenerative power for the MR-J3/MR-J3W series

Lists combinations and regenerative power for MR-J3/MR-J3W series.

1.2 Combination and regenerative power for MR-J4 series (replacement model)

POINT

Highlights changed items and notes on parameter settings.

2.1 External Form Comparison

MR-J3 series

Shows external form comparison for MR-J3 series servo amplifiers.

2.1.2 General-Purpose Interface/SSCNET Interface 400 V class (30 kW or more)

(1) Comparison of Dimensions

Compares dimensions of MR-J3 and MR-J4 series servo amplifiers.

2.1.3 General purpose interface/SSCNET interface 200 V class (30 kW or more)

(1) Comparison of Dimensions

Compares dimensions of MR-J3 and MR-J4 series servo amplifiers.

2.1.4 General purpose interface/SSCNET interface 400 V class (30 kW or more)

(1) Comparison of Dimensions

Compares dimensions of MR-J3 and MR-J4 series servo amplifiers.

7.4 FR-BU2-(H) brake unit

POINT

Highlights the function of EM2 and EM1 in torque control mode.

7.4.1 Selection

Use a combination of converter unit, brake unit and resistor unit listed below.

Lists compatible combinations of converter units, brake units, and resistor units.

7.4.2 Brake unit parameter setting

POINT

Provides a point about connecting PR terminal of the brake unit to L+ terminal.

(1) Combination with FR-BR-(H) resistor unit

Explains the combination with FR-BR-(H) resistor unit.

7.5 Regenerative option

7.5.1 Combination and regenerative power

Compares combinations and regenerative power for MR-J3 and MR-J4 series.

7.6 External dynamic brake

CAUTION

Warns about potential accidents if external dynamic brake is not used.

POINT

Provides points about EM2 function, brake release time, and usage frequency.

7.6.1 MR-J3 series

7.6.2 MR-J4 series

7.7 Dimensions

(1) MR-J3-CR55K_

Provides dimensions for MR-J3-CR55K_.

(2) MR-J3-DU30K_/MR-J3-DU37K_/MR-J3-DU45K_4/MR-J3-DU55K_4

MR-J3-DU30K_/MR-J3-DU37K_

Shows dimensions for MR-J3-DU30K_/MR-J3-DU37K_ series.

MR-J3-DU45K_4/MR-J3-DU55K_4

Shows dimensions for MR-J3-DU45K_4/MR-J3-DU55K_4 series.

Part 6: Common Reference Material

1. SPECIFICATION DIFFERENCES

Details specification and function differences between MR-J3 and MR-J4 series.

1.1 Detailed Specification/Function Differences

Compares detailed specifications and functions between MR-J3 and MR-J4 series.

1.2 Servo amplifier

1.2.1 Main circuit terminal block

Shows the main circuit terminal block configurations for MR-J3 and MR-J4 series.

1.2.2 Comparison of encoder signals (CN2)

Note 1. Signal abbreviations in parentheses are for MR-J4 series.

Provides signal abbreviations in parentheses for MR-J4 series.

1.2.3 Dynamic brake: coasting distance

(1) Dynamic brake time constant

Compares dynamic brake time constants for MR-J3 and MR-J4 series.

1.2.4 Forced stop deceleration function selection

(1) Parameter setting

Details parameter settings for forced stop deceleration function.

1.2.5 Servo setup software: Setup software (SETUP221E) => MR Configurator2

(1) MR Configurator2 (SW1DNC-MRC2-E) specification

Lists specifications for MR Configurator2 software.

(2) System configuration

Describes system configuration requirements for servo setup software.

1.2.6 Servo amplifier initializing time

<Points to note upon replacement>

Provides notes for replacement, especially regarding electromagnetic brake.

(1) MR-J4-_A_/MR-J4-_B_series servo amplifier/MR-J4W2-_B servo amplifier

Explains the initializing time for MR-J4 series servo amplifiers.

(2) MR-J3-_A_series servo amplifier

Explains the initializing time for MR-J3-_A_ series servo amplifiers.

(3) MR-J3-_B_/MR-J3W-_B series servo amplifier

(4) MR-J4W2-0303B6 servo amplifier

(5) MR-J3W-0303BN6 servo amplifier

1.2.7 The pulse width of the encoder Z-Phase pulse

<Precautions>

Always reset the home position upon replacement.

<Amplifier replacement>

Compares encoder pulse width between MR-J3/J3W and MR-J4 series.

<Simultaneous replacement>

Compares encoder pulse width for simultaneous replacement.

1.3 Overload protection characteristics

POINT

Highlights differences in overload protection characteristics after replacement.

(1) MR-J4 servo amplifier/MR-J3 servo amplifier

Note. The combination is for increasing the maximum torque of the servo motor to 400%.

Notes combinations for increasing maximum torque of servo motors.

1.4 Comparison of Networks

POINT

Refers to Part 6 Common Reference Material for network applications.

1.4.1 Comparison of servo system network specifications

Compares network specifications for servo systems like SSCNET III and SSCNET III/H.

(1) Explanation of SSCNET III/H cable models

Function

Lists functions and their compatibility across different models and software versions.

2. SERVO AMPLIFIER DIMENSIONS/ATTACHMENT DIFFERENCES

2.1 MR-J3 series => MR-J4 series Comparison Table of Servo Amplifier Dimensions/Installation Differences

Compares dimensions and installation differences between MR-J3 and MR-J4 series servo amplifiers.

2.1.1 General-Purpose Interface/SSCNET Interface 200 V/100 V class (22 kW or less)

Compares dimensions of servo amplifiers in 200 V/100 V class (up to 22 kW).

2.1.2 General-Purpose Interface/SSCNET Interface 400 V class (22 kW or less)

(1) Comparison of dimensions

Compares dimensions of MR-J3 and MR-J4 series servo amplifiers in 400 V class.

2.2 Parameter conversion

2.2.1 Operation procedure of parameter conversion

Explains the operation procedure for parameter conversion using MR Configurator2.

2.2.2 MR-J3-_A_ parameter diversion procedure

POINT

Provides a point about parameter conversion and reading servo parameters.

2.2.4 Converting the parameters of MR-J3-_A_ and writing them to the MR-J4-_A_ servo amplifier

(1) Start MR Configurator2 (SW1DNC-MRC2-E).

Details on starting MR Configurator2 software.

(2) Create a new project.

Describes how to create a new project in MR Configurator2.

(3) Change MR-J3-_A_ parameters to MR-J4-_A_ parameters.

Click [Update Project].

Instructs to click the 'Update Project' button after parameter changes.

(4) Write the changed parameters to the MR-J4-_A_servo amplifier.

Note: The servo gain is not perfectly equal.

Notes that servo gain may not be perfectly equal after conversion.

2.2.5 Conversion rules (MR-J3-_A_ => MR-J4-_A_)

POINT

Highlights interchangeability issues and necessary checks for parameters.

2.3.4 Parameters that need to be checked after parameter conversion

(1) MR-J3-_B_ and MR-J3W-_B => MR-J4-_B_ and MR-J4W2-_B

Lists conversion rules for parameters between MR-J3/J3W and MR-J4/J4W2 series.

2.3.4 Parameters that need to be checked after parameter conversion

(1) MR-J3-_B_ and MR-J3W-_B => MR-J4-_B_ and MR-J4W2-_B

Lists conversion rules for parameters between MR-J3/J3W and MR-J4/J4W2 series.

2.3.4 Parameters that need to be checked after parameter conversion

(1) MR-J3-_B_ and MR-J3W-_B => MR-J4-_B_ and MR-J4W2-_B

Lists conversion rules for parameters between MR-J3/J3W and MR-J4/J4W2 series.

2.3.4 Parameters that need to be checked after parameter conversion

(1) MR-J3-_B_ and MR-J3W-_B => MR-J4-_B_ and MR-J4W2-_B

Lists conversion rules for parameters between MR-J3/J3W and MR-J4/J4W2 series.

2.3.4 Parameters that need to be checked after parameter conversion

(1) MR-J3-_B_ and MR-J3W-_B => MR-J4-_B_ and MR-J4W2-_B

Lists conversion rules for parameters between MR-J3/J3W and MR-J4/J4W2 series.

2.3.4 Parameters that need to be checked after parameter conversion

(1) MR-J3-_B_ and MR-J3W-_B => MR-J4-_B_ and MR-J4W2-_B

Lists conversion rules for parameters between MR-J3/J3W and MR-J4/J4W2 series.

2.3.4 Parameters that need to be checked after parameter conversion

(1) MR-J3-_B_ and MR-J3W-_B => MR-J4-_B_ and MR-J4W2-_B

Lists conversion rules for parameters between MR-J3/J3W and MR-J4/J4W2 series.

2.3.4 Parameters that need to be checked after parameter conversion

(1) MR-J3-_B_ and MR-J3W-_B => MR-J4-_B_ and MR-J4W2-_B

Lists conversion rules for parameters between MR-J3/J3W and MR-J4/J4W2 series.

2.3.4 Parameters that need to be checked after parameter conversion

(1) MR-J3-_B_ and MR-J3W-_B => MR-J4-_B_ and MR-J4W2-_B

Lists conversion rules for parameters between MR-J3/J3W and MR-J4/J4W2 series.

2.3.4 Parameters that need to be checked after parameter conversion

(1) MR-J3-_B_ and MR-J3W-_B => MR-J4-_B_ and MR-J4W2-_B

Lists conversion rules for parameters between MR-J3/J3W and MR-J4/J4W2 series.

2.3.4 Parameters that need to be checked after parameter conversion

(1) MR-J3-_B_ and MR-J3W-_B => MR-J4-_B_ and MR-J4W2-_B

Lists conversion rules for parameters between MR-J3/J3W and MR-J4/J4W2 series.

2.3.4 Parameters that need to be checked after parameter conversion

(1) MR-J3-_B_ and MR-J3W-_B => MR-J4-_B_ and MR-J4W2-_B

Lists conversion rules for parameters between MR-J3/J3W and MR-J4/J4W2 series.

2.3.4 Parameters that need to be checked after parameter conversion

(1) MR-J3-_B_ and MR-J3W-_B => MR-J4-_B_ and MR-J4W2-_B

Lists conversion rules for parameters between MR-J3/J3W and MR-J4/J4W2 series.

2.3.4 Parameters that need to be checked after parameter conversion

(1) MR-J3-_B_ and MR-J3W-_B => MR-J4-_B_ and MR-J4W2-_B

Lists conversion rules for parameters between MR-J3/J3W and MR-J4/J4W2 series.

2.3.4 Parameters that need to be checked after parameter conversion

(1) MR-J3-_B_ and MR-J3W-_B => MR-J4-_B_ and MR-J4W2-_B

Lists conversion rules for parameters between MR-J3/J3W and MR-J4/J4W2 series.

2.3.4 Parameters that need to be checked after parameter conversion

(1) MR-J3-_B_ and MR-J3W-_B => MR-J4-_B_ and MR-J4W2-_B

Lists conversion rules for parameters between MR-J3/J3W and MR-J4/J4W2 series.

2.3.4 Parameters that need to be checked after parameter conversion

(1) MR-J3-_B_ and MR-J3W-_B => MR-J4-_B_ and MR-J4W2-_B

Lists conversion rules for parameters between MR-J3/J3W and MR-J4/J4W2 series.

2.3.4 Parameters that need to be checked after parameter conversion

(1) MR-J3-_B_ and MR-J3W-_B => MR-J4-_B_ and MR-J4W2-_B

Lists conversion rules for parameters between MR-J3/J3W and MR-J4/J4W2 series.

2.3.4 Parameters that need to be checked after parameter conversion

(1) MR-J3-_B_ and MR-J3W-_B => MR-J4-_B_ and MR-J4W2-_B

Lists conversion rules for parameters between MR-J3/J3W and MR-J4/J4W2 series.

2.3.4 Parameters that need to be checked after parameter conversion

(1) MR-J3-_B_ and MR-J3W-_B => MR-J4-_B_ and MR-J4W2-_B

Lists conversion rules for parameters between MR-J3/J3W and MR-J4/J4W2 series.

2.3.4 Parameters that need to be checked after parameter conversion

(1) MR-J3-_B_ and MR-J3W-_B => MR-J4-_B_ and MR-J4W2-_B

Lists conversion rules for parameters between MR-J3/J3W and MR-J4/J4W2 series.

2.3.4 Parameters that need to be checked after parameter conversion

(1) MR-J3-_B_ and MR-J3W-_B => MR-J4-_B_ and MR-J4W2-_B

Lists conversion rules for parameters between MR-J3/J3W and MR-J4/J4W2 series.

2.3.4 Parameters that need to be checked after parameter conversion

(1) MR-J3-_B_ and MR-J3W-_B => MR-J4-_B_ and MR-J4W2-_B

Lists conversion rules for parameters between MR-J3/J3W and MR-J4/J4W2 series.

2.3.4 Parameters that need to be checked after parameter conversion

(1) MR-J3-_B_ and MR-J3W-_B => MR-J4-_B_ and MR-J4W2-_B

Lists conversion rules for parameters between MR-J3/J3W and MR-J4/J4W2 series.

Part 6: Common Reference Material

2.2 Parameter conversion

Explains the parameter conversion process using MR Configurator2.

2.2.1 Operation procedure of parameter conversion

Details the operation procedure for parameter conversion.

2.2.2 MR-J3-_A_ parameter diversion procedure

POINT

Provides a point about parameter conversion and reading servo parameters.

2.2.3 Parameter reading from the servo amplifier MR- J3-_A_

(1) Start MR Configurator2 (SW1DNC-MRC2-E).

Details on starting MR Configurator2 software.

(2) Create a new project.

Describes how to create a new project in MR Configurator2.

(3) Read the servo parameters.

2.2.4 Converting the parameters of MR-J3-_A_ and writing them to the MR-J4-_A_ servo amplifier

(1) Start MR Configurator2 (SW1DNC-MRC2-E).

Details on starting MR Configurator2 software.

(2) Create a new project.

Describes how to create a new project in MR Configurator2.

(3) Change MR-J3-_A_ parameters to MR-J4-_A_ parameters.

Click [Update Project].

Instructs to click the 'Update Project' button after parameter changes.

(4) Write the changed parameters to the MR-J4-_A_servo amplifier.

Note: The servo gain is not perfectly equal.

Notes that servo gain may not be perfectly equal after conversion.

2.2.5 Conversion rules (MR-J3-_A_ => MR-J4-_A_)

POINT

Highlights parameter interchangeability issues and necessary checks.

2.3.4 Parameters that need to be checked after parameter conversion

(1) MR-J3-_B_ and MR-J3W-_B => MR-J4-_B_ and MR-J4W2-_B

Lists conversion rules for parameters between MR-J3/J3W and MR-J4/J4W2 series.

4. COMMUNICATION FUNCTION (MITSUBISHI GENERAL-PURPOSE AC SERVO PROTOCOL)

POINT

Notes about RS-422, USB communication, and availability.

4.1 Structure

4.1.1 Configuration diagram

Shows configuration diagrams for single-axis and multi-drop connections.

4.3 Protocol

4.3.1 Transmission data configuration

Explains the structure of transmission data for controller-servo communication.

4.3.3 Error codes

4.3.4 Checksum

4.3.5 Time-out processing

4.5 Detailed explanations of commands

4.5.1 Data processing

Explains data processing methods for sending and receiving data.

4.5.2 Status display mode

(1) Reading the status display name and unit

Shows how to read status display names and units.

(2) Status display data reading

Explains how to read status display data and processing information.

(3) Status display data clear

Describes how to clear cumulative feedback pulse data.

4.5.3 Parameter

(1) Specification of the parameter group

Explains how to specify parameter groups for reading or writing settings.

(2) Parameter group reading

Shows how to read parameter groups set with slave stations.

(3) Reading symbols

Explains how to read parameter symbols and specify parameter groups.

4.5.4 External I/O signal status (DIO diagnosis)

(1) Reading input device status

Explains how to read the status of input devices.

(2) Reading external input pin status

Explains how to read the on/off status of external input pins.

4.5.5 Input device on/off (test operation)

POINT

Notes that input devices can be turned on/off, but external signals must also be switched off.

4.5.7 Input devices on/off (test operation)

POINT

Notes that input devices can be turned on/off, but external signals must also be switched off.

4.5.8 Test operation mode

POINT

Notes that test operation mode is for checking, not actual operation.

(1) How to prepare and cancel the test operation mode

Details how to prepare and cancel the test operation mode.

6.1 J3 compatibility mode

POINT

Highlights that J3 compatibility mode is only for MR-J4-_B_(-RJ) and MR-J4W2-_B.

6.1.1 J3 Outline of J3 compatibility mode

POINT

Details J3 series servo motor driving in J3 compatibility mode.

6.1.3 J3 compatibility mode supported function list

Function

Lists functions compatible with J4 mode and J3 compatibility mode.

6.1.4 Distinguishing J3 compatibility mode

Servo amplifier power on

Shows status display for distinguishing J4 mode and J3 compatibility mode.

6.1.5 How to switch J4 mode/J3 compatibility mode

(1) Mode selection by the automatic identification of the servo amplifier

Explains mode selection via automatic identification based on controller.

(2) Mode selection using the application software "MR-J4(W)-B mode selection"

Describes mode selection using the MR-J4(W)-B mode selection application.

6.1.6 How to use the J3 compatibility mode

(1) Setting of the controller

Explains controller settings for J3 compatibility mode.

(2) Setting of setup software (SETUP221E)

Guides on setting up the software for J3 compatibility mode.

(3) Setting of MR Configurator2

Provides system settings for MR Configurator2 in J3 compatibility mode.

6.1.7 Cautions for switching J4 mode/J3 compatibility mode

6.1.8 Cautions for the J3 compatibility mode

The J3 compatibility mode is partly changed and has restrictions compared with MR-J3 series.

Highlights changes and restrictions of J3 compatibility mode compared to MR-J3 series.

6.2 Master-slave operation function

WARNING

Warns about potential damage if axes are not stopped simultaneously.

POINT

Notes on master-slave operation function conditions and compatibility.

(1) Summary

(2) System configuration

POINT

Lists control modes compatible with master-slave operation.

(3) Parameter setting for the master-slave operation function

To use the master-slave operation function, the following parameter settings are necessary.

Details necessary parameter settings for master-slave operation.

(4) Rotation direction setting

6.3 Scale measurement function

POINT

Notes availability and restrictions of the scale measurement function.

6.3.1 Functions and configuration

(1) Function block diagram

Shows the block diagram for the scale measurement function.

(2) System configuration

(a) For a rotary encoder

Details system configuration for rotary encoders.

6.3.2 Scale measurement encoder

POINT

Highlights points about scale measurement encoder cables and usage.

(1) Rotary encoder

Specifies servo motors to use as encoders for rotary encoder scale measurement.

(2) Configuration diagram of encoder cable

(a) Rotary encoder

Shows configuration diagrams for encoder cables of rotary encoders.

Part 7: Review on Replacement of Motor

1. SERVO MOTOR REPLACEMENT

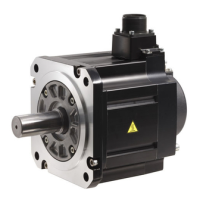
Covers servo motor replacement procedures.

1.1 Servo Motor Substitute Model and Compatibility

Provides information on compatible substitute models and compatibility.

(1) HF-KP motor series (With gears for general industrial machines with a reducer)

Series

Lists series, models, and example replacement models for HF-KP motors.

(2) HF-KP series (With reduction gear for precision application compliant)

Series

Lists series, models, and example replacement models for HF-KP series.

(3) HF-MP series (With gears for general industrial machines)

Series

Lists series, models, and example replacement models for HF-MP series.

(4) HF-MP series (With reduction gear for precision application compliant)

Series

Lists series, models, and example replacement models for HF-MP series.

(5) HF-SP series (With gears for general industrial machines)

Servo amplifier series

Compares servo amplifier series for HF-SP motors.

(6) HF-SP series (With shaft-output type gear reducer for high precision applications)

Servo amplifier series

Compares servo amplifier series for HF-SP motors.

(7) HC-UP series

Same torque characteristics

Compares torque characteristics for HC-UP series motors.

(8) HF-JP series

Same torque characteristics

Compares torque characteristics for HF-JP series motors.

(9) HA-LP series

POINT

Notes that torque characteristics differ for HG-JR motors.

(10) HA-LP series

(a) HA-LP 1000 r/min series 200 V class

Shows torque characteristics for HA-LP 1000 r/min series, 200 V class.

(d) HA-LP 2000 r/min series 400 V class

Note 1. The above torque characteristics are for 3-phase 400 V AC.

Notes that torque characteristics are for 3-phase 400 V AC.

Part 8: Review on Replacement of Optional Peripheral Equipment

1. COMPARISON TABLE OF REGENERATIVE OPTION COMBINATIONS

Compares regenerative option combinations for MR-J3 and MR-J4 series.

1.1 Regenerative Options 200 V class /100 V class

1.1.1 Combination and regenerative power for the MR-J3/MR-J3W series

Lists regenerative options and power for MR-J3/MR-J3W series.

1.2 Combination and regenerative power for MR-J4 series (replacement model)

POINT

Highlights changed items and notes on parameter settings.

2.1 External Form Comparison

MR-J3 series

Shows external form comparison for MR-J3 series.

2.1.2 General-Purpose Interface/SSCNET Interface 400 V class (30 kW or more)

(1) Comparison of Dimensions

Compares dimensions of MR-J3 and MR-J4 series servo amplifiers.

2.1.3 General purpose interface/SSCNET interface 200 V class (30 kW or more)

(1) Comparison of Dimensions

Compares dimensions of MR-J3 and MR-J4 series servo amplifiers.

2.1.4 General purpose interface/SSCNET interface 400 V class (30 kW or more)

(1) Comparison of Dimensions

Compares dimensions of MR-J3 and MR-J4 series servo amplifiers.

3. COMPARISON TABLE OF CABLE OPTION COMBINATIONS

3.1 Changes from MR-J3 series to MR-J4 series

Details changes in cable options from MR-J3 to MR-J4 series.

4. POWER SUPPLY WIRE SIZE

4.1 Selection of Power Supply Wire Size (Example)

Provides examples for selecting power supply wire sizes.

4.1.1 MR-J3 series power supply wire size

Specifies power supply wire sizes for MR-J3 series.

4.1.2 MR-J4 series power supply wire size

POINT

Advises to use specified wires for compliance with standards.

(1) Example of selecting the wire sizes

POINT

Recommends using HIV wire for MR-J4 replacement.

4.3 Selection of Molded-Case Circuit Breaker, Fuse, and Magnetic Contactor (Example)

CAUTION

Emphasizes selecting circuit breakers with high speed shut-off for safety.

4.3.1 MR-J3 series, molded-case circuit breakers, fuses, and magnetic contactors

(1) For main circuit power supply

Lists recommended circuit breakers, fuses, and contactors for main circuit power supply.

4.3.2 MR-J4 series, molded-case circuit breakers, fuses, and magnetic contactors (recommended)

(1) For main circuit power supply

Lists recommended circuit breakers, fuses, and contactors for MR-J4 series main circuit.

(2) For control circuit power supply

5. BATTERY

POINT

Refers to Servo Amplifier Instruction Manual for battery replacement.

WARNING

Warns about electric shock hazard and need for waiting time before battery replacement.

CAUTION

Advises to take precautions against static electricity damage.

5.1 Combinations of batteries and the servo amplifier

5.2 MR-J3 series Battery

(1) Purpose of use for MR-J3BAT

Explains the purpose of MR-J3BAT battery for absolute position detection system.

(2) Year and month when MR-J3BAT is manufactured

Describes how to find the production year and month of MR-J3BAT from the serial number.

5.3 MR-J4 series Battery

5.3.1 Battery replacement procedure

Provides the procedure for replacing batteries in MR-J4 series.

5.5.1 MR-BT6VCASE battery case

POINT

Notes on MR-BT6VCASE usage and compatibility.

(1) The number of connected servo motors

Specifies the number of servo motors connectable to MR-BT6VCASE.

(2) Dimensions

Provides dimensions for the MR-BT6VCASE battery case.

(3) Battery mounting

POINT

Notes on battery unit connectivity and MR-J4W-_-B compatibility.

(3) Battery replacement procedure

(a) Installation procedure

Details the procedure for installing the battery.

(b) Removal procedure

Explains the procedure for removing the battery.

(4) Replacement procedure of the built-in battery

POINT

Provides guidance on handling lead wires during case assembly.

6. EMC FILTER (RECOMMENDED)

6.1 MR-J3/MR-J3W/MR-J4 series EMC Filter (recommended) (100 V/200 V/400 V class)

Recommends EMC filters for MR-J3/J3W/J4 series to comply with EN EMC directive.

6.1.1 Connection example

(1) MR-J3/MR-J3W series

Shows connection examples of EMC filters for MR-J3/MR-J3W series.

(2) MR-J4 series 200 V/100 V class

Shows connection examples of EMC filters for MR-J4 series (200 V/100 V).

(3) MR-J4 series 400 V class

Shows connection examples of EMC filters for MR-J4 series (400 V).

6.1.2 Dimensions

(1) EMC filter

Provides dimensions for HF3010A-UN/HF3010A-UN2 EMC filters.

7. POWER FACTOR IMPROVING AC REACTOR/POWER FACTOR IMPROVING DC REACTOR

7.1 MR-J3 series Power Factor Improving DC Reactor

Explains the advantages and installation of MR-J3 series power factor improving DC reactors.

7.3 Selection of Molded-case Circuit Breaker, Fuse, and Magnetic Contactor (Example)

CAUTION

Emphasizes selecting circuit breakers with high speed shut-off for safety.

4.3.1 MR-J3 series, molded-case circuit breakers, fuses, and magnetic contactors

(1) For main circuit power supply

Lists recommended circuit breakers, fuses, and contactors for main circuit power supply.

4.3.2 MR-J4 series, molded-case circuit breakers, fuses, and magnetic contactors (recommended)

(1) For main circuit power supply

Lists recommended circuit breakers, fuses, and contactors for MR-J4 series.

(2) For control circuit power supply

8. SETUP SOFTWARE (SETUP221E)

8.1 MR-J3/MR-J3W series Setup Software (SETUP221E)

Describes the setup software for MR-J3/MR-J3W series servo amplifiers.

8.1.1 Specifications

Lists the specifications of the SETUP221E software.

8.2 MR-J4 series MR Configurator2

8.2.1 Specifications

Lists the specifications of MR Configurator2 software.

8.3 System configuration

8.3.1 Components

Lists the required components for setting up MR Configurator2.

9. PANEL THROUGH ATTACHMENT

POINT

Notes that MR-J3ACN is usable only for MR-J4-22K_(4).

9.1 MR-J3 series (MR-J3ACN)

(1) Panel cut dimensions

Shows panel cut dimensions for MR-J3ACN.

(2) How to assemble the attachment for panel through attachment

Details assembly of the attachment for panel through attachments.

(3) Mounting method

a. Assembling the panel through attachment

Illustrates the assembly of the panel through attachment.

b. Mounting it to the control box

Shows how to mount the assembly into the control box.

(4) Outline dimension drawing

9.2 MR-J4 series (MR-J4ACN15K/MR-J3ACN)

(1) Panel cut dimensions

Shows panel cut dimensions for MR-J4ACN15K.

(b) How to assemble the attachment for panel through attachments

Details assembly of the attachment for panel through attachments.

(c) Mounting method

a. Assembling the panel through attachment

Illustrates the assembly of the panel through attachment.

b. Mounting it to inside cabinet

Shows how to mount the assembly inside the cabinet.

(d) Mounting dimensional diagram

Part 9: Startup Procedure Manual

1. STARTUP

Provides essential startup information and warnings.

1.1 Switching power on for the first time

1.1.1 Startup procedure

Details the step-by-step startup procedure for the servo amplifier.

MEMO

[Appendix 1] Introduction to Renewal Tool

POINT

Advises checking the website for tool details and compatible models.

1. SUMMARY

Introduces the MR-J3 renewal tool for replacing MR-J3/J3W with MR-J4 series.

1.1 Servo amplifier replacement model

Lists servo amplifier models for MR-J3 to MR-J4 series replacement.

1.2 Features

Highlights features like cable compatibility and mounting ease.

2. IMPORTANT POINTS TO NOTE WHEN REPLACING

Lists crucial points to consider during the replacement process.

3. REPLACMENT COMBINATION LIST

3.1 Servo amplifier replacement combination list

Lists servo amplifier replacement combinations for MR-J3 to MR-J4 series.

(1) Replacement model and tool for replacing MR-J3 series with MR-J4 series

(a) General-Purpose Interface/SSCNET Interface 200 V class

Shows replacement models for General-Purpose/SSCNET Interface (200 V class).

(b) General-Purpose Interface/SSCNET Interface 400 V class

Shows replacement models for General-Purpose/SSCNET Interface (400 V class).

(2) Replacement model and tool for replacing MR-J3W series with MR-J4 series

(a) SSCNET Interface 200 V class

Shows replacement models for SSCNET Interface (200 V class).

5. SPECIFICATIONS

5.1 Standard Specifications

Provides standard specifications for mounting attachments and conversion cables.

(1) Mounting attachment specifications

Item

Lists items and their specifications for mounting attachments.

(2) Conversion cable specifications (For both servo amplifier side and servo motor side)

Item

Lists items and their specifications for conversion cables.

6. DIMENSIONS

6.1 Mounting attachment

Provides mounting attachment dimensions for General-Purpose and SSCNET interfaces.

(1) SC-J2SJ4BS04

(a) Mounting attachment alone

Shows mounting attachment dimensions for SC-J2SJ4BS04.

(b) Mounting attachment + Combination with servo amplifier

Illustrates mounting attachment with servo amplifier combination.

(2) SC-J2SJ4BS06

(a) Mounting attachment alone

Shows mounting attachment dimensions for SC-J2SJ4BS06.

(b) Mounting attachment + Combination with servo amplifier

Illustrates mounting attachment with servo amplifier combination.

(3) SC-J3WJ4WBS02

(a) Mounting attachment alone

Shows mounting attachment dimensions for SC-J3WJ4WBS02.

(b) Mounting attachment + Combination with servo amplifier

Illustrates mounting attachment with servo amplifier combination.

6.2 Conversion cable

6.2.1 Servo motor side power supply conversion cable

Details the SC-J3J4PW1C1M- servo motor side power supply conversion cable.

(1) SC-J3J4PW1C1M-_

Provides cable pulling direction information for SC-J3J4PW1C1M.

6.2.2 Servo motor side encoder conversion cable

(1) SC-J3J4ENM1C1M

Details the SC-J3J4ENM1C1M servo motor side encoder conversion cable.

(2) SC-J3J4ENM1C1M-

Provides cable pulling direction for SC-J3J4ENM1C1M-.

6.2.5 The control signal conversion cable for the servo amplifier side

POINT

Shows names of cable connection diagram signals for servo amplifiers.

(1) SC-J3WJ4WCTC03M

Describes the SC-J3WJ4WCTC03M control signal conversion cable.

REVISIONS

Nov. 2016 L(NA)03127ENG-A

First edition of the installation guide.

Aug. 2017 L(NA)03127ENG-B

Revision details including addition of MR-J3W series and partial changes.

May. 2018 L(NA)03127ENG-C

Revision details for MR-J3-DU/MR-J4-DU and MR-J3W-0303BN6/MR-J4W2-0303B6 servo amplifiers.

Related product manuals