Do you have a question about the Mitsubishi Electric PUHY-HP72 and is the answer not in the manual?
| Brand | Mitsubishi Electric |
|---|---|
| Model | PUHY-HP72 |
| Category | Air Conditioner |
| Language | English |
Safety guidelines for handling electrical work, refrigerant, and preventing hazards.
Guidelines for safe handling and proper installation procedures for the unit.
Procedures and warnings for installing the unit in various locations and conditions.
Safe practices and procedures for connecting refrigerant piping, including brazing and leak testing.
Safety precautions and guidelines for performing electrical wiring on the unit.
Procedures and precautions for safely moving and repairing the unit.
Important considerations for specific situations like using R410A tools and handling electrical noise.
Essential steps and considerations before starting piping work for air conditioning systems.
Guidelines for handling and understanding the properties of piping materials, refrigerants, and oils.
Procedures and precautions for performing brazing, air tightness testing, and vacuum drying.
Essential safety measures and guidelines for electrical wiring work on the unit.
Information on compatible indoor and outdoor units and their configuration limits.
Details on suitable cable types and maximum permissible lengths for transmission and controller wiring.
Necessary switch configurations based on system setup and unit operation.
Procedures for setting M-NET addresses for units and controllers in the system.
Specific guidelines on the maximum allowable length of refrigerant pipes for different models.
Guidelines for selecting the correct diameter for refrigerant pipes based on unit capacity and location.
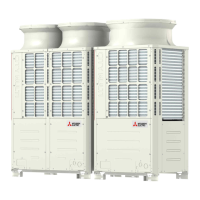
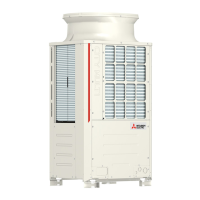
Visual identification of outdoor unit components and their arrangement.
Schematic diagrams illustrating the refrigerant flow within the outdoor unit.
Detailed explanation of the role and specifications of key outdoor unit components.
Layout and identification of components within the outdoor unit's control box.
Detailed breakdown and identification of components on the outdoor unit's circuit boards.
Electrical schematics illustrating the wiring connections for the outdoor unit.
Details on the functions of dipswitches and their default factory settings on various unit components.
Overview of the control logic and operation modes for the outdoor unit.
Explanation of how solenoid valves manage refrigerant bypass for optimal operation.
Conditions and procedures for initiating and stopping the defrost cycle.
Crucial checks and preparations required before conducting the unit's test run.
Methods for assessing and adjusting refrigerant levels for optimal system performance.
Identification of normal operational symptoms that may appear unusual.
Comprehensive list of error codes, their preliminary codes, and associated unit searches.
Detailed explanations and solutions for error codes ranging from 0 to 999.
Troubleshooting steps for error codes within the 1000 to 1999 range.
Solutions for error codes associated with drain sensors and float switches.
Troubleshooting common issues related to MA remote controller display and operation.
Diagnosing and resolving issues with the ME remote controller's LCD display and unit recognition.
Identifying and addressing issues related to insufficient cooling or heating capacity due to refrigerant control.
Methods for analyzing transmission signals and identifying electrical noise issues.
Introduction to the USB port's capabilities for data collection and software updates.
Procedures for collecting and storing operational data using a USB memory stick.
Steps for rewriting the outdoor unit's software using a USB memory stick.
Guidance on interpreting maintenance LED displays and troubleshooting USB function errors.
Explanation of how to read and interpret the status displayed by LEDs on the circuit board.
Guide to understanding the numerical and flag displays shown on the service monitor LEDs.
Information displayed on the monitor screen during the unit's initial settings phase.
Details on the outdoor unit's clock function for tracking time and storing error history.