α2
Simple Application Controllers
Function Blocks 6
6 - 19
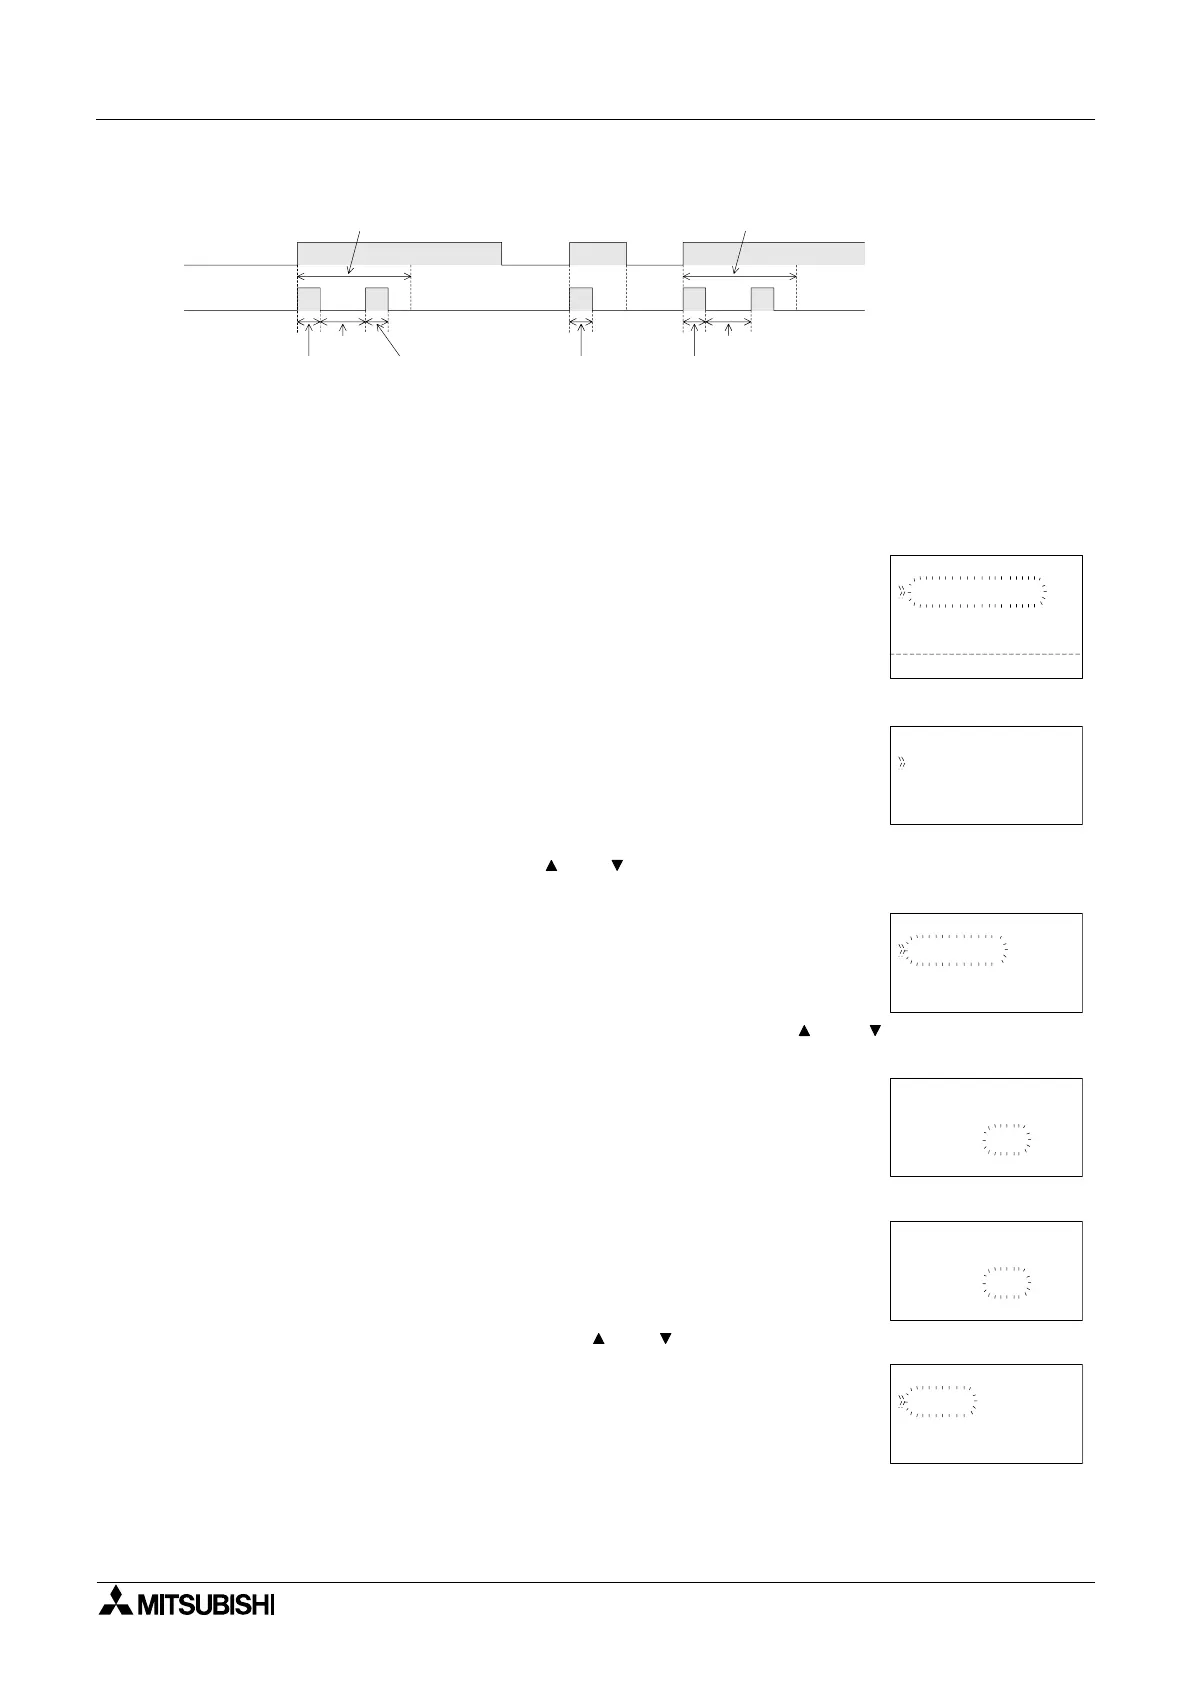
3 ) Time control action
Setup of the Flicker Function Block directly from the
α2 Series Controller
1 ) Allocate the input pin to be used for the function block.
2 ) Press the “OK” key with the cursor in the function block. The function block edit screen is
displayed as shown.
3 ) Press the “OK” key to set the Time unit for the delayed output.
4 ) Press the “OK” key having selected the value for the flicker time unit and return to the func-
tion block edit screen. Using the “ and ” keys highlight the Setup FB and press the “OK”
key. The screen displayed is shown.
5 ) Select the On Time, Off Time or Period option using the “ and ” Keys and press the
“OK” key. The On Time can be entered using the “+” or “-” keys.
6 ) The OffTime can be entered using the “+” or “-” keys.
7 ) The Period can be entered using the “ and ” Keys.
Input pin I
Output
ON OFF
On time
Off time
On time
Off time
registered number of times
On time On time
registered number of times
B001 : FL
Se t up FB
Cha nge No
De l e t e FB
Time uni t
Time uni t
100 sm
10 ms
1s
B001 : FL
OnT i me
Of f
Time
Pe r i od
B001 : FL
T= 0 . 1s
t= 0.0s
OnT i me
B001 : FL
T= 0 . 1s
t= 0.0s
Of f Time
B001 : FL
Time
Cou
nt
Con t i nuou
 Loading...