l
A
tyre in which puncture sealant has been
used should ideally be replaced with a new
one. If you wish to have such a tyre properly
repaired for reuse, please contact a
MITSUBISHI MOTORS Authorized Service
Point or another specialist. Note that a proper
repair is impossible following an emergency
repair if the puncture hole cannot be located.
l
Wipe away any sealant that gets on the
wheel. Provided the valve is replaced with a
new one, the wheel can be reused.
l
The manufacturer is unable to guarantee that
all tyre punctures can be repaired with the
tyre repair kit, in particular cuts or perfora-
tions with a diameter of more than 4 mm or
away from the tyre’s tread. The manufacturer
is not liable for damage sustained through im-
proper use of the tyre repair kit.
l
The manufacturer is not liable for damage sus-
tained through re-use of any tyre in which
tyre sealant has been used.
How to change a tyre
E00801202637
Before
changing a tyre, first stop your vehicle in a
safe, flat location.
1. Park the vehicle on level and stable ground,
free of loose pebbles, etc.
2. Set the parking brake firmly.
3. On vehicles with M/T, stop the engine and
move the gearshift lever to the “R” (Reverse)
position.
On vehicles with CVT, move the selector lev-
er to the “P” (PARK) position and stop the en-
gine.
4. Turn on the hazard warning flashers and set
up a warning triangle, flashing signal lamp,
etc., at an adequate distance from the vehi-
cle, and have all your passengers leave the ve-
hicle.
NOTE
l
The warning triangle and flashing signal
lamp do not come with your vehicle. It is rec-
ommended that you keep one in the vehicle
for use if needed.
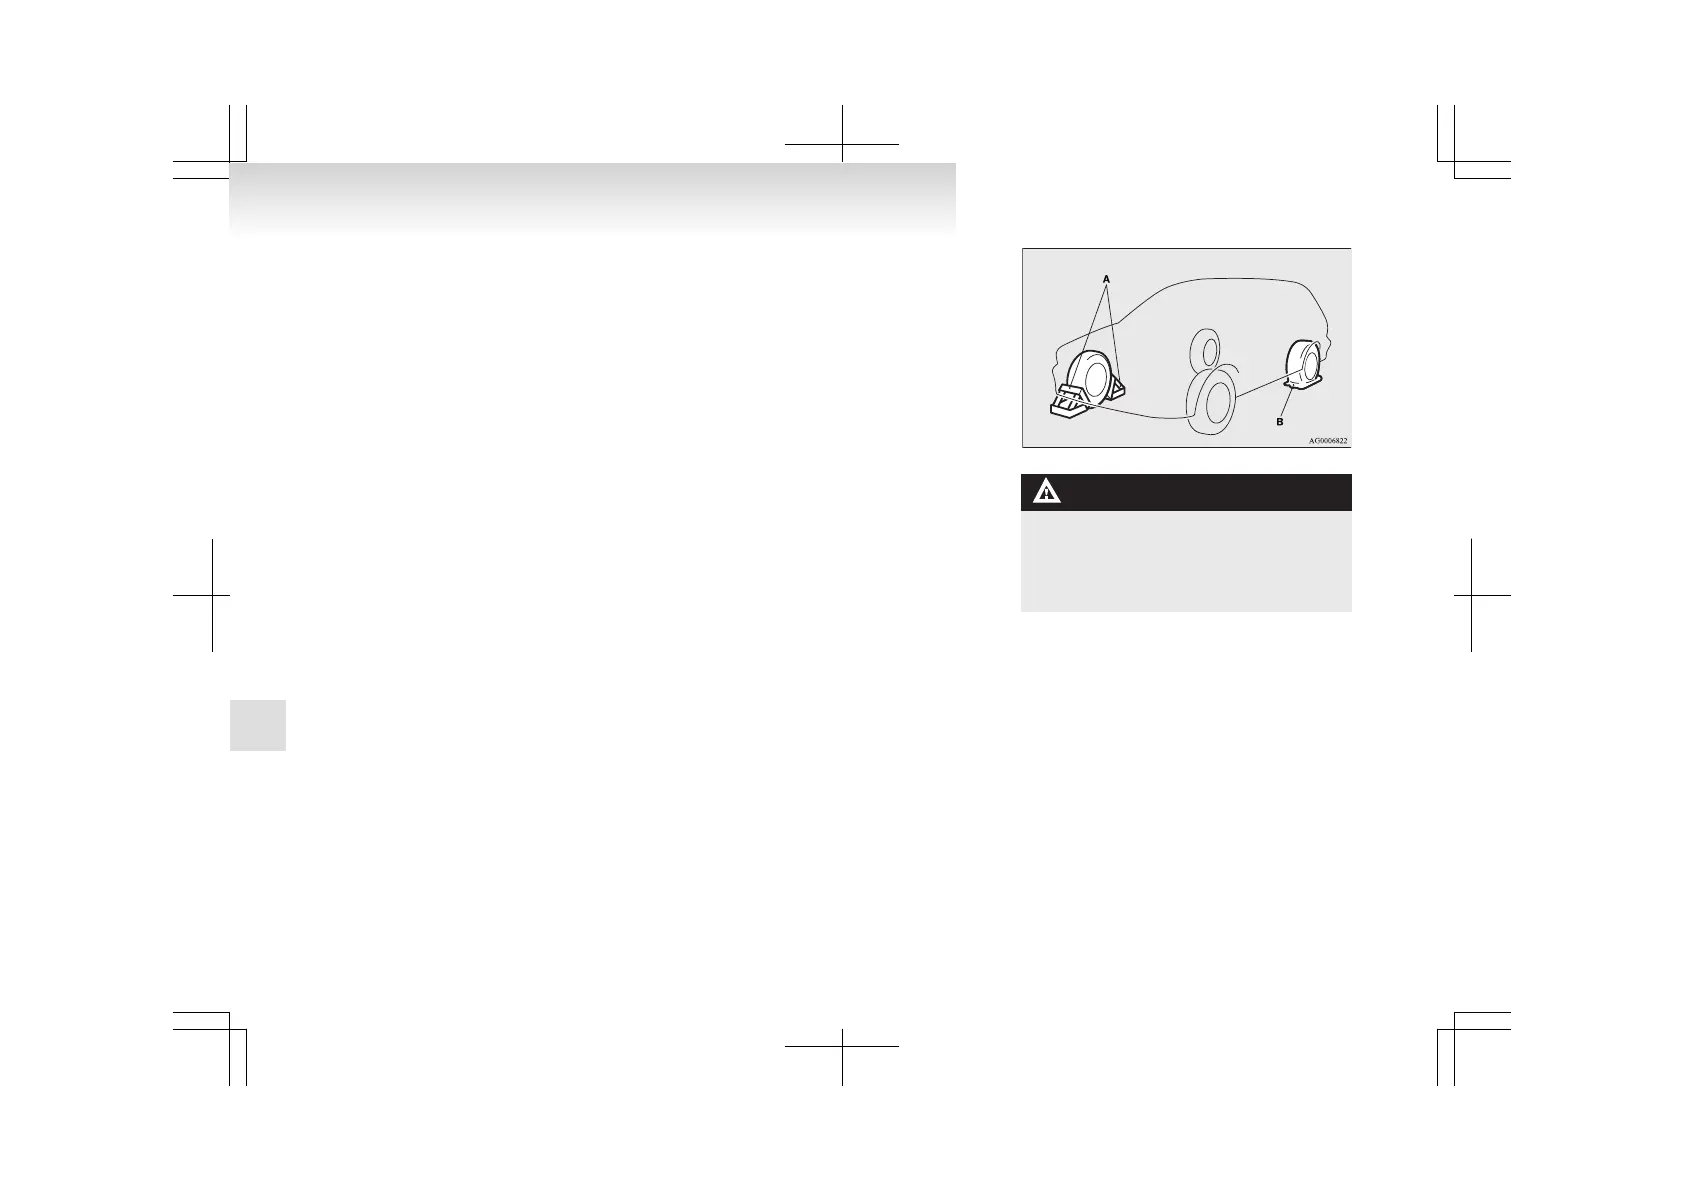
5. To prevent the vehicle from rolling when it
is raised on the jack, place chocks or blocks
(A) in front of and behind the tyre that is di-
agonally opposite from the tyre (B) you are
changing.
WARNING
l
Be
sure to apply chocks or blocks to the
correct tyre when jacking up the vehicle.
If the vehicle moves while jacked up, the
jack could slip out of position, leading to
an accident.
NOTE
l
The
chocks shown in the illustration do not
come with your vehicle. It is recommended
that you keep one in the vehicle for use if nee-
ded.
l
If chocks or blocks are not available, use
stones or any other objects that are large
enough to hold the wheel in position.
6. Get the jack bar and wheel nut wrench ready.
Refer to “Tools, jack and tyre repair kit” on
page 6-06.
For emergencies
6-12
6

 Loading...