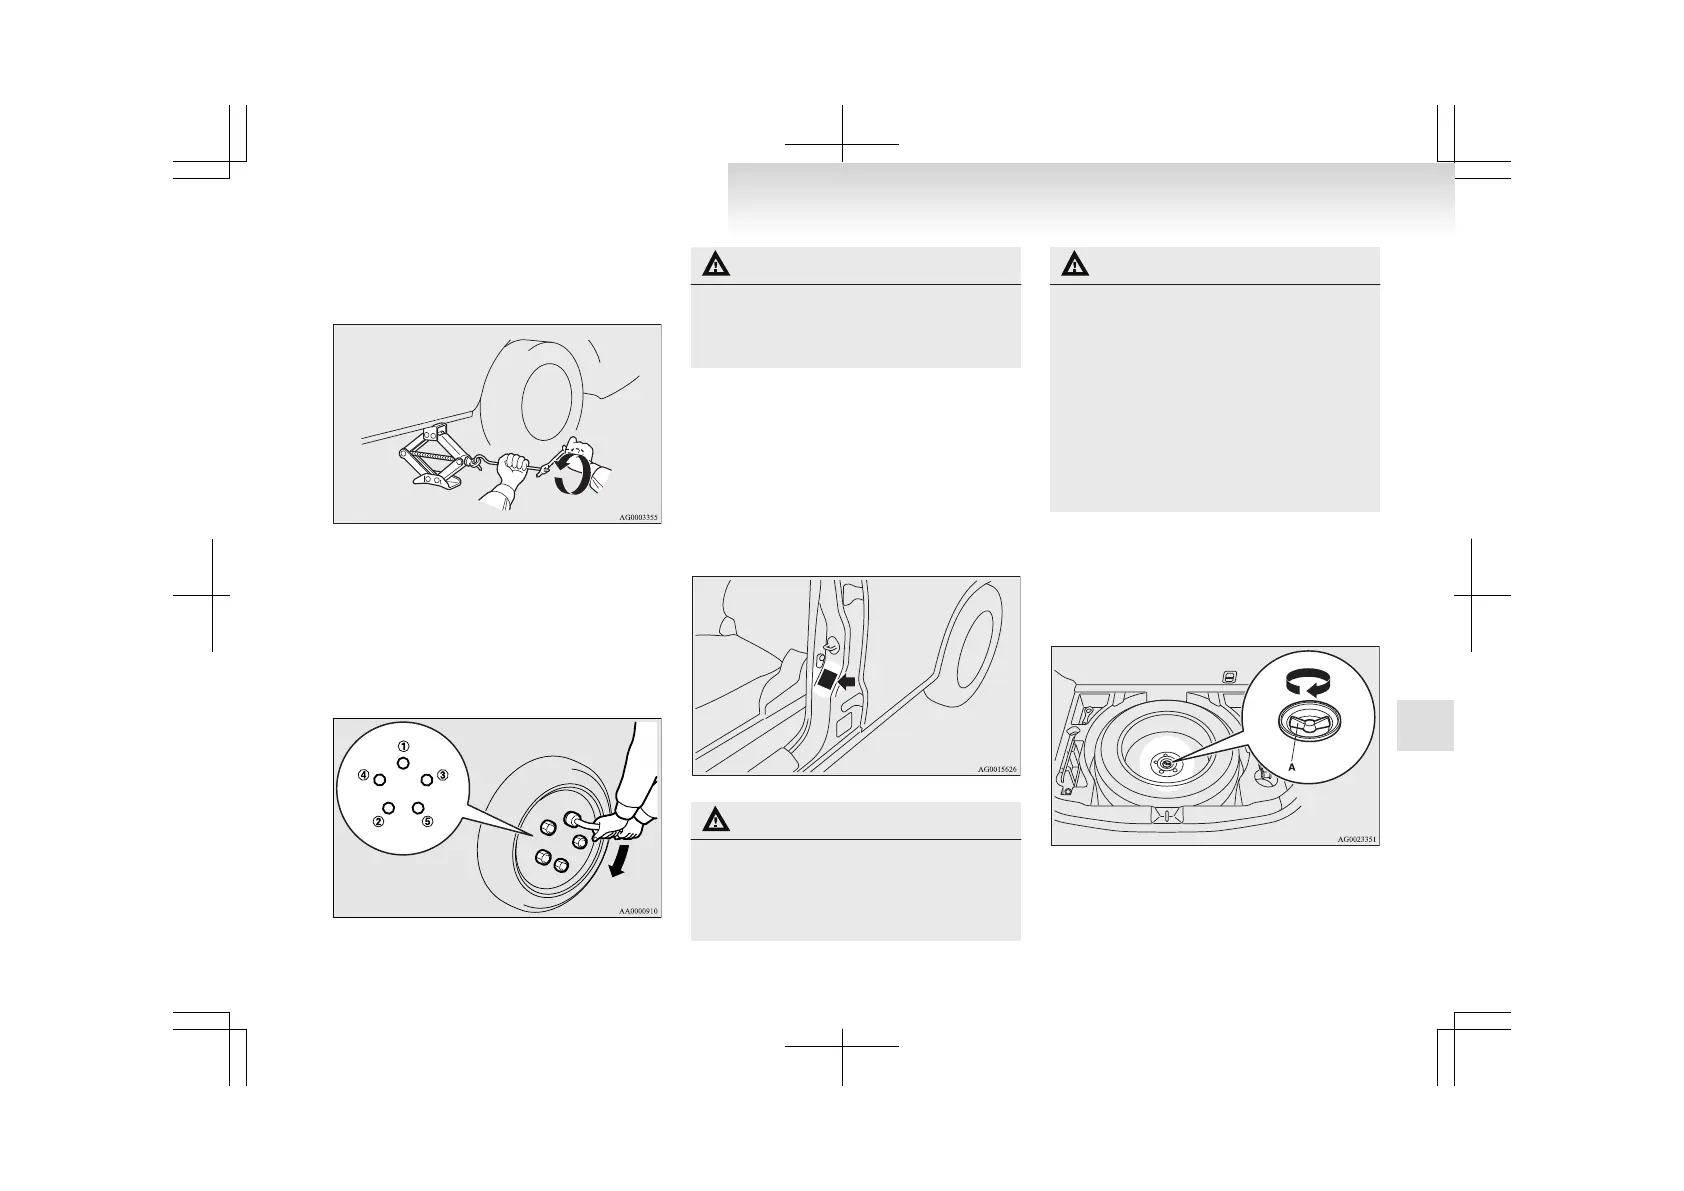
8. Lower the vehicle slowly by rotating the
wheel nut wrench anticlockwise until the
tyre touches the ground.
9. Tighten
the nuts in the order shown in the il-
lustration until each nut has been tightened
to the torque listed here.
Tightening torque 88 to 108 Nm
(Achieved by applying force of 350 to 420 N
at end of wheel nut wrench supplied with ve-
hicle)
CAUTION
l
Never use your foot or a pipe extension
for extra force in the wheel nut wrench.
If you do so, you will tighten the nut too
much.
10. If the vehicle has a wheel cover, install it.
Refer to “Wheel covers” on page
6-18.
11. Lower and remove the jack, then store the
jack, flat tyre, and chocks. Have your dam-
aged tyre repaired as soon as possible.
12. Check your tyre inflation pressure at the next
gasstation.
The correct tyre pressures are shown on the
driver’s door label. See the illustration.
CAUTION
l
The
temporary spare wheel is to be used
only temporarily when the standard
wheel is damaged. Repair the damaged
tyre as soon as possible and use it to re-
place the temporary spare tyre.
CAUTION
l
After changing the tyre and driving the ve-
hicle about 1,000 km (620 miles), retight-
en the wheel nuts to make sure that they
have not come loose.
l
If the steering wheel vibrates when driv-
ing after changing the tyre, we recom-
mend you to have the tyres checked for
balance.
l
Do not mix one type of tyre with another
or use a different size from the one listed.
This would cause early wear and poor han-
dling.
To store the flat tyre or spare wheel
E00803400176
1. Lift up the luggage floor board.
2. To
store the flat tyre or spare wheel, fit the
installation clamp (A) by turning it clockwise.
NOTE
l
On
vehicles with a T155/90D16 or
T125/90D16 size spare wheel, the clamp can-
not be used for a normal size tyre.
For emergencies
6-17
6

 Loading...