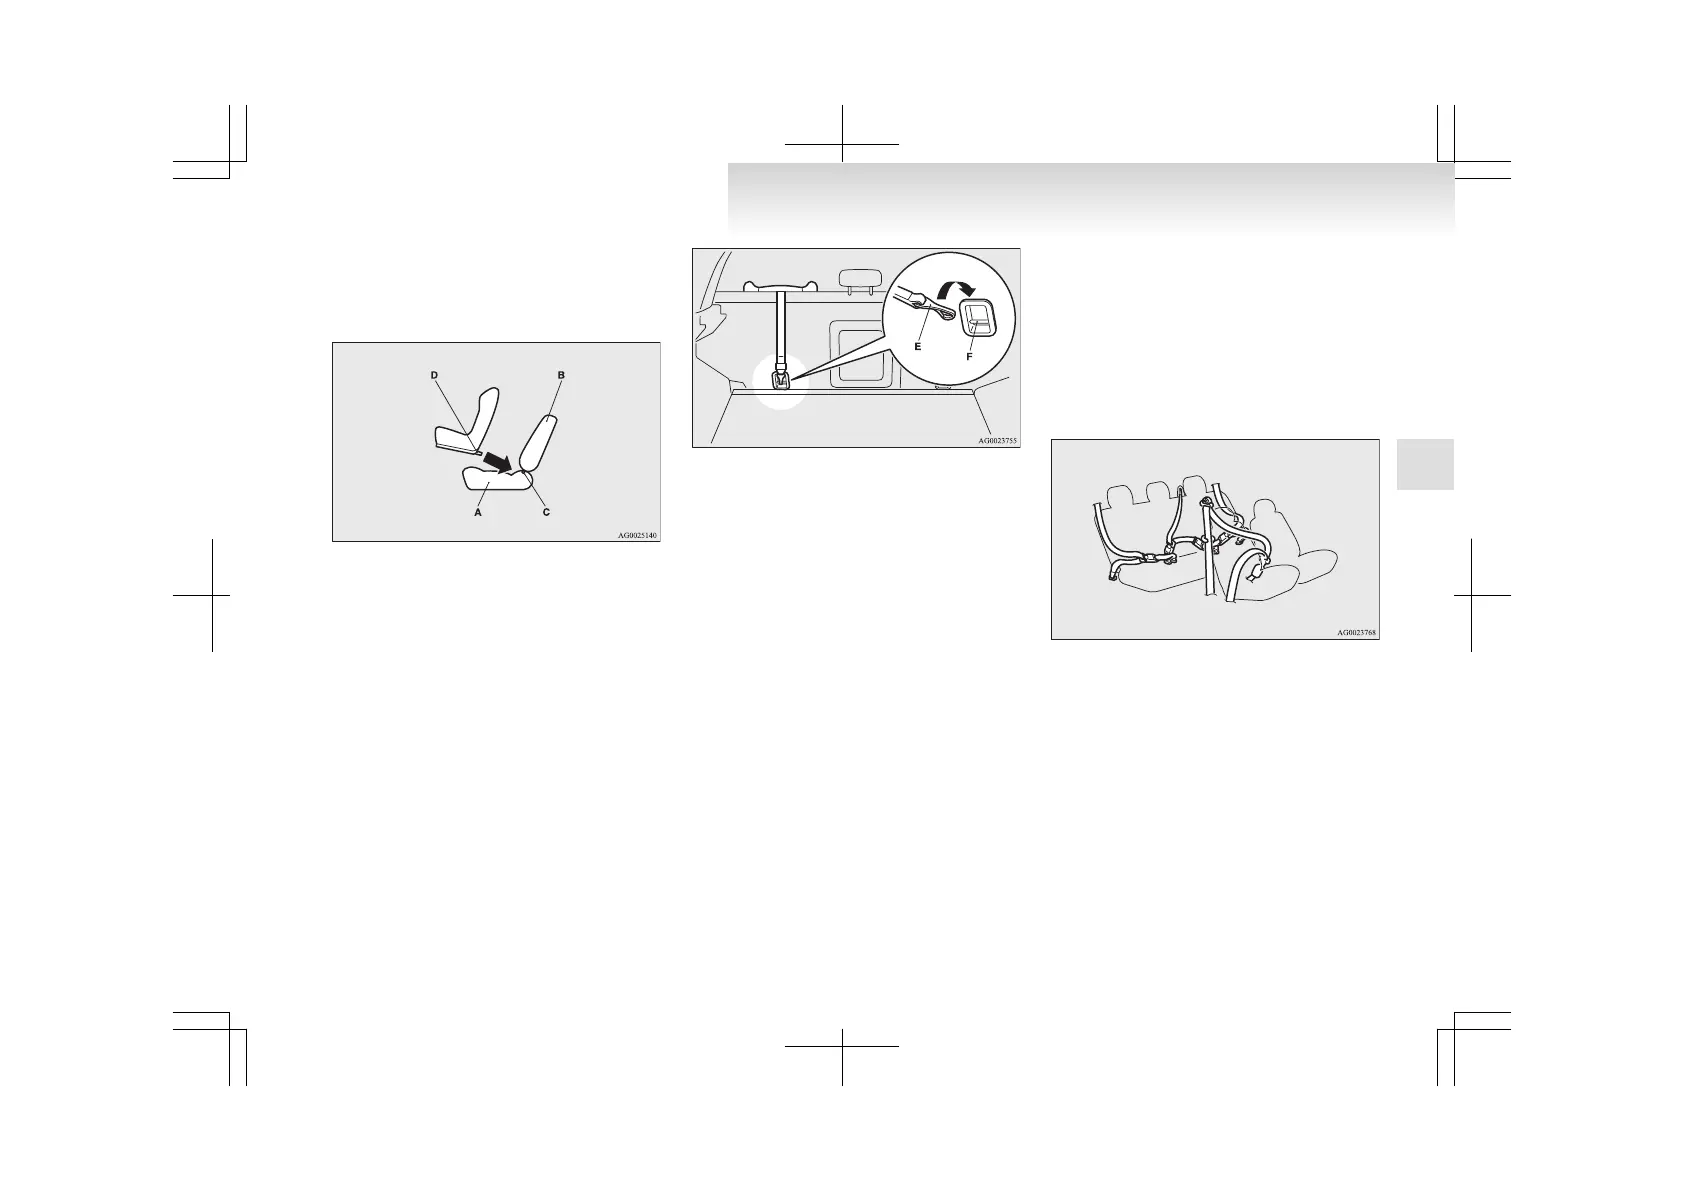
3. Push the child restraint system’s connectors
(D) into the lower anchorages (C) in accord-
ance with the instructions provided by the
child restraint system’s manufacturer.
A- Vehicle seat cushion
B-
Vehicle seatback
C- Lower anchorage
D- Connector
4. Remove the head restraint from the location
in which you wish to install a child restraint.
5. Latch the tether strap hook (E) of the child
seat to the tether anchorage bar (F) and tight-
en the top tether strap hook so it is securely
fastened.
NOTE
l
If
it is difficult to latch the tether strap hook
(E), turn the hook sideways.
6. Push and pull the child restraint in all direc-
tions to be sure it is secure.
To remove
Remove the child restraint in accordance with the
instructions provided by the child restraint sys-
tem’s manufacturer.
Installing a child restraint system to a
3-point type seat belt (with emergency
locking mechanism)
E00408700617
3-point type seat belt location
The
child restraint system can be fitted by using
the 3-point type seat belt at the below illustrated
seating position.
Installation:
1. Fasten the seat belt to secure the child re-
straint system.
Make sure you hear a “click” when you in-
sert the latch plate in the buckle.
2. Use the locking clip to completely eliminate
any slackness.
3. Push and pull the child restraint in all direc-
tions to be sure it is secure.
Seat and seat belts
2-23
2

 Loading...