7
THE FOLLOWING STEP REQUIRES
THE HELP OF ANOTHER ADULT!
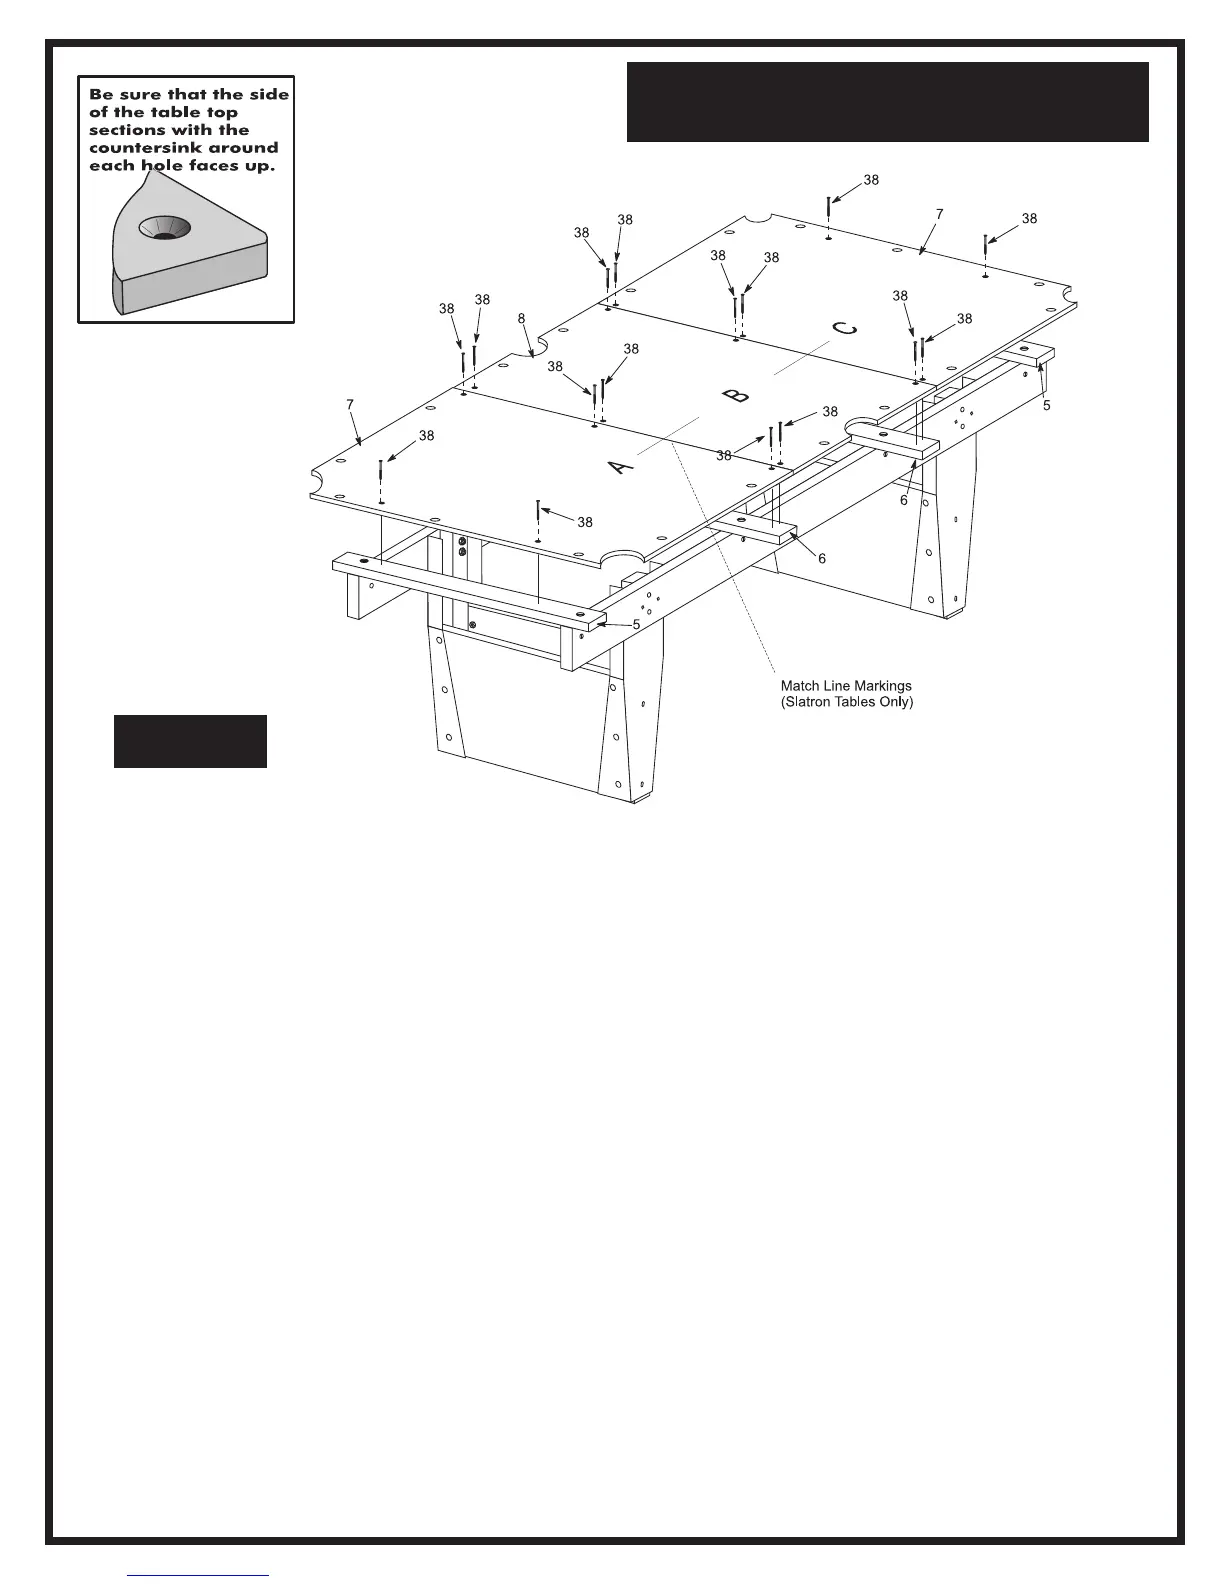
Figure 11
CAUTION: Be sure countersunk holes in all three
table top sections #7 and #8 face up: See Detail "A",
Figure 11. NOTE: Slatron tables have "match" line
markings like those shown above (or letters A, B, C).
Line up these lines or letters when putting down the
slatron sections.
17. Place center section #8 on the two long slats #6.
Center this piece on slats as well as you can. Center
section #8 should overhang the ends of the slats by ½"
inch. Use a tape measure to be sure.
18. Put a pencil (or punch) into each countersunk hole in
center section #8 and mark slats below. Remove center
section #8 and drill pilot holes in slats using a 1/8" drill
bit. Clean tops of slats completely of dust and
wood chips. Any dirt and debris can cause table
top sections to be uneven.
19. Place center section #8 back on slats and secure it to
long slats #6 with six screws #38. Dry soap on screw
threads will make this job easier. CAUTION: When
driving screws through slatron sections, hold slatron
down tight against the slats so they don't ride up on the
screws. NOTE: Be sure there are no gaps be-
tween center section #8 and slats. If gaps exist,
tighten screws more. However do not tighten
screws so much that center section begins to
crush or crack.
20. Place end sections #7 onto slats. Be sure they are
square, in line and butted up tight against center slate
#8.
21. Mark slats with a pencil through countersunk holes in
end sections #7. Remove end sections and drill pilot
holes with a 1/8" drill bit. Clean tops of slats
completely of dust and wood chips. Any dirt
and debris will prevent end sections from
aligning properly.
22. Place end sections #7 back on slats and secure using
screws #38 (five screws per end section). NOTE: Be
sure there are no gaps between end sections
#7 and slats. Run your finger across the two
seams between center section #8 and end
sections #7 to check for any uneven areas.
Sections should be even.
You should not need shims to even up the table top
sections #7 and #8, so if the sections do not align, first
try loosening screws and brush out underneath to
remove chips etc.. Then check under table to make sure
there are no gaps between the table top sections and
the slats. If gaps exist, tighten screws more. However,
do not tighten screws so much that the sections begin
to crush or crack. Top edges of seams must be precisely
level and even with one another. If you need to use
shims, read the shimming instructions on the following
page.
Detail A
 Loading...