8
SHIMMING INSTRUCTIONS IF REQUIRED
General Rules
nAccomplish the leveling of the playing surface with as few
shims as possible.
nDo not tap with a hammer or tighten screws unreasonably
tight. You will not be able to compress the playing surface.
You must shim up the playing surface to level. Shims are
meant only to raise the low places at the seams and ends.
Very short and low places should be filled with grout. Do not
assume the floor is level. Most leveling can be accom-
plished by working with the frame.
nIf using power tools be sure to use only enough torque to
reasonably tighten screws.
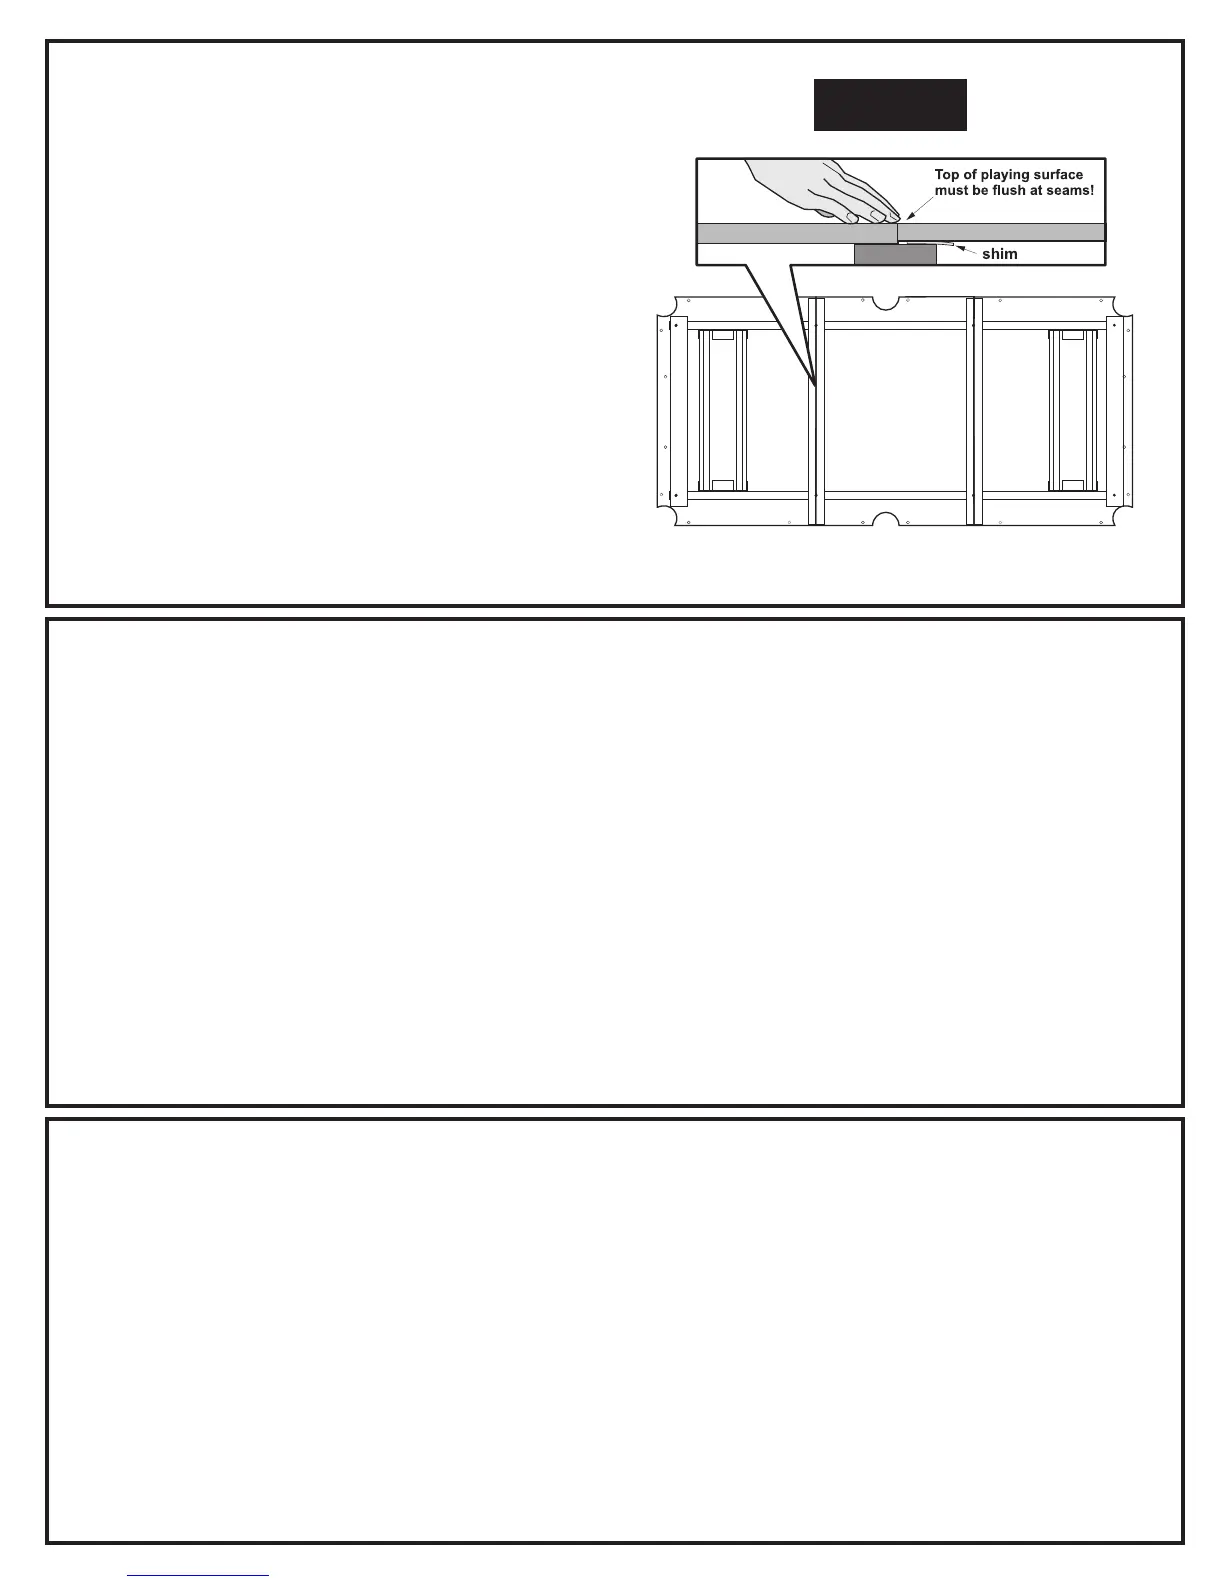
nSeams can best be checked by passing your finger over the
seam and feeling if it is flush.
nAll screws must be tightened after shimming.
STEP BY STEP SHIMMING
23. Be sure table is set in its final location.
24. Table must be as level as possible before shimming.
Large differences in levelness must be corrected
by raising or lowering frame with shim stock.
DO NOT ASSUME FLOOR IS LEVEL!
25. Tighten down all the playing surface mounting screws.
26. Check with a carpenter's level to determine where slate
is low on ends, and use finger tips to locate uneven spots
at the seams. Loosen screws at these points and see if
slate comes up to flush. If so detach individual shims from
the sheet shipped with this table and place under these
areas. Place shims next to screws.
27. Lay a straight edge across seams to be sure slate pieces
are at the same height.
28. After top surface of slate is flat and level all screws must
be snugged down tight. DO NOT OVERTIGHTEN
SCREWS! Check these screws before proceeding to
the next step.
29. Minor differences can be filled with grout.
GROUTING INSTRUCTIONS
30. Clean top sections with a damp cloth. DO NOT USE
TOO MUCH WATER. Allow enough time for top sections
to dry thoroughly before starting the next step.
31. A small container of grout has been provided for filling
small imperfections in the table seams and countersinks.
Using a putty knife, fill both seams and the four
countersunk holes in the center playfield area (all other
countersunk holes in slate will be covered by the rails).
Do not use more grout than is necessary. Spread grout
smoothly and evenly.
32. Allow grout to cure before starting the next step.
33. Using a medium grit sandpaper and a sanding block,
lightly sand the filled areas smooth and flat. USE A
STRAIGHT EDGE TO CHECK THAT THESE AREAS
ARE FLAT. Apply grout again if you find low places at
countersunk holes or seams.
Figure 12
 Loading...