Do you have a question about the MJM E-TR20 and is the answer not in the manual?
Critical safety instructions and warnings before operating the e-bike.
Detailed steps for charging the e-bike battery.
Overview of the LCD screen layout and information displayed.
Explanation of the MODE button and power control functions.
Understanding current display segments for power output.
How to view speed, switch units, and control backlight.
Explanation of the 6 KM/H power assist walk mode.
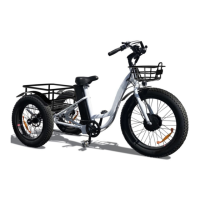
Instructions for assembling the front wheel unit onto the e-bike.
Guidelines for proper maintenance and maximizing lifespan of Li-ion batteries.
Advice on charging, battery usage, and lifespan.
Understanding the LED indicators on the charger and the charging process.
Recommendations for storing the battery for extended periods and optimal temperature.
Checklist for ensuring proper assembly and safety of the bike.
Detailed checks for seat, pedals, brakes, rack, kickstand, tires, and electrics.
Instructions on starting, riding, and managing battery power during use.
Advice on braking, riding surfaces, load limits, and following traffic rules.
Details on warranty coverage, limitations, and circumstances that void the warranty.
Information on purchasing specific components exclusively from the manufacturer.
This document serves as the user's manual for the MJM WHEELS LTD. E-TR20 and E-TRF20 electric bicycles, providing essential information for operation, maintenance, and safety.
The MJM WHEELS E-TR20 and E-TRF20 are electric bicycles designed to provide assisted pedaling, making cycling easier and more accessible. These e-bikes are equipped with a Li-ion battery system that powers an electric motor, offering various levels of pedal assistance. The primary function of these e-bikes is to assist the rider with propulsion, reducing physical exertion, especially during uphill climbs or long distances. The e-bike features a display unit that shows crucial riding information such as speed, distance, and battery level, allowing the rider to monitor their journey effectively. The pedal assist function is activated by rotating the pedals, and the motor provides power based on the selected assist level.
The e-bikes are designed for user-friendly operation, starting with a straightforward charging process. The battery can be charged either while installed on the bike or uninstalled. To remove the battery, the user needs to push a key and twist it anticlockwise until a "Click" is heard, possibly requiring the removal of the seat post first. A cover on the battery needs to be moved before plugging in the charger. The charging status is indicated by lights: a red light signifies charging, and a green light indicates a full charge. The charger itself is a "Smart Charger" with lights to show the battery charge status. It connects to an easy-access charger port on the bike. When the charger is plugged into an outlet and turned on, a red power light illuminates. Inserting the XLR plug into the bike's charger port will cause a second light to flash orange as the charger "seeks" the battery. Once found, this light turns solid orange, and a cooling fan starts, indicating the charging process has begun. A solid green light signifies a full charge.
The LCD display, labeled C300S, is a central interface for controlling and monitoring the e-bike. It features three buttons: MODE ("M"), UP ("+"), and DOWN ("-"). Holding the MODE button powers on the display and provides power to the controller. Holding MODE again activates the backlight. To turn off the display, press MODE for 1.5 seconds. The display automatically goes to sleep if the speed is less than 2 km/h for 5 minutes, conserving battery. The display shows the current discharging current of the controller, represented by segments, where each segment equals 2A, and six segments indicate >=12A.
Speed is displayed prominently, with options to show it in KM/H or MPH. The user can select the desired unit for speed and mileage. The backlight can be turned on by holding the UP button for 1.5 seconds and turned off by clicking it again. A unique feature is the "6 KM/H WORK" mode, activated by holding the DOWN button for 1.5 seconds. In this mode, the e-bike travels at a constant 6 Km/h, providing power assist for walking alongside the bike.
The e-bike offers an "ASSIST LEVEL SELECTION" feature, allowing riders to choose from different stages of output power ratio. By clicking the UP or DOWN buttons, the user can change the assist level, which ranges from 1 to 6 by default, though these levels can be customized. Level 1 is the default setting.
Before riding, several checks are recommended. The handlebars and saddle height should be adjusted to suit the rider, ensuring toes can touch the ground. All lights and meters must be checked for functionality. Electrical connectors between the bike and battery should be clean. Brakes need to be tested by applying them while pushing the bike forward; the bike should not move, and brake levers should not touch the handlebars. If the bike has a quick release on the front wheel, its tightness must be verified, as these mechanisms can loosen more easily than conventional axles. Appropriate clothing should be worn to avoid entanglement with wheels or the chain, and a CSA-approved helmet is mandatory.
To start riding, after mounting the bicycle, the main switch is turned on, and the power display light illuminates. The kickstand is released, and with one foot ready to pedal, the rider checks for safety before setting off. The motor will engage as pedaling begins. As the battery depletes, power level indicator lights will turn off sequentially. If the battery becomes flat, the main switch should be turned off, and the bike can be ridden using pedals only, with a full recharge recommended after the journey.
Riding practices include using both brakes together for stopping and being aware that wet conditions reduce braking effectiveness, requiring longer stopping distances. The manual advises against riding through deep puddles or streams to prevent water from reaching the motor and controller. Uneven surfaces, curbs, potholes, and carrying extra passengers or heavy loads are discouraged to prevent damage. Riding under the influence of drugs or alcohol, or when feeling unwell, is prohibited. Night riding requires functional lights; if lights are not working, it's safer to walk the bike. Adherence to the Highway Code is emphasized, and new or inexperienced riders are advised to practice in quiet areas before riding on busier roads.
Proper maintenance is crucial for maximizing the lifespan and ride time of the e-bike's Li-ion batteries. The manual stresses the importance of fully charging batteries immediately upon receipt and before first use, recommending 4-6 hours for Li-ion batteries. Batteries should always be recharged before the power indicator shows no power. Failure to follow charging instructions voids the warranty. For long-term storage, batteries should be charged at least every 90 days to prevent capacity loss, as they self-discharge and can be permanently damaged if allowed to reach critically low voltages. The charger should always be disconnected from the wall outlet and battery once charging is complete. Batteries should not be stored below 50°Fahrenheit or allowed to freeze (below 32°Fahrenheit). The recommended storage temperature for Li-ion batteries is between 32°F and 77°F, and exposure to extreme heat (104°F or higher) for extended periods should be avoided. The e-bike has a 5-second sleep mode; for long periods of disuse, the button above the battery should be held for 5 seconds until the light flashes, putting it into "Sleep Mode" to conserve charge.
The manual also highlights environmental responsibility, urging users to recycle old batteries at local centers rather than disposing of them in regular garbage. Frequent "stops and starts" drain the battery more quickly than sustained use. It's noted that rechargeable batteries do not last forever, and their average life depends on usage and conditions.
Regular inspection of the charger and charger port for damage (cord, plug, enclosure) is recommended. If damage is found, use should cease until repairs or replacements are made. Only MJM WHEELS Authorized Li-Ion chargers should be used with these e-bikes; using any other charger will damage the batteries and void the warranty.
For the front wheel installation, the manual provides detailed steps. It instructs users to identify the nuts and lock washers for the front axle assembly. The front wheel unit is then assembled onto the front fork, ensuring lock washers pass through the axle and the tab locks into the groove of the front fork. The nuts on both sides of the hub must be tightened with a torque wrench to 35 Nm. Crucially, the disc brake and brake caliper must be on the same side (left side), and the disc brake must slide into the gap between the two brake pads of the caliper. The wheel should turn freely without rubbing against the brake pads when the front brake is not pressed.
A final checklist ensures the bike is properly assembled and safe to ride. This includes checking that handlebars are straight, secure, and all relevant bolts are tight, testing their attachment by gripping the front wheel between the legs and attempting to turn them. For wheels, front and rear mudguard stays must be tight, and the quick release mechanism for the front wheel must be securely gripping. For the seat and post, ensure they are straight and secure. Pedals and chain should be fully wound in and tight, using a spanner if necessary, and gears should shift cleanly. Brakes must be tested to ensure both wheels stop completely when applied, and there should be at least a finger's width between the grip and the brake lever when fully depressed. The rack must be secure with all visible bolts tight. The kickstand should not wobble when the bike is gently rocked, and its bolt on the frame should be tightened if necessary. Tires should be pumped to a firm state, roughly 60ppi for Sport and Classic models and 50ppi for Urban models. Finally, for electrics, the pedal assist function should be tested by rotating the pedals with the rear wheel raised, and the battery should be fully charged before use.
| Motor Power | 250W |
|---|---|
| Battery | Lithium-ion |
| Category | Scooter |
| Max Speed | 25 km/h |
| Max Load | 120 kg |
| Brake Type | Disc |