8 9hellomockingbird.com hellomockingbird.com
Setup and UseAssembly
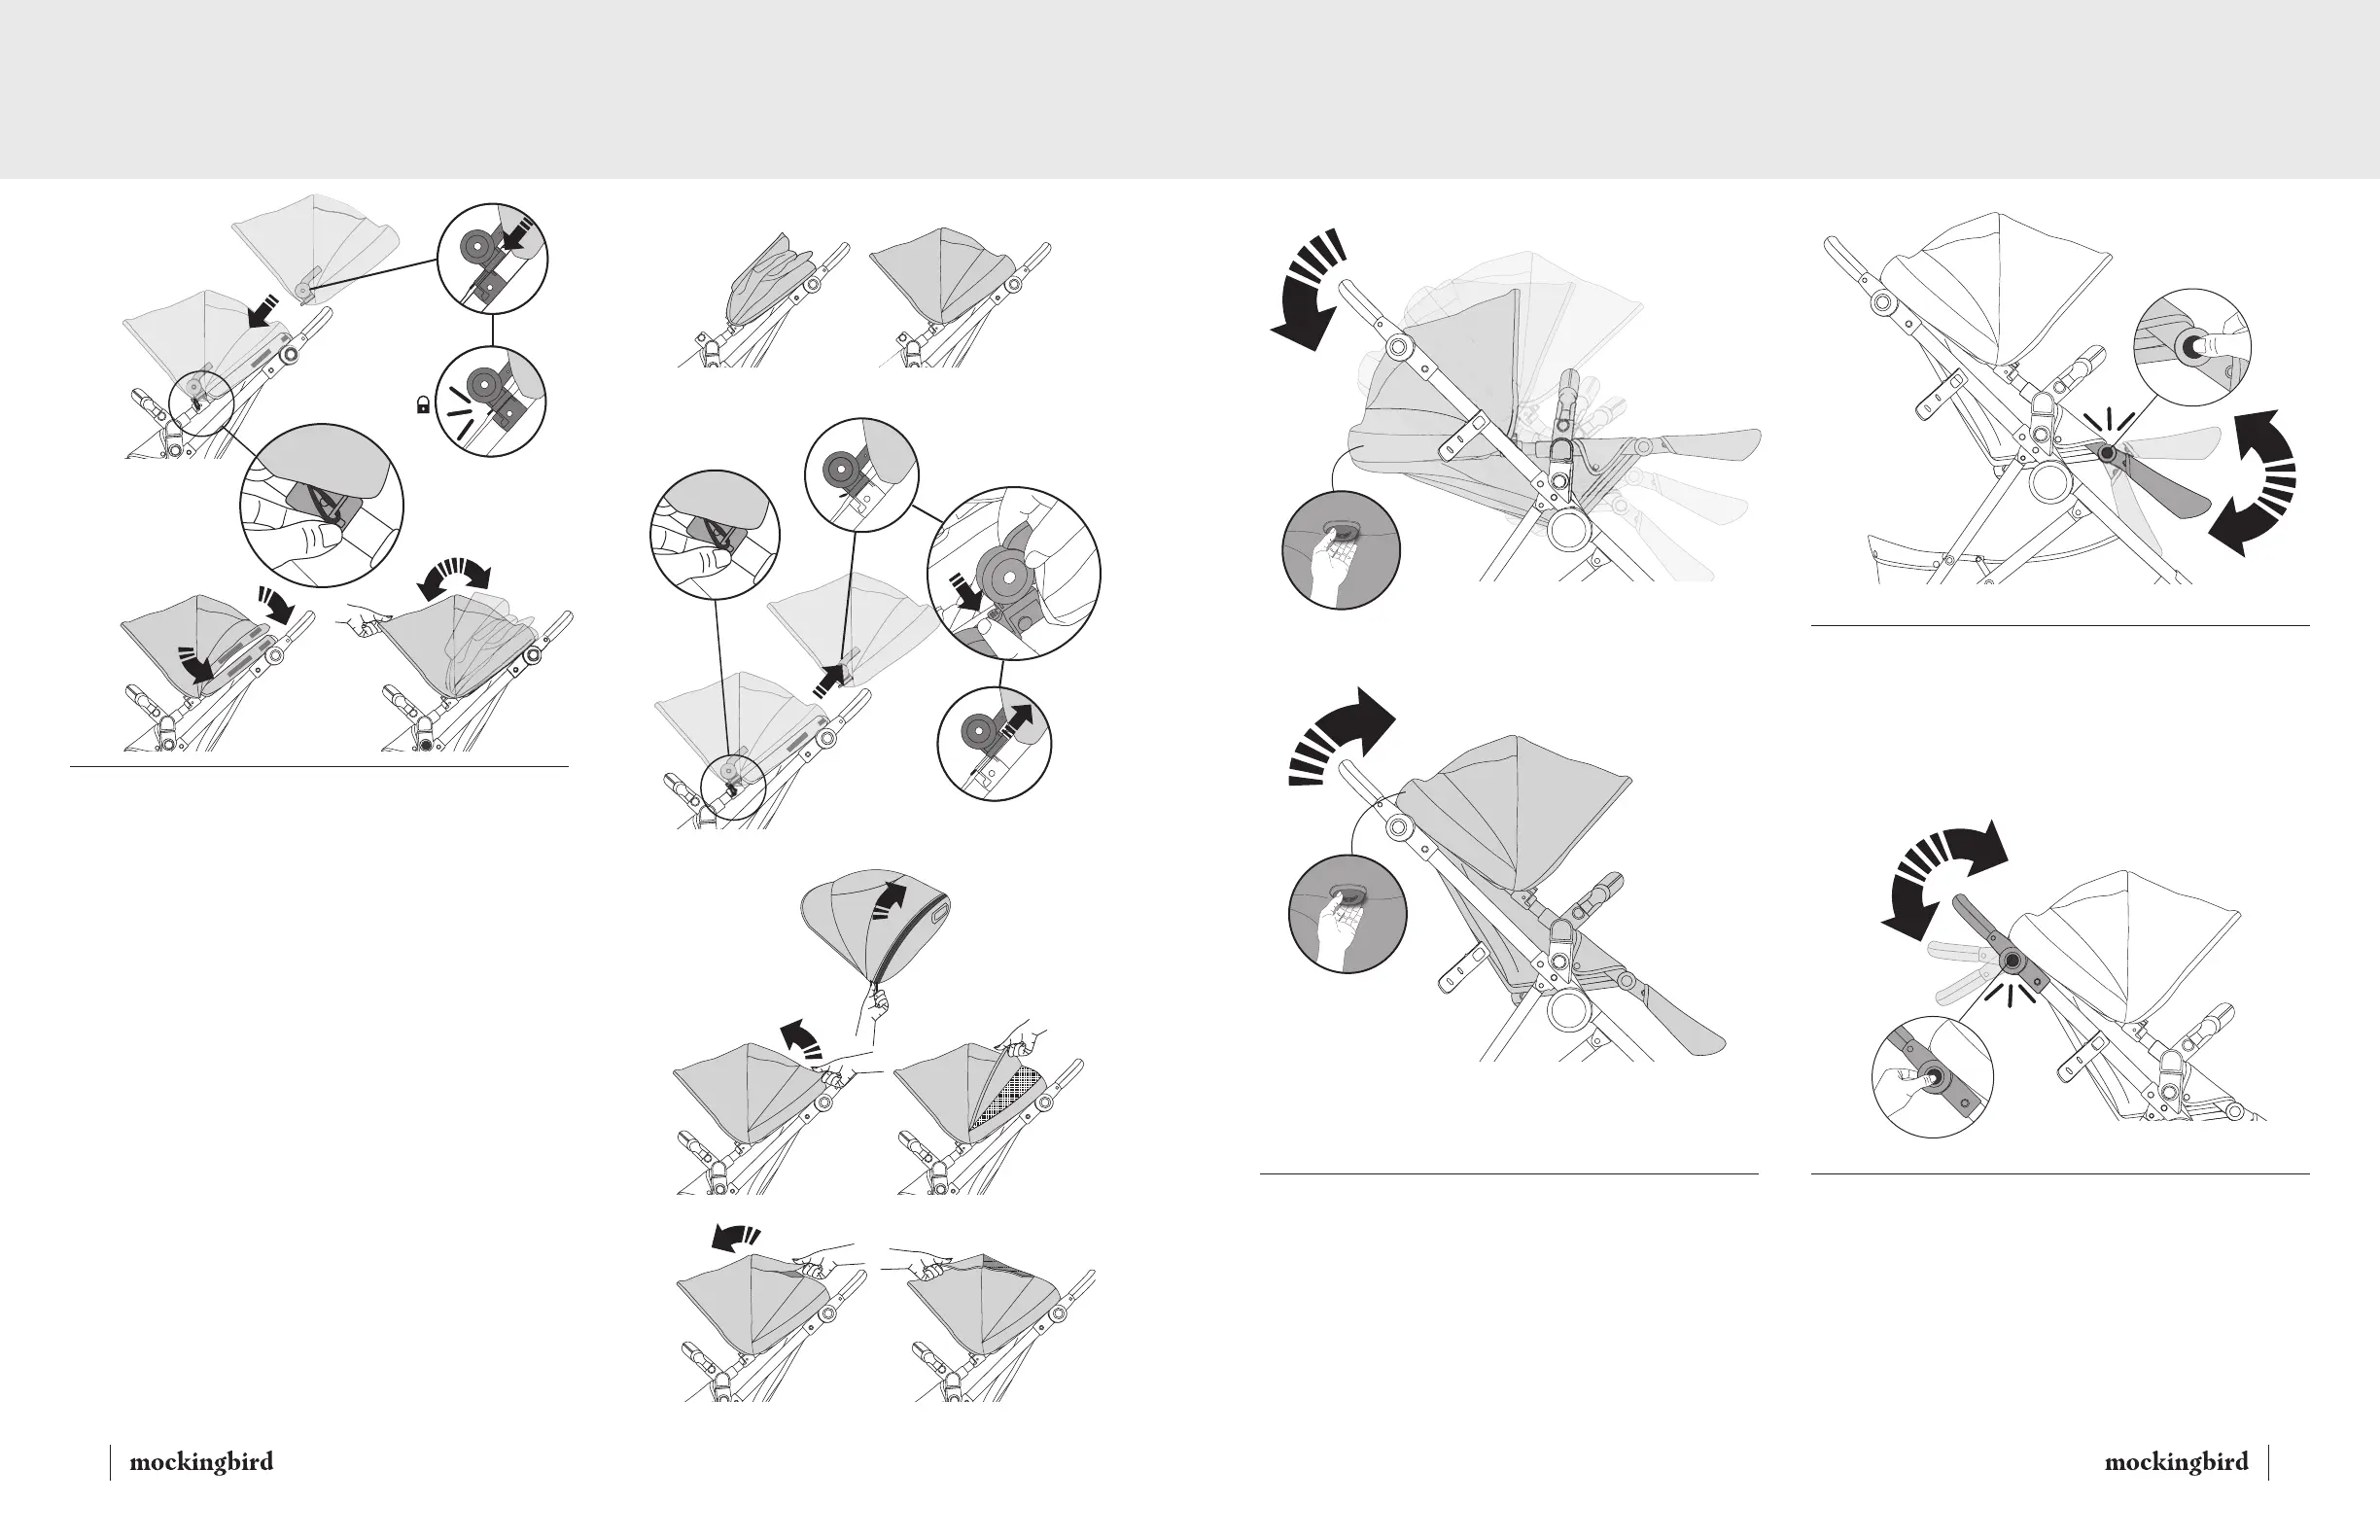
8.
Attaching Canopy
• Place back of canopy onto top of seat support. (Fig. 8)
• Then, slide both sides of the canopy locks into both canopy housings
until it “CLICKS” into a fully locked position. (Fig. 8A)
• Locate on left / right side of canopy elastic loops and secure around
stroller frame hook. (Fig. 8B)
• Match the velcro edges of the canopy with the top seat velcro until
the canopy is fully attached to the top seat. (Fig. 8C)
• Pull the front edge of the canopy forward until fully opened. (Fig. 8D)
To Close Canopy
• Push backward on the front edge of canopy until it is all the way collapsed.
(Fig. 8E)
Removing Canopy
• First locate on left / right side of sunshade elastic loops and remove from
stroller frame hook. Next unvelcro the canopy off the top seat. Then press
canopy release buttons downward and slide canopy locks upward until fully
released. (Fig. 8F)
To Open Canopy Vent Section
• Locate zipper on back of canopy and unzip from left to right completely. (Fig. 8G)
• Pull upward on vent flap until it is in a fully opened position. (Fig. 8H)
To Open Peek A Boo Window
• Pull upward on window flap until it is in a fully opened position. (Fig. 8I)
Fig. 10
Fig. 11
Fig. 9
RECLINE
Fig. 9A
UPRIGHT
1.
Seat Back Recline Positioning
To Recline Seat
• Lift the recline latch located on the top center of the seat upward
and rotate seat downward into any of the three positions. (Fig. 9)
To Return To An Upright Position
• Lift the recline latch upward and rotate seat upward into any of the
three positions. (Fig. 9A)
3.
Adjustable Handle
• Press both left / right buttons located on left/ right side of the stroller
handle inward. While pressing both buttons rotate the handle upward
or downward to its desired position.
• The handle “CLICKS” on both sides once it is in a fully locked position. (Fig. 11)
2.
Foot Rest Adjustment
• Press both left / right recline buttons located on left/right side of foot rest.
While pressing both recline buttons, rotate foot rest upward or downward
to its desired position.
• The footrest “CLICKS” on both sides once it is in a fully locked position.
(Fig. 10)
CLICK
CLICK
Fig. 8A
Fig. 8
Fig. 8C
Fig. 8D
Fig. 8B
Fully Locked
Position
CLICK
Fig. 8F
Fig. 8E
Fig. 8G
Fig. 8H
Fig. 8I

 Loading...