14 15
UI Combinations
Quick Recalls
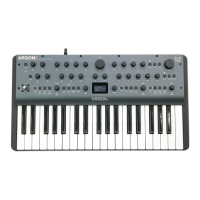
Argon8 has 8 Quick Recall slots for quickly loading presets. Quick Recalls are controlled using
the following button combos:
• Hold ‘Patch’ + hold one of the eight buttons on bottom left of the panel to assign the
currently loaded patch to a QR slot
• Hold ‘Patch’ + press one of the eight buttons on bottom left of the panel to load the
patch in the QR slot
LFO
• Turn the ‘Rate’ encoders into the negative range to access synced rates
Oscillators
• Hold the ‘Patch’ button and turn the ‘Wave1’ or ’Wave2’ encoder to control the WavMod
parameters
Filter
• Hold the ‘Patch’ button and turn the ‘Cutoff’ encoder to control the Filter Type parameter
Envelopes
• Hold any of the EG buttons for one second and then turn the ADSR encoders to adjust all
envelopes simultaneously
• Press the MEG button when MEG is already selected to latch MEG assign
Sequencer
• Hold the ‘Mute’ button to clear the sequencer notes
• Hold the Anim1 / Anim2 / Anim3 / Anim4 buttons to clear an animation lane
• When the screen is displaying the ‘Linked Sequence’ parameter, hold the ‘Edit’ switch to
set the value to be the currently loaded sequence.
Arp
• Hold the ‘Arp’ button and press keys on the internal or an external keyboard to add
pattern notes or press the ‘Rest’ button to add a rest to the pattern
• Hold the ‘Patch’ button and turn the ‘Division’ encoder to control Arp Gate
UI Combinations
Keyboard/Voice
• Press ‘Unison’ repeatedly to cycle through the different unison modes; press ‘Stack’
repeatedly to cycle through the different stack modes
• Press ‘Chord’ whilst holding a chord on the internal or an external keyboard to set the
chord mode chord.
• Hold ‘Transpose’ and press a key on the internal keyboard to transpose all notes, where
the central C key is the root note. Press ’Transpose’ with no keyboard interaction to reset
the transpose value back to 0.
Modulation
• To assign a Mod Slot either hold (momentary) or latch the desired Mod source button -
then set a depth by turning desired modulation destination parameter encoder
• When latched in a Mod Source assign mode pressing the flashing Mod Source button
again will exit assign mode
• Mod source button + ‘Depth’ encoder - set global depth for that mod source
• Press ModSlot repeatedly to cycle through and view all mod slot settings on the screen
• When the screen is displaying a mod slot ‘Depth’ parameter (most easily accessed via
assigning modulation using the panel or via the ModSlot button), hold the ‘Edit’ switch to
clear the mod slot assignment.
• To assign a mod source to an osc’s global frequency destination, use either of the fine
tune controls. ‘Tune1’ will assign to Osc1 tune, ‘Tune2’ will assign to Osc2 tune.
FX
• Press FX1 / FX2 / FX3 button repeatedly to change the FX type of the slot
• Hold FX1 / FX2 / FX3 button to reset the FX type of the slot to ‘None’
• Turn the ‘B’ encoder into the negative range for the slot with a Delay FX assigned to
access synced delay times
• Press FX1 + FX2 + FX3 to jump to the ‘FX Preset Load’ parameter
Global Settings
• When the screen is displaying the ‘Reset’ option, hold the ‘Edit’ switch to trigger the
‘Reset’ function.


 To Next Page