This document is a user manual for the MODENA Slim Hood, Series RX. It provides comprehensive information on the installation, operation, maintenance, and specifications of the appliance.
Function Description
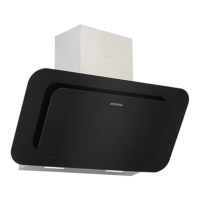
The MODENA Slim Hood is an kitchen appliance designed to extract smoke and cooking odors, ensuring the kitchen remains free from oil particles and bad odors. It operates using two main methods:
- Ducting / Exhaust System: In this mode, the hood sucks smoke and cooking odors and discharges them outside through a vent. This system requires a heat/fire-resistant ducting system and the carbon filter must be removed.
- Recirculating System: In this mode, the hood filters smoke and cooking odors through an aluminum filter and a carbon filter, then recirculates the filtered air back into the room. This system is used when external ducting is not possible. Both carbon and aluminum filters must be used, and the air discharge holes in the front cabinet should not be closed.
Important Technical Specifications
The manual provides specifications for two models: RX 9632 and RX 7632. Both models share the following characteristics:
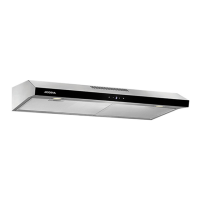
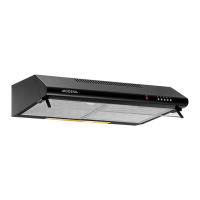
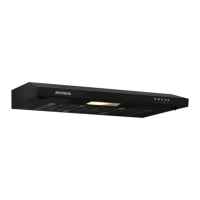
- Type: Slim hood
- Material of cabinet: Stainless
- Color of cabinet: Stainless
- Front color: Black
- Amount of Motor: 2
- Light: 2 LED
- Control: Touch button
- Variable speed level: 3
- Kind of filter: Cassette Aluminum Filter + Carbon filter
- Motor power: 2 x 80 W
- Lamp power: 2 x 1.5 W
- Product dimension (L x D x H): 895 x 480 x 135 mm
The appliance is designed for a 220 Volt electricity input, single phase with 50 Hz frequency. It uses a double-insulated power cord (2 parallel cords) and should not be connected to a grounding wire.
Usage Features
The slim hood is controlled via a touch button interface. The control panel includes:
- ON/OFF button: To turn the appliance on or off.
- Speed decrease button: To reduce the motor speed.
- Display: Shows the current motor speed or timer countdown.
- Speed increase button: To increase the motor speed.
- Lamp button: To control the lighting.
The motor speed should be adjusted based on the intensity of smoke/steam generated during cooking.
A timer function is available:
- To activate, press and hold the lamp button for 3 seconds.
- The digital display will flash and begin a 5-minute countdown.
- After 5 minutes, the motor and lamp will automatically turn off, accompanied by a 1-second buzzer sound.
Important usage notes:
- Avoid direct contact between the vent hood and open flames from the stove.
- For optimal filtering results, turn off the vent hood 20-30 minutes after cooking is finished.
Maintenance Features
The MODENA Slim Hood is designed for long-term use with minimal complicated maintenance. Regular cleaning is recommended to maintain its quality.
Cleaning the cabinet:
- The surface of the exhaust hood cabinet should be cleaned after each cooking session.
- Use a cloth/sponge with soap water and then dry it to remove sticky oil particles.
Cleaning the filter:
Smoke, steam, and oil particles are absorbed by the filter, requiring regular cleaning.
Installation
The exhaust hood should be installed 65-75 cm vertically above the stove surface. The wall where the hood is installed must be strong enough to support its weight.
Preparations before installation:
- Remove the hood from its packaging and place it on an even surface.
- Open and pull out the aluminum filter.
- Remove the spigot/flange (pipe connector) and hole cover from the plastic bag.
- Turn the air directing knob to the appropriate position:
- Exterior symbol ◊ for ducting/exhaust system.
- Interior symbol ◊ for re-circulating system.
- Reassemble the aluminum filter.
- Install the spigot/flange on one of the air holes (D or E) for ducting/exhaust systems, covering the unused hole with a hole cover. For re-circulating systems, cover both air holes D and E with the plastic hole cover.
Installation on concrete (brick) wall:
- Draw a centerline on the wall.
- Use a template or the hood itself to mark drilling spots.
- Drill 6 mm diameter holes and insert fishers.
- ATTENTION: Before drilling, ensure no cables, water pipes, or installations are inside the wall.
- Install screws in the upper holes, leaving 1 cm between the screw head and the wall.
- Hang the exhaust hood on the screws.
- Tighten the upper screws once the hood is correctly positioned.
- Install and tighten screws in the bottom holes for reinforcement.
- Reassemble the aluminum filter.
- Connect the exhaust system with the spigot/flange if operating as a ducting/exhaust system.
Installation on the bottom part of the kitchen set:
- Position the exhaust hood on the bottom of the kitchen set.
- Mark and create a hole for the flexible pipe if operating with a ducting/exhaust system.
- Install the exhaust hood with 4 screws.
- Install and tighten screws in other holes on the upper part for reinforcement.
- Connect the exhaust system with the spigot/flange if operating as a ducting/exhaust system.
Troubleshooting
The manual includes a troubleshooting guide for common issues:
- Exhaust hood malfunctioning:
- Cause: Power cord not connected or electrical outlet has no current.
- Solution: Connect the power cord to a functioning electrical outlet.
- Reduced suction power:
- Cause: Dirty aluminum filter or dirty carbon filter.
- Solution: Clean the aluminum filter, dry it, and replace it. Replace the carbon filter with a new one.
- Motor fan malfunctioning:
- Cause: Broken motor coil.
- Solution: Contact MODENA Service Center.
- Motor stops working after a while:
- Cause: Safety thermal regulator is active or air circulation is not optimal.
- Solution: The vent hood might be installed too close to the stove. Ensure optimal air circulation. Contact MODENA Service Center if the issue persists.