EasyManua.ls Logo

Moen T2191 User Manual

Moen T2191
6 pages
To Next Page IconTo Next Page
Page #1 background imageLoading...
Page #1 background image
Installation Guide
Guía de Instalación
Guide d’installation
Thread seal tape
Cinta para sellar roscas
Ruban pour joints letés
5/32" Hex
Llave hexagonal de 5/32"
Clé hexagonale de 5/32 po
7/64" Hex
Llave hexagonal de 7/64"
Clé hexagonale de 7/64 po
HERRAMIENTAS ÚTILES
Para que el cambio de la llave sea fácil y
seguro, Moen le recomienda usar estas
útiles herramientas.
OUTILS UTILES
Par mesure de sécurité et pour faciliter
l’installation, Moen suggère l’utilisation des
outils suivants.
HELPFUL TOOLS
For safety and ease of faucet replacement,
Moen recommends the use of these
helpful tools.
INS1901E - 8/14
ONE-HANDLE TUB/SHOWER TRIM
TERMINACIÓN DE MONOMANDO
PARA TINA/REGADERA
GARNITURE DE DOUCHE/
BAIGNOIRE À UNE POIGNÉE
Style varies by model.
El estilo varía por el modelo.
Le style varie selon le modèle.
TS2713
TS2712
TS2711
T2693
T2692
T2691
T2193
T2192
T2191
T4503
T4502
T4501
Please Contact Moen First
For Installation Help, Missing or
Replacement Parts
(USA)
1-800-BUY-MOEN (1-800-289-6636)
Mon - Fri 8:00 AM to 7:00 PM, Eastern
Sat. 9:00 AM to 3:00 PM Eastern
WWW.MOEN.COM
(Canada)
1-800-465-6130
Mon - Fri 7:30 AM to 8:00 PM, Eastern
WWW.MOEN.CA
Shower heads: Standard 9.5 L/min (2.5 gpm) max.
and High Eciency 7.6 L/min (2.0 gpm) max. or less
For use with automatic compensating valves rated at 4.2 L/min (1.1
gpm) or less
Por favor, contáctese primero con Moen
Para obtener ayuda de instalación, piezas
faltantes o de recambio
01-800-718-4345
Lunes a viernes de 8:00 a 20:00 hs.
(Costa Este)
Sáb. 8:00 a 18:30 hs. (Costa Este)
WWW.MOEN.COM.MX
Roseta: estándar 9.5 L/min (2.5 gpm) máx. y alta
eciencia 7.6 L/min (2.0 gpm) máx. o menos
Para usarse con válvulas de compensación automática de 4.2 L/min
(1.1 gpm) o menos
Veuillez d’abord contacter Moen
en cas de problèmes avec l’installation, ou pour obtenir toute pièce
manquante ou de rechange
1-800-465-6130
Du lundi au vendredi:
de 7 h 30 à 20 h, HE
WWW.MOEN.CA
Pommes de douche : standards 2,5 gpm (9,5 L/min)
max. ou à haute ecacité 2,0 gpm max. (7,6 L/min)
ou moins
À utiliser avec des soupapes de compensation automatiques dont le
débit nominal est de 4,2 L/min (1,1 gpm) ou moins
Question and Answer IconNeed help?

Do you have a question about the Moen T2191 and is the answer not in the manual?

Moen T2191 Specifications

General IconGeneral
BrandMoen
ModelT2191
CategoryKitchen & Bath Fixtures
LanguageEnglish

Summary

Contact and Support

Moen Customer Support Contact

Provides phone numbers and website for installation help, missing or replacement parts.

Shower Flow Rate Information

Details maximum flow rates for standard and high-efficiency shower heads and compensating valves.

Installation Preparation

Recommended Tools for Installation

Lists essential tools recommended by Moen for safe and easy faucet replacement and installation.

Installation Steps Overview

Parts List and Identification

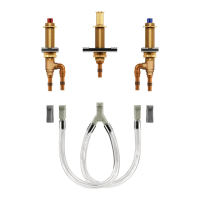
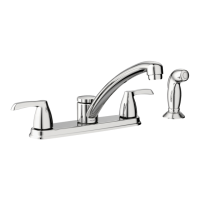
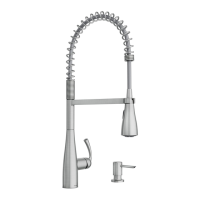
Identifies all included parts with corresponding letters, Spanish, and French names for easy reference.

Old Faucet Removal Safety Tips

Crucial safety advice for turning off water supply and relieving pressure before removing the old faucet.

Core Installation Procedures

Shower Arm and Head Installation

Instructions for wrapping thread seal tape, screwing the shower arm, and attaching the shower head.

Tub Spout and Escutcheon Mounting

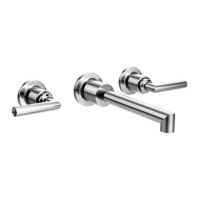
Guidance on installing the tub spout, stop tube, and securing the escutcheon against the wall.

Handle and Temperature Control Setup

Cartridge, Handle Adapter, and Handle Installation

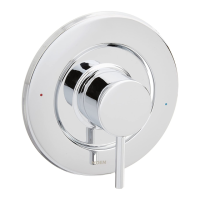
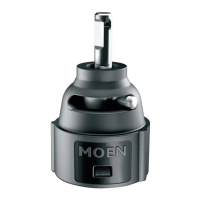
Steps for positioning the cartridge stem, installing the handle adapter, and attaching the main handle.

Hot Water Temperature Testing

Procedure to test hot water temperature, ensuring it does not exceed 120°F (49°C).

Final Installation Adjustments

Adjustable Temperature Limit Stop

Instructions for setting the limit stop to prevent unsafe temperatures and reattaching components.

Securing the Handle

Final step to secure the handle using the set screw and hex wrench, completing the installation.

Product Warranty Information

Moen Limited Lifetime Warranty Overview

Details the warranty coverage for original purchasers, including terms for leaks, drips, parts, and finishes.

Related product manuals