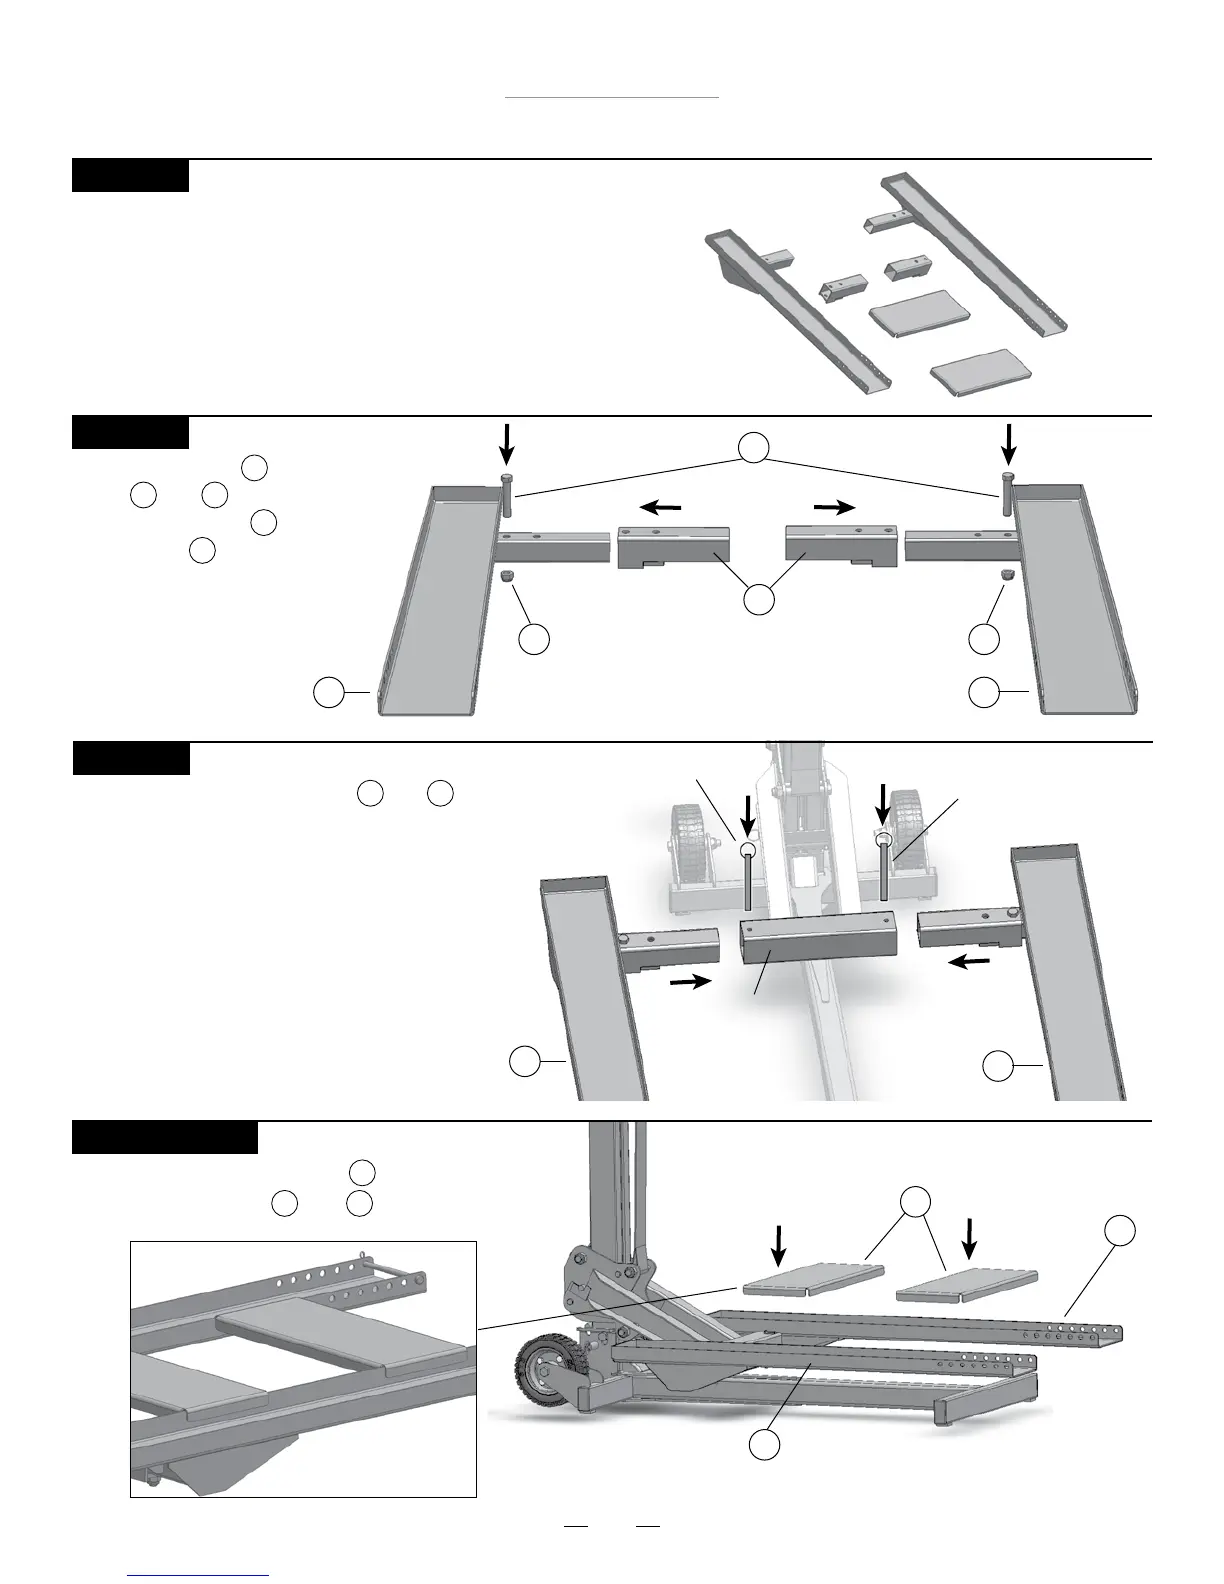
MoJack WorkBench
9
Right Sled
2
Left Sled
1
WorkBench Inserts
3
Assembly Instructions for use with MoJack PRO
STEP 1
Remove MoJack WorkBench from package.
Inventory items to be certain all parts and hardware
are present. If any parts or hardware are missing,
please contact MoJack at 1-877-575-3173 or
email us at parts@themojack.com.
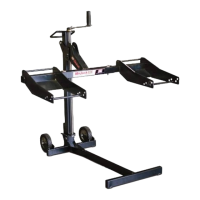
STEP 4 (Optional)
Place the WorkBench Inserts onto the
Left and Right Sleds and as shown.
3
1 2
Push Pin
Left Sled
1
Right Sled
2
Push Pin
STEP 3
Slide the Left and Right Sleds and into
the Lift Arm and secure with Push Pins that are
used to secure the wheel pads of the MoJack
as shown.
1 2
STEP 2
Slide Sled Inserts onto
Sleds and , and secure
using Cap Screws and
Nylock Nuts and tighten
as shown.
4
1 2
7
8
Right Sled
2
Left Sled
1
Sled Insert
4
Cap Screw
7
Nylock Nut
8
Nylock Nut
8
Lift Arm