17
Installation
48" Built-In Refrigerator
Step 3
Install
Side Panels
Step 4
Roll Refrigerator
Into Opening
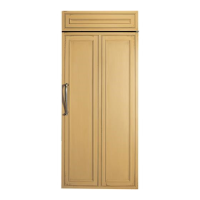
Step 5
Level
Refrigerator
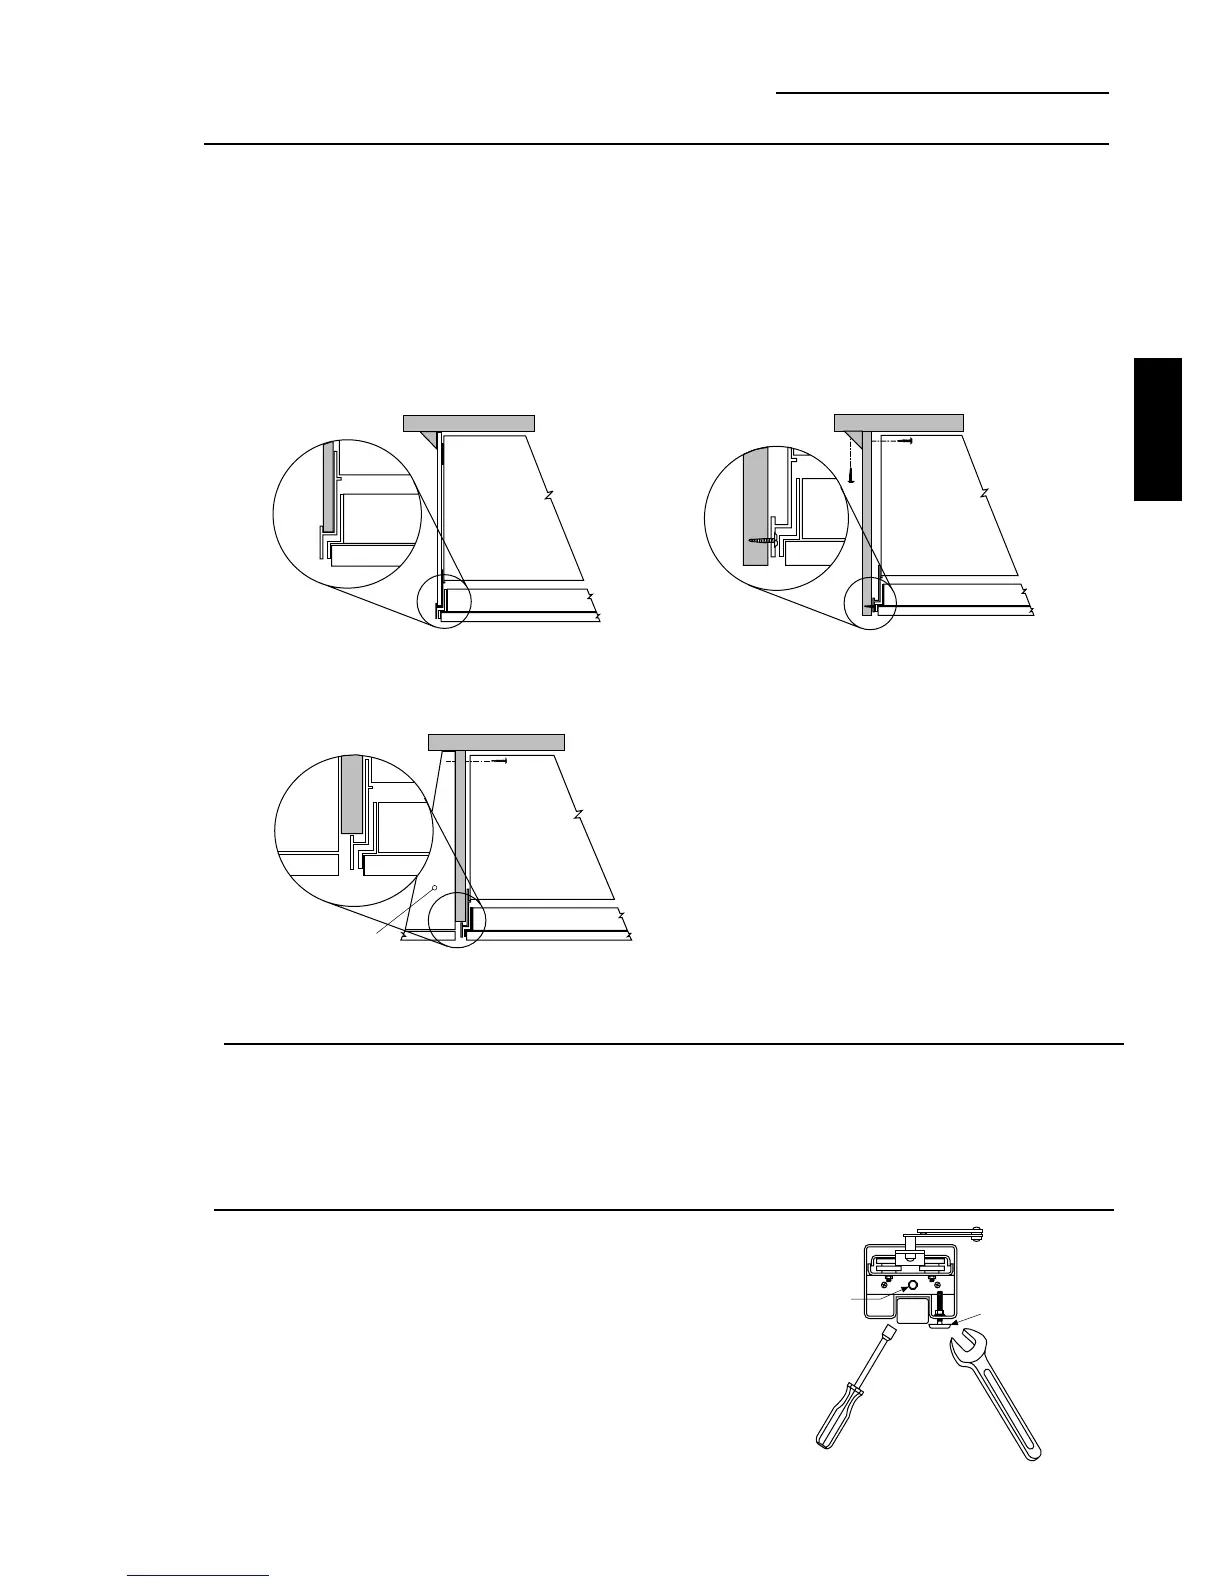
• Side panels are not required when the refrigerator is
installed into an enclosure. Skip this step if you are
installing in an enclosure.
• Side panels are required whenever the sides of the
refrigerator will be exposed and when installed
between frameless cabinets. See pages 3 and 4.
• Side panel installation will be determined by the
design of the side panel you have previously chosen.
• Side panels must be installed plumb.
• If you choose to use 1/4" side panels, they should be
inserted into the case trim as illustrated. Fasten the
panels to the refrigerator with Velcro strips (provided)
before setting refrigerator in place. See illustration A.
• 1/2" to 3/4" side panels are normally set into place and
fastened to adjacent cabinetry or the back wall before
rolling the refrigerator into the opening. See illustra-
tions B and C.
• Gently push refrigerator into opening with hands
against front corners. The cardboard protective pad
should be beneath the refrigerator.
• Roll refrigerator into the opening until it is flush with
adjacent cabinets.
Refrigerator door
Side
Panel
Refrigerator
Cabinet
Refrigerator
Cabinet
Refrigerator door
Illustration B
Illustration C
Illustration A
Cabinet
Refrigerator
Cabinet
Refrigerator door
1/2" to 3/4" Side Panels – Leading Edge Of Side Panel Is Flush
With Cabinet front. Fasten To The Back Wall Using A Cleat.
1/4" Side Panels – Insert End Of Side Panel Into Case Trim. Fasten
WIth Velcro Strips provided.
1/2" to 3/4" Side Panels – Recessed Front Edge of Side Panel.
Fasten To Adjacent Cabinet.
All models have 4-point leveling. The front is supported
by leveling legs, the rear is supported by wheels.
• To level the back of the refrigerator, turn the 7/16" hex
nut located above the front wheels. Turn to raise or
lower the refrigerator.
• For front leveling, use the 1-1/2" open-end wrench
(provided).
• Adjust carefully, the refrigerator should be level and
plumb with cabinetry, and should align with toekick
height.
Hex Nut Adjusts
Rear Wheels
Leveling Leg
PRODUCT
INSTALLATION