30
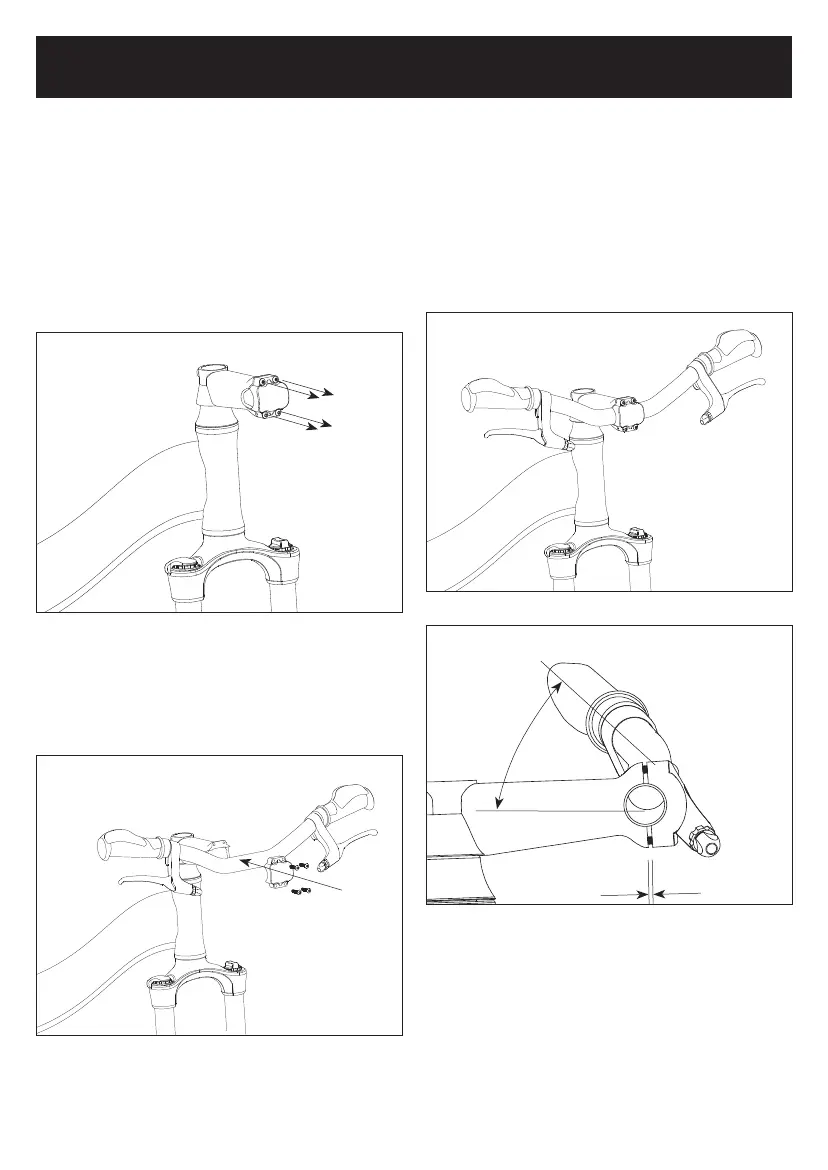
3. Tighten with the provided hex wrench
(Fig. 17) to proper torque (page 49).
Make sure that the gap between
the stem is roughly the same on
the top and bottom (Fig. 18, a), and
the handlebars are at a comfortable
riding angle (Fig. 18, b).
To complete the assembly of your
Montague bicycle, continue with the
instructions provided in the next sections,
Installing the Front Wheel, Unfolding the
Pedals.
Installing the Handlebars
For some models, the handlebars are
shipped o the bike. If so:
1. Using the provided hex wrench,
remove the two screws (or four,
depending on model) holding the
stem clamp in place (Fig. 15).
2. Place and center handlebars within
the stem (some have centerline
marks), and replace screws (Fig. 16).
ASSEMBLING YOUR MONTAGUE BICYCLE CONTINUED
Fig. 17: Tighten screws.
Fig. 16: Replace and center handlebars.
Fig. 15: Remove the stem clamp.
Fig. 18: Set at comfortable angle.
A
B
cables hidden
for clarity