56
Wheel installation
Your Montague bicycle could use two
dierent types of wheel attachment
devices. Carefully read the instructions
for the devices on your bicycle.
• Traditional quick-release
• Threaded axle and nut
To install a wheel with a traditional
quick-release
1. Move the quick release lever to the
OPEN position (Fig. 54) and set the
wheel so it fully engages the frame
dropouts.
2. With the lever in the MID position
(Fig. 54), tighten the adjusting nut
(Fig. 53) until it is slightly tight.
DO NOT change or swap wheels be-
tween dierent bicycles. Your wheels
may not engage the other bicycle’s
fork correctly causing an accident.
WARNING
PROPER MAINTENANCE AND ADJUSTMENT CONTINUED
3. Move the quick release into the
closed position (Fig. 54) with the
palm of your hand.
4. A properly closed quick release lever
should leave a mark on the palm of
your hand from closing.
5. If you can lock the lever with little
or no resistance, the clamp-force is
not sucient. Go back to step 2 and
tighten the adjustment nut 1/4 turn
and return to step 3.
6. Examine for correct quick release
adjustment. With the quick release
closed, lift the bicycle and hit the
top of the tire with a solid blow (Fig.
9 page 28). The wheel should not
come o, be loose, or move from
side to side.
To remove a wheel with a traditional
quick-release:
1. Open quick release lever (Fig. 54).
2. Decrease the tightness of the
adjustment nut; turn it approximately
three full turns.
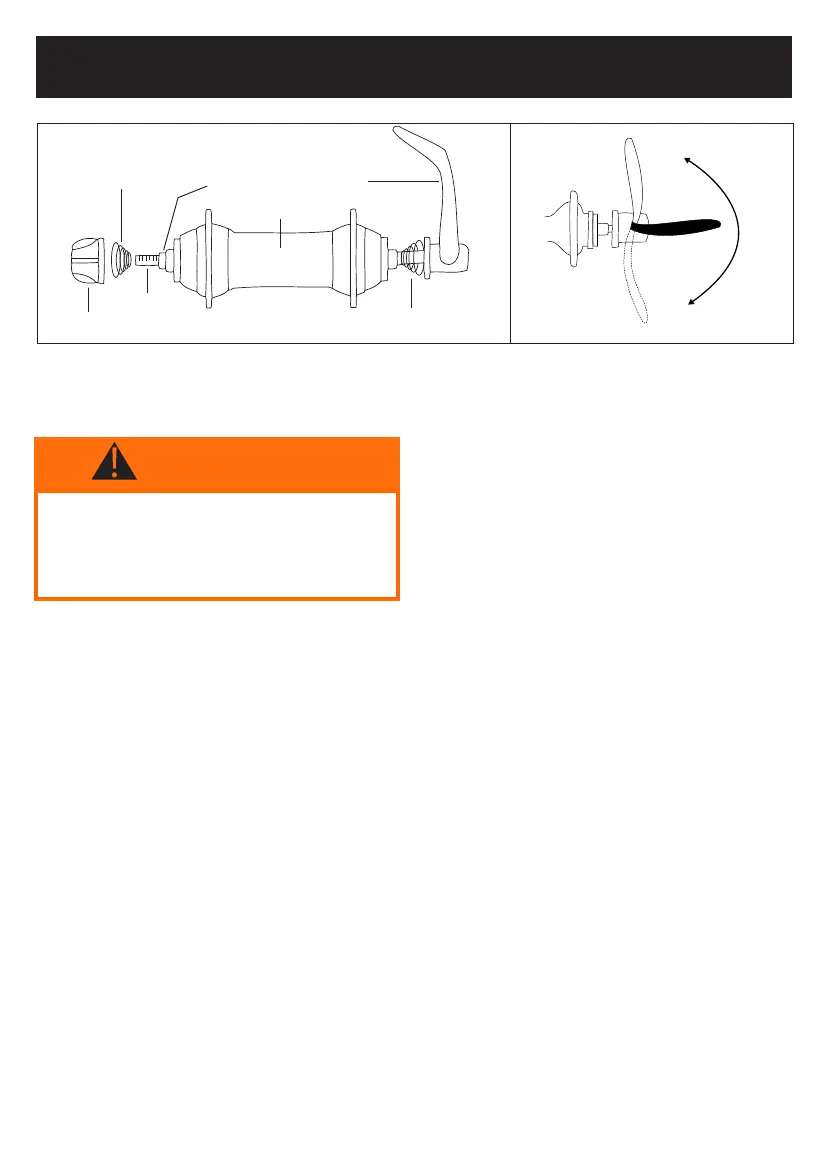
Hub
Quick release
lever
Spring
Spring
Hub axle
Quick release
skewer
Adjustment
nut
Open
Mid
Closed
Fig. 53: Traditional quick release; diagram of parts.
Fig. 54: Positions of a quick release.