MOONEY INTERNATIONAL CORPORATION
M20V SERVICE AND MAINTENANCE MANUAL
Date
MAR 2017
Rev Date
Page
21
MID
SCREW
SCREW
GEAR DOOR
MIDDLE GEAR DOOR REMOVAL
FIGURE 32-17
32- 40- 00 - WHEELS AND BRAKES
32- 40- 01 - MAIN WHEELS
The main wheels have standard brand, 6:00 x 6, Type
III, six- ply rated tires with standard tubes. To remove
main wheels:
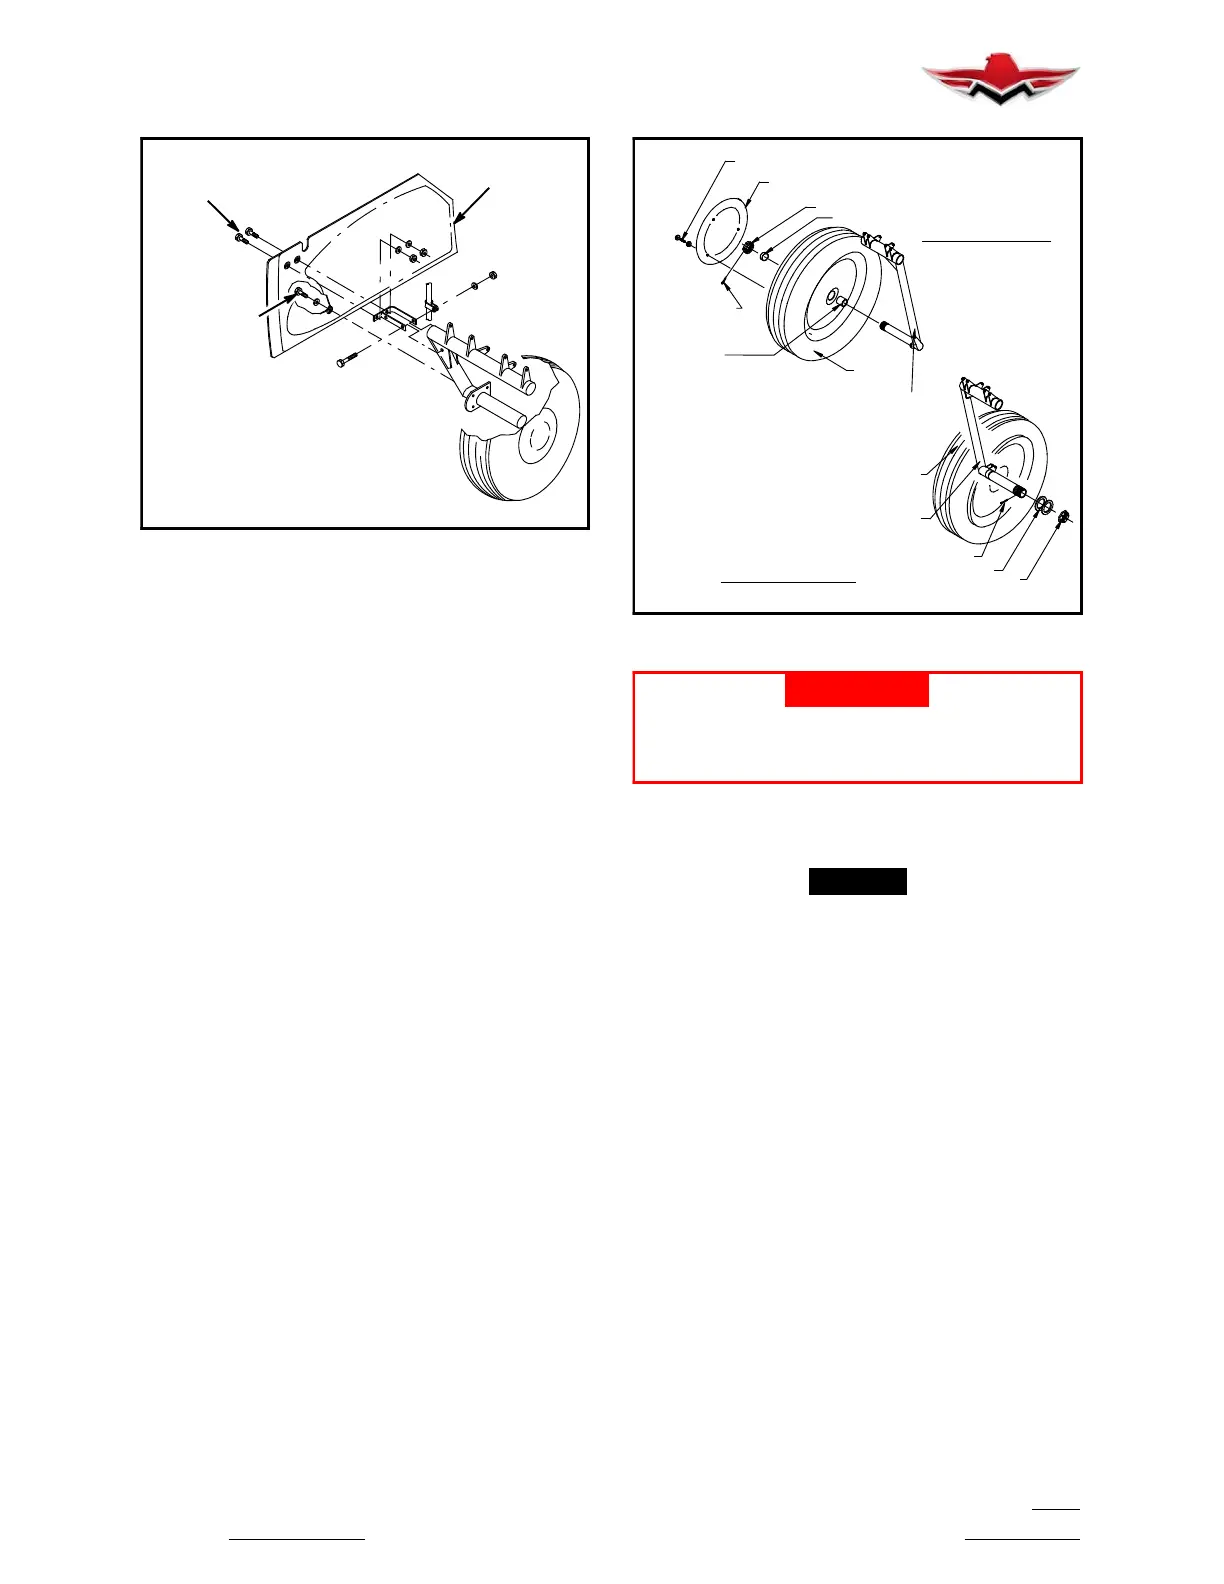
1. Remove MID gear door (See Fig. 32- 17).
2. Detach dust shield (See Fig. 32- 18). Remove
three screws and washers.
3. Remove 2 bolts from single puck brake caliper; (4
bolts on dual puck caliper) (See Fig. 32- 19).
4. Remove wheel by removing cotter key, nut and
spacer from axle. (See Fig. 32- 18)
5. Slide wheel off axle.
32- 40- 02 - MAIN WHEEL DISASSEMBLY/AS-
SEMBLY
1. Remove snap ring, (10) grease seal rings, (8) and
felt seals (9), (See Fig. 32- 20).
2. Remove bearings (7).
3. Completely deflate tire.
MAIN GEAR LEG ASSY.
COTTER PIN
LEG ASSY.
NOSE GEAR
NOSE TIRE
NOSE WHEEL
WASHERS
NUT
MAIN WHEEL
SCREW
SPACER
COTTER PIN
NUT
(TYP. 3 PLCS.)
MAIN
TIRE
SPACER
DUST SHIELD
LANDING GEAR WHEEL REMOVAL
FIGURE 32-18
-WARNING-
Do not loosen wheel half retaining nuts be-
fore tire is completely deflated. Failure to ob-
serve t his warning may result in bodily injury.
4. Remove nuts, washers, and wheel half retaining
bolts, (5); remove brake disc (2), separate halves, (3 &
4) and remove tire and tube.
-NOTE-
Bearing cups are shrink fitted; do not remove
them unless necessary for replacement.
5. Clean all wheel parts thoroughly in cleaning fluid.
Exercise special care in cleaning bearing cones and
felt rings to insure thorough cleaning.
6. Inspect all parts for cracks, corrosion, or evidence
of wear.
7. Inspect bearing cups and replace if cups are dam-
aged or worn. If necessary to remove bearing cups,
heat wheel in boiling water for at least 30 minutes. Then
remove cup by tapping evenly.
To install cup, heat wheel half again as above; cool cup
with dry ice. Position cup and tap lightly to insure proper
seating.
8. Polish small burrs or nicks out of wheel halves with
No. 400 grit sandpaper, clean thoroughly, and refinish
protective coating as required.
32-40-00
 Loading...


