MOONEY INTERNATIONAL CORPORATION
M20V SERVICE AND MAINTENANCE MANUAL
Page
Date
16
MAR 2017
Rev Date
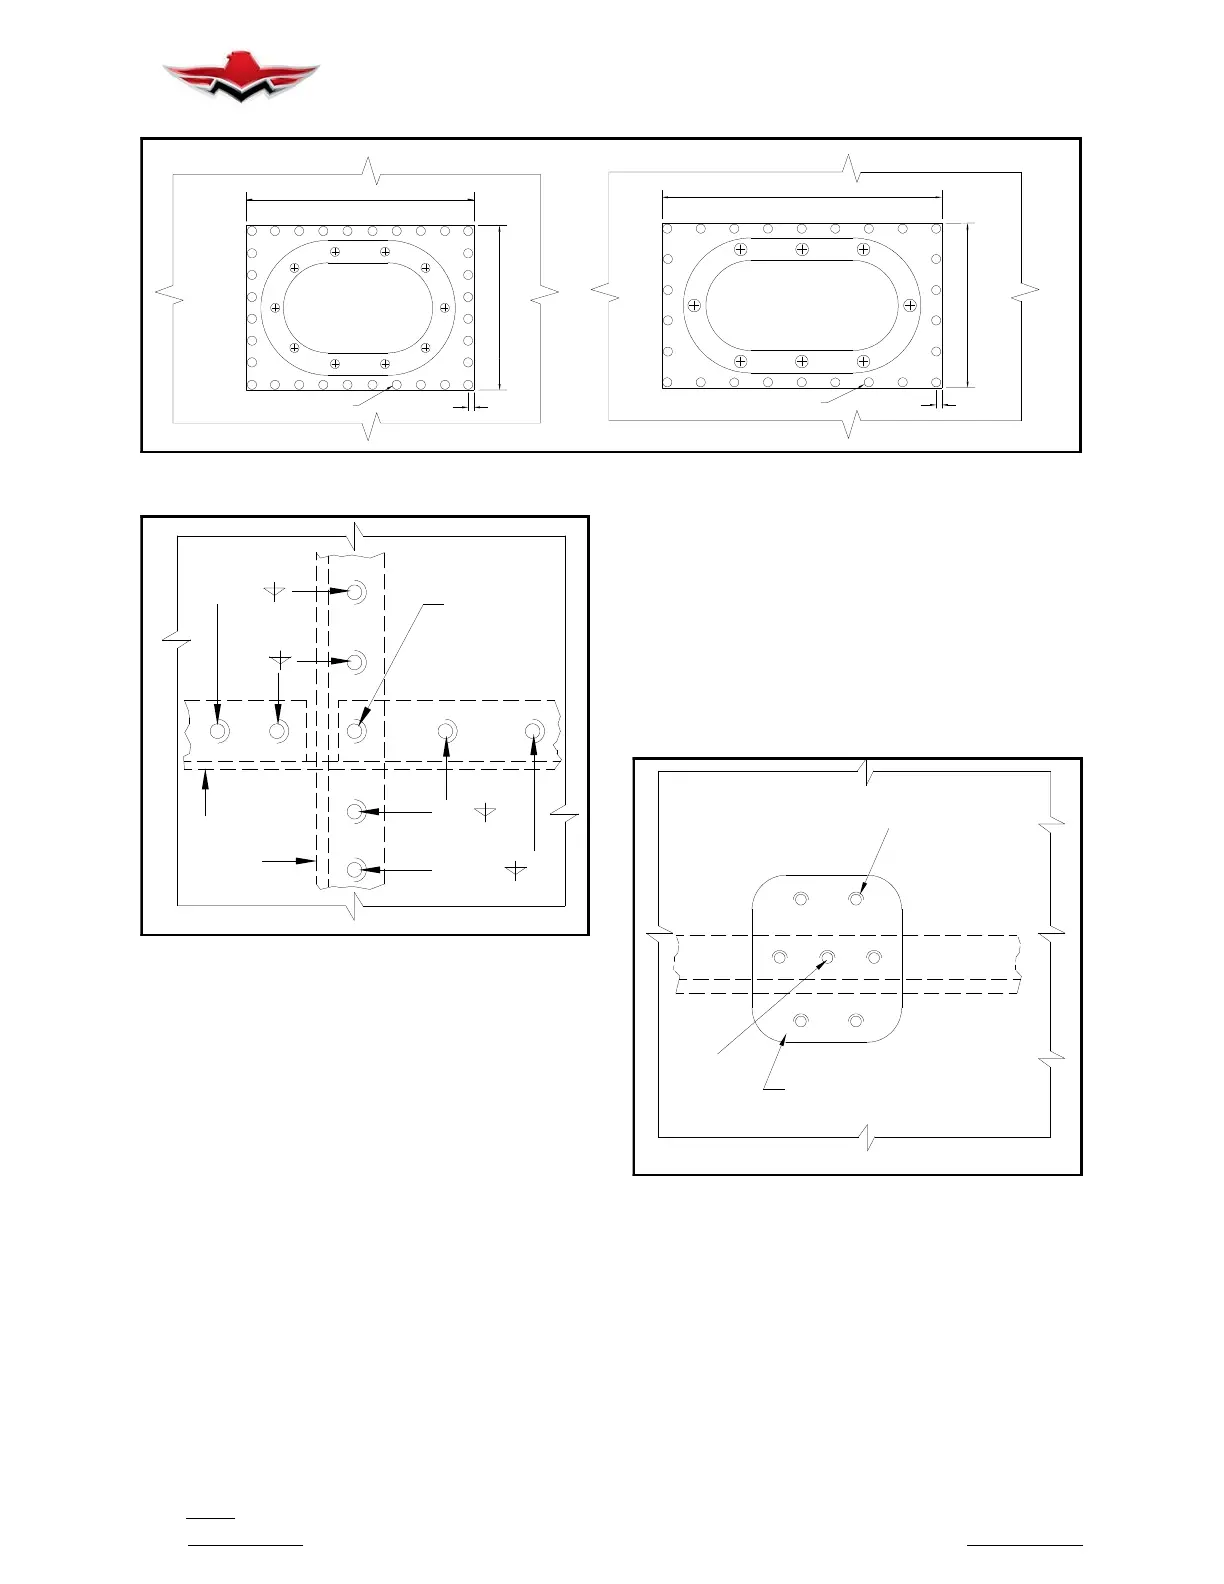
26 EQUALLY SPACED
RIVETS
32 EQUALLY SPACED
.25 TYPICAL
7.5
9.5
.25 TYPICAL
8.8
5.40
RIVETS
ACCESS COVER REPAIR
FIGURE 51- 16
STRINGER
RIB
ADD
EXISTING
BP
BP
EXISTING
ADD
BP
BP
DIMPLE
CRACKED
DIMPLE CRACKS REPAIR
FIGURE 51- 17
2. Repair of Cracks Wholly Within Dimple Radius
(Figure 51- 17). Surface cracks on inside (bearing) face
of dimple that do not extend through material can be re-
paired by sanding out crack. Cracks in dimples which
do not extend beyond dimple radius can be repaired by
(a) stop drilling crack with a No. 60 drill and (b) by add-
ing rivets, same size as those in original pattern, to
each side of cracked dimple. Maintain four- diameter
(4D) spacing and two- diameter (2D) edge distances.
When original rivet pattern has rivets on only one or two
sides of a dimple, only one or two rivets need be added.
3. Repair of Cracks Extending Beyond Dimple Ra-
dius (Figure 51- 18). Cracks that extend through face of
dimple into surrounding skin can be repaired as fol-
lows:
A. Stop drill crack with No. 60 bit.
B. Cut doubler from same material as skin to be re-
paired. Allow for six rivets at four- diameter rivet spac-
ings with two- diameter edge distances in a circular pat-
tern around cracked dimple.
C. Round corners of doubler, and scarf sand-
wiched edges to about .010 inch by .250 inch.
D. Drill holes for six rivets (same size as those in
original rivet pattern) through doubler and area to be re-
paired. Dimple 100 degree dimples in doubler.
E. Prime area to be repaired and install doubler
with wet primer.
.25 IN. WIDE; ROUND CORNERS
APPROX. .010 IN. DEEP AND
AS SKIN)- - SCARF EDGES TO
FASTENER WITH CRACKED DIMPLE)
6 FASTENERS (SAME SIZE AS ORIGINAL
DIMPLE
CRACKED
DOUBLER (SAME GAUGE
DIMPLE CRACKS
FIGURE 51- 18
4. Repair of Circumferentially Cracked Dimples. Cir-
cumferentially cracked dimples (dimples with cracks
that appear as an annular mark around the dimple) can
be repaired by installing a conical washer.
A. Drill through dimple using a drill large enough to
remove damaged area.
B. Install doubler as shown in Figure 51- 18. Wet
prime prior to assembly.
51-13-07
 Loading...


