MOONEY INTERNATIONAL CORPORATION
M20V SERVICE AND MAINTENANCE
Page
Date
10
MAR 2017
Rev Date
56- 22- 00 - CABIN WINDOWS
56- 22- 01 - CABIN WINDOWS - REMOVAL
Remove interior trim from window (1) to be replaced
(Figure 56- 11).
The window will be bonded to outside skin with PR
sealant. There is a carbon fiber bonding rod (.040” or
.050”), used to create a uniform sealant gap and to al-
low acrylic glass to be flush with outer shell.. Consider-
able ef fort may be required to break bond between
acrylic and outer skin. Care should be exercised to
keep window from twisting and possibly cracking.
Remove window and clean all remaining sealant from
composite skin. Careful scraping with a phenolic or
hardwood utility knife, and careful removing excess
sealant as required, do not use solvent cleaners, it is
permissible to use isopropyl alcohol.
56- 22- 02 - CABIN WINDOWS - INSTALLATION
Once all old sealant has been removed. Place window
(1) into position to assure proper fit. Trim if necessary
(Figure 56- 11).
Apply a thick, uniform thickness of CS3204-B2 (B), or
equivalent sealant (reference Mooney Spec. 20, Sec-
tion XII), to both window and skin areas where window
(1) will be located. Install a .040” to .050” carbon fiber
bonding rod. This rod is used to create a uniform
sealant gap and to allow acrylic glass to be flush with
outer shell. Suf ficient sealant should be used so excess
sealant is extruded from all edges of windows, both in-
side and outside, (approximately 5, 3.5 oz. tubes for 4
windows).
Force window (1) into place, sealant will be forced out
and seal window to outside skin. Carefully wipe excess
sealant off acrylic before it sets up. After sealant cures
excess can be cut off with a sharp razor knife (Figure
56- 11).
Check replaced window for leaks. Reinstall interior trim
panels as required. Clean acrylic as noted in section
56- 00- 01.
-CAUTION-
If composite shell laminate has damage, it
must be repaired prior to installing the wind-
shield, refer to Chapter 51 for details.
56- 23- 00 - STORM WINDOW
The storm window (4) is mounted with two aluminum
hinges (5), attaching hardware (6) and held closed by a
latch (7). A gasket (8) is bonded to the storm window for
sealing purposes when closed (Figure 56- 11).
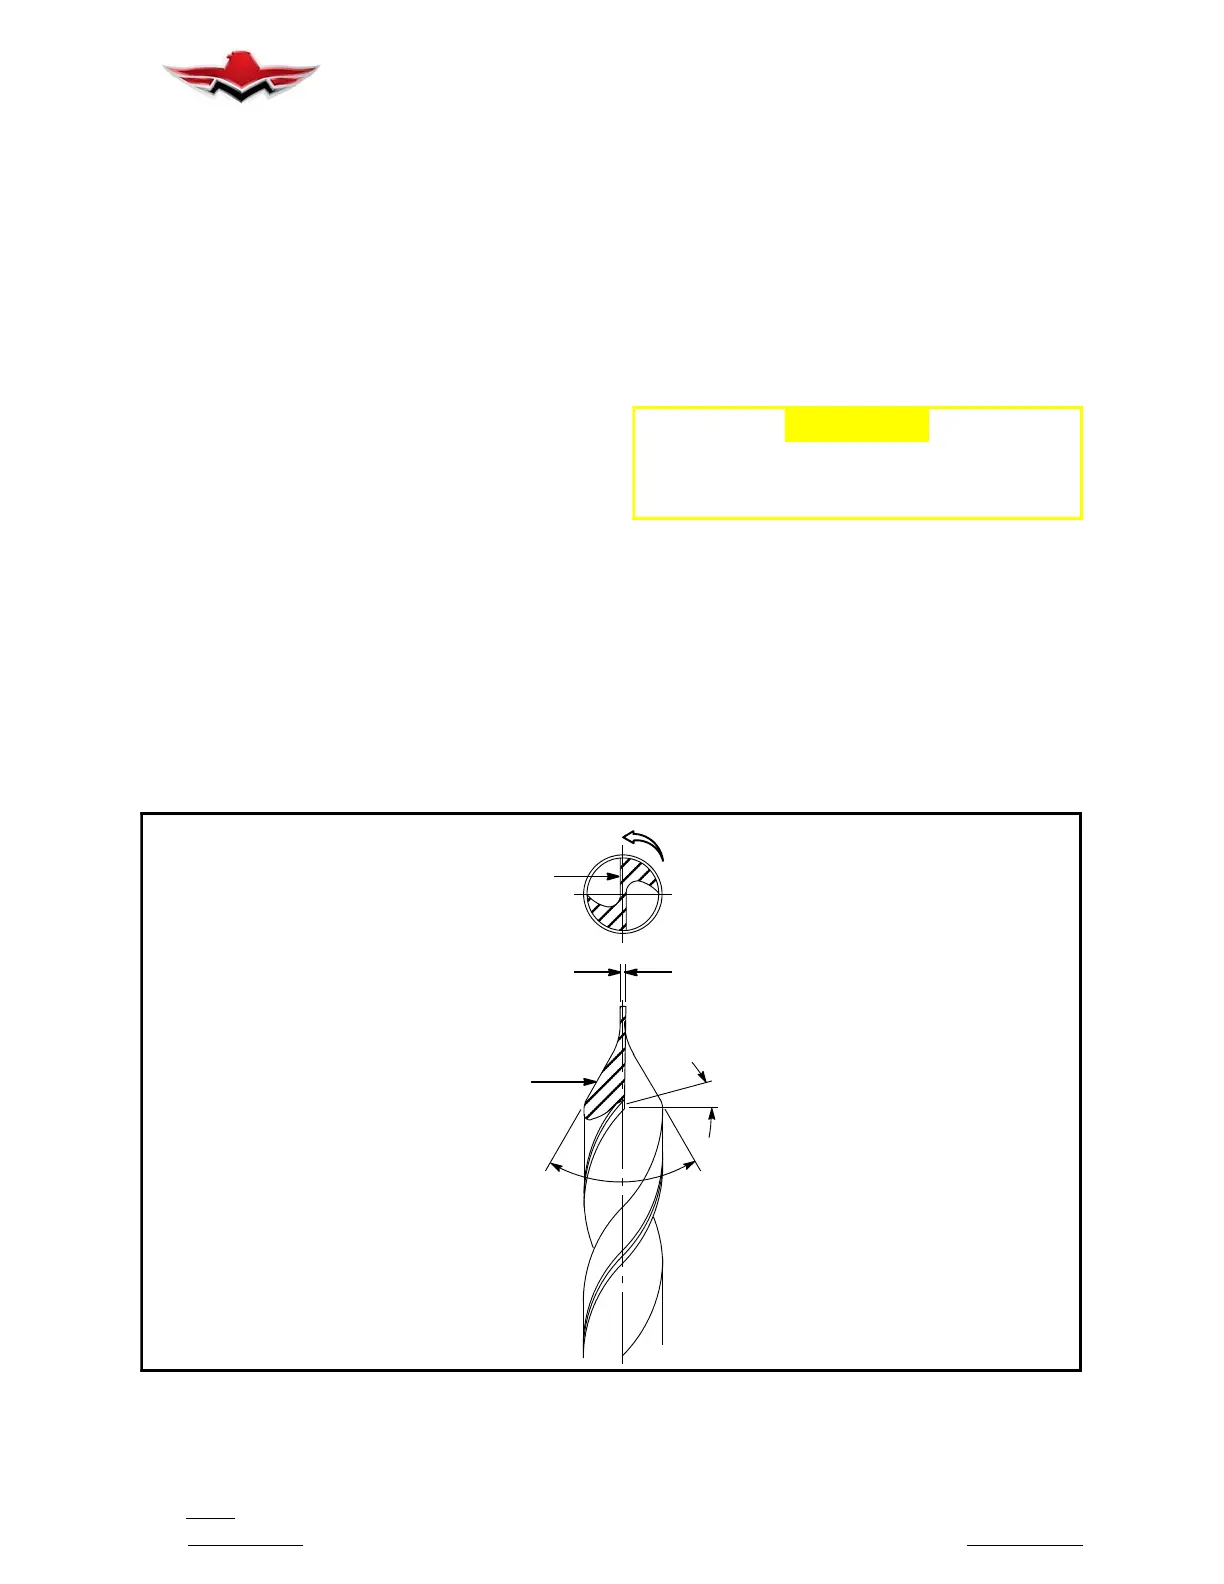
56- 50- 00 - ACRYLIC DRILLING
Drill bits for acrylic should be ground per Figure 56- 12.
A fast turning drill bit with light pressure is desirable. It is
suggested that trial holes be drilled in a scrap piece of
acrylic to determine best combination of drill speed and
pressure to drill a clean hole.
CUTTING DIRECTION
“DUBBED OFF”
CLEARANCE
60
1215
0
RAKE ANGLE
ACRYLIC DRILL BIT
FIGURE 56- 12
56-22-00
 Loading...


