4
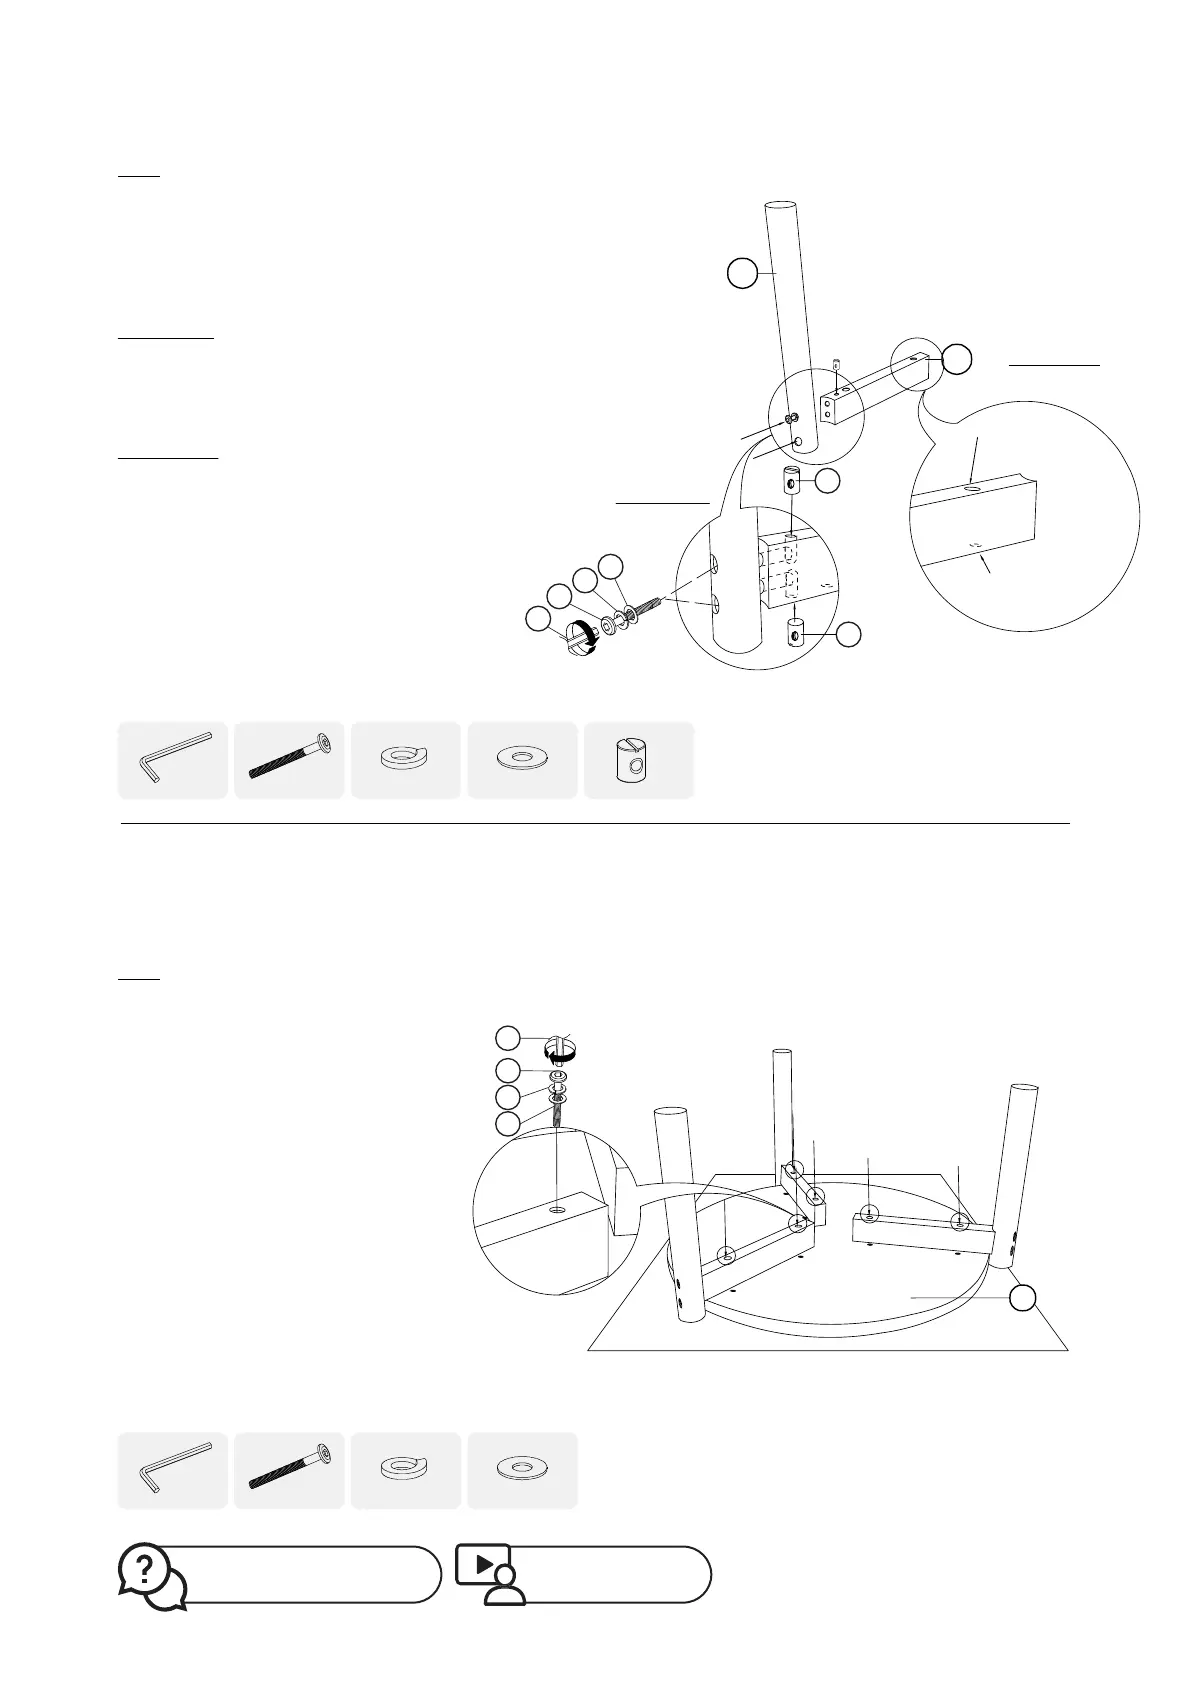
Step 3
Ensure your floor is properly protected.
Take out 3 pieces of Table Leg (5) and 3 pieces of
Support Bar (6).
Attach Table Leg (5) to Support Bar (6).
Illustration 1:
Please ensure that you install the correct side of
Support Bar (6). The side with holes of larger
diameter (14mm) should face the longer end of Table
Leg (5).
Illustration 2:
Plug in Barrel Nut (F) into hole as indicated. Ensure
that the hole is facing the right direction to the bolt.
Slide in Spring Washer (D) and Flat Washer (E) onto
JCBC Screw (B). Insert this screw combination into
the holes as indicated. Tighten with Allen Key (A).
If you have difficulties aligning JCBC Screw (B) and
Barrel Nut (F), try shaking or readjusting the Barrel
Nut (F) position using a screwdriver.
Ensure that you screw into the correct holes
according to the illustration.
A
x1
D
x6
E
x6
B
x6
F
x6
Step 4
Ensure your floor is properly protected.
Use cardboard or styrofoam to prevent
damages.
Take out Table Top (4).
Install Table Top (4) to Support Bar (6).
Slide in Spring Washer (D) and Flat
Washer (E) onto JCBC Screw (C). Insert
this screw combination into the holes
as indicated. Tighten with Allen Key (A).
Please ensure you screw into the
correct holes according to the
illustration.
A
x1
D
x6
E
x6
C
x6
D
E
A
C
4
DYLAN NESTING
COFFEE TABLE SET | 07
Watch demo video at:
https://bit.ly/3BrQgaC
Missing parts? Or feeling stuck?
Contact us at www.mopio.com#chat.
6
5
F
D
E
A
B
F
x 3
Illustration 1
Small hole
8mm
Large Hole
14mm
Illustration 2