Do you have a question about the MOSKO MOTO Nomad and is the answer not in the manual?
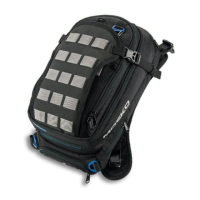
Remove the front harness from the tank bag and orient the loop for the steering column.
Route the harness around the motorcycle's steering column, checking for cable clearance and steering interference.
Connect the tank bag to the front harness and tighten straps for optimal forward positioning.
Select frame mount points for rear straps and secure them using zip ties, avoiding contact with exhaust.
Tighten zip ties for rear straps, trim excess, and install a second zip tie through a different loop.
Adjust the length of the rear straps, clip them to the bike, pull tight, and secure with Velcro.
Cut off excess strap length at Velcro breaks and singe ends to prevent fraying.
Undo the two straps on the back of the map pocket by releasing snaps and Velcro.
Thread map pocket straps through MOLLE webbing on the tank bag and secure the snaps and Velcro.
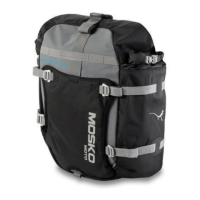
Route the hydration hose through the side slot, elastic top strap, and plastic side clip; unzip bottom pocket.
Open the main compartment, remove the rain cover, and unzip the pocket underneath.
Feed the hydration reservoir into the hydration pocket, using the zipper opening to help pull it up.
Once the reservoir is in place, plug the hose end into its designated receptacle.
Reach into the zipper opening and route the grey Velcro strap through the top of the reservoir.
Secure the Velcro, replace the rain cover, and ensure all zippers and straps are fastened.
| Brand | MOSKO MOTO |
|---|---|
| Model | Nomad |
| Category | Motorcycle Accessories |
| Language | English |