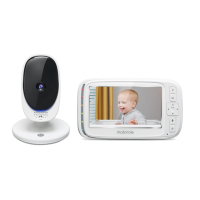
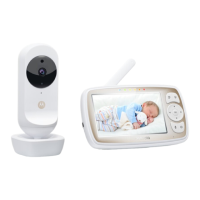
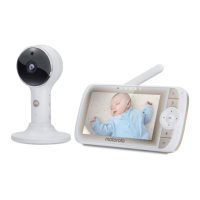
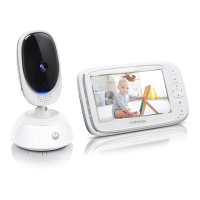
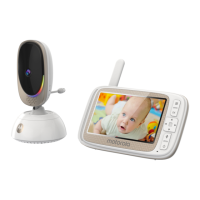
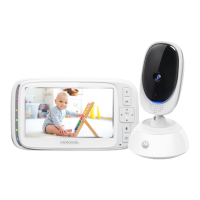
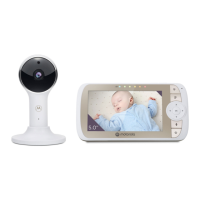
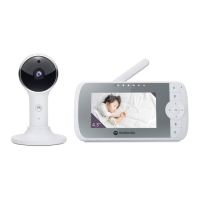
This document describes the Motorola 5" HD Wi-Fi® Video Baby and Home Monitor, including models COMFORT85 CONNECT, COMFORT85-2 CONNECT, COMFORT85-3 CONNECT, COMFORT85-4 CONNECT, CN75, CN75-2, CN75-3, CN75-4, COMFORT85, COMFORT85-2, COMFORT85-3, and COMFORT85-4.
Function Description
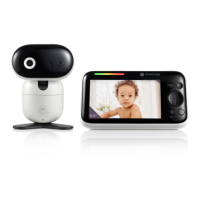
The Motorola Video Baby Monitor allows you to see and hear your baby sleeping in another room or monitor older children in their playroom. It consists of a Parent Unit (with a built-in Li-ion battery) and one or more Baby Units (Cameras). The system establishes a radio link between the Parent Unit and Baby Unit(s) for local monitoring, and also supports Wi-Fi® Internet Viewing via the Hubble for Motorola Monitors App on Android™ or iPhone®/iPad® devices, or through a web portal on a PC/Notebook. The Hubble server authenticates user identity for remote access.
Important Technical Specifications
- Baby Unit:
- Frequency: 2400 MHz - 2483.5 MHz
- Image sensor: Color CMOS 0.3M Pixels
- IR LED: 8 pcs
- Operating Temperature Range: 0 °C ~ +50 °C
- Power Adapter: Ten Pao International Ltd. S005BNU0500100 (Input 100-240V AC, 50/60Hz, 150mA; Output: 5.0V DC, 1000mA) or CSEC CS6F050100FUF (Input 100-240V AC, 50/60Hz, 200mA; Output: 5.0V DC, 1000mA). Only the provided power supply should be used.
- Parent Unit:
- Frequency: 2400 MHz - 2483.5 MHz
- Display: 5" diagonal TFT LCD, 16.7M color
- LCD Brightness control: 8 steps
- Volume control: 8 steps
- Operating Temperature Range: 0 °C ~ +50 °C
- Power Adapter: Ten Pao International Ltd. S005BNU0500100 (Input: 100-240V, 50/60Hz 150mA; Output: 5.0V, 1000mA) or CSEC CS6F050100FUF (Input 100-240V AC, 50/60Hz, 200mA; Output: 5.0V DC, 1000mA). Only the supplied power adapter should be used.
- Battery Pack: LENOVO BL253 (Built-in) Li-ion Battery, 3.8V/2000mAh. Non-rechargeable batteries should not be used. Risk of explosion if battery is replaced by an incorrect type.
- Wi-Fi® Internet Viewing Minimum System Requirements:
- Web Portal: Windows® 7, Mac OS® 10.7, Chrome™ 24, Internet Explorer® 9, Safari® 6, Java™ 7, Firefox® 18.0, Adobe® Flash® Player 15.0.
- Android™ System: Version 4.2 or above.
- iPhone®/iPad® iOS: Version 7.0 or above.
- High Speed (Wi-Fi®) Internet: At least 0.6 Mbps upload bandwidth per camera.
Usage Features
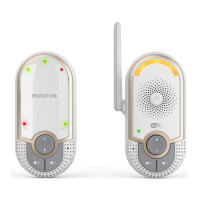
Parent Unit Overview:
- Display (LCD screen): Shows video feed and menu icons.
- Battery status, Power, Sound level, Pairing indicators:
- Blue light: Parent Unit battery charging.
- Green light: Parent Unit switched on.
- Green-Orange-Red-Red LEDs: Indicate sound level detected by Baby Unit.
- Rapid green flash: Parent Unit searching for Baby Unit or in pairing mode.
- Main menu button (=): Enters/exits menu mode.
- OK / (button): Selects menu items, saves settings, enters remote scan mode.
- Control key panel (UP/VOLUME+, DOWN/VOLUME-, LEFT, RIGHT):
- Adjusts speaker volume.
- Scrolls through menus.
- Tilts (UP/DOWN) and pans (LEFT/RIGHT) in remote scan mode.
- Adjusts brightness (LEFT/RIGHT).
- TALK BACK (button): Hold to talk back to the baby unit.
- Power button (ن): Press and hold to switch unit On/Off; press to turn video screen Off/On.
- Power socket: For charging.
- Reset button: For troubleshooting.
- Support Stand: For positioning the Parent Unit.
- Speaker: For audio output.
- Antenna: For signal reception.
Baby Unit (Camera) Overview:
- Camera Lens: Captures video.
- Microphone: Detects sound.
- Power indicator: Blue when on and linked, off when off.
- Light Sensor (Night Vision Mode): Activates infrared LEDs in low light, displaying black and white video on the Parent Unit.
- Pair button: Press and hold to pair with the Parent Unit.
- Power Adapter Socket: For power supply.
- Temperature Sensor: Provides temperature readings.
- Power ON/OFF switch: Slides to turn the Baby Unit on or off.
- Adjust Speaker Volume: 8 levels + off, adjusted with UP/DOWN buttons.
- Set the Screen Brightness: 8 levels, adjusted with LEFT/RIGHT buttons.
- Adjust Settings (Lullabies, Alarm, Video on timer, Zoom function, Temperature format, Add/Delete/View camera): Accessed via the MENU button.
- Set lullaby: Selects one or all 5 lullabies to play, with adjustable volume.
- Set alarm: Sets an alarm for 2, 4, or 6 hours as a reminder.
- Screen off timer: Sets screen off time (5, 15, or 30 mins) while sound remains active.
- Digital Zoom: Zooms in/out (x1/x2) on the image.
- Set temperature format: Switches between Centigrade and Fahrenheit.
- Add camera: Connects up to four Baby Units. Requires pressing the PAIR button on the camera.
- Delete camera: Removes a camera connection.
- View camera: Selects a specific camera feed or cycles through paired cameras (scan mode).
- Two-way communication: Hold the TALK BACK button to speak through the Baby Unit.
- Remote Pan Scan: Pans and tilts the video image using the control key panel in scan mode.
Wi-Fi® Internet Viewing (Hubble App):
- Setup: Connect power, turn on Baby Unit, ensure Wi-Fi® router range. Status LED indicates pairing, connection, or ready for connection. Setup is via smartphone/tablet only.
- User Account and Camera Setup:
- Download "Hubble for Motorola Monitors" App from Google Play™ Store or App Store.
- Create an account, agree to Terms of Service.
- Add camera by tapping the "+" icon in the app, following on-screen instructions (plug in, switch on, wait for warm-up, tap Continue when LED blinks).
- Enable Pairing Mode by pressing and holding the PAIR button on the Camera Unit for 3 seconds.
- Select Wi-Fi® Network, enter password, and tap Connect.
- Name the camera's location.
- View live video.
- Camera Functions on Hubble App:
- Menu: Access camera list, event log (motion/sound triggered video records), user profile, subscription plan, notifications, remote connection settings, and app information.
- Photo/Video: Take photos or record videos. Videos are stored internally on the smart device and can be played via the Hubble App.
- Lullaby: Access Melody menu to play pre-set melodies on the Camera Unit.
- Temperature Measure: Displays temperature from the Camera Unit. Readings turn RED if outside set high/low limits.
- Two-way communication: Activate to speak through the Camera Unit.
- Speaker: Toggle speaker on/off.
- Zoom: Slide scroll bar or use pinch-in/out gestures (if device supports multi-touch).
- Camera Setting: Change camera name, cloud subscription, image, timezone, model, firmware, delete events. Set sound/motion detection sensitivity, high/low temperature alerts, ceiling mount, brightness, and volume.
- Add Camera: Initiates camera addition procedure.
- Delete All Events: Deletes all recorded events.
- Select Events: Check box to select recorded events.
- Edit Events: Select and delete specific events.
- Delete Events: Delete selected events.
- Working with PC/Notebook: Access via https://app.hubbleconnected.com/#login. View camera list, live video streaming, and change settings.
- Procedure for Resetting the Camera: For moving the camera to a new router or setup issues. Slide ON/OFF to OFF, press and hold PAIR, slide ON/OFF to ON, release PAIR after beep. LED will flash red slowly when reset. Then re-add the camera via the app.
Maintenance Features
Safety Instructions:
- Strangulation Hazard: Keep cords out of reach of children (more than 3ft away). Do not use extension cords; only use provided AC Adapters.
- Baby Unit Set Up & Use:
- Determine a location for the Baby Unit that provides the best view of the baby.
- Place on a flat surface or mount to a wall using keyhole slots.
- NEVER place the Baby Unit or cords within the crib.
- General Warnings:
- Compliant with electromagnetic field standards.
- Adult assembly required; keep small parts away from children.
- Not a toy; not a substitute for adult supervision.
- Keep User's Guide for future reference.
- Do not place Baby Unit or cords within reach of the baby (more than 1 meter away).
- Keep cords out of reach of children.
- Do not cover with towel or blanket.
- Test monitor functions before actual use.
- Do not use in damp areas or close to water.
- Only use provided chargers and power adapters.
- Only insert a battery pack of the same type.
- Do not touch plug contacts with sharp or metal objects.
- Connect power adapters to easily accessible electrical outlets.
- Parent Unit Battery: Built-in, non-user-accessible Li-ion battery. Contact helpline for replacement. Risk of explosion if replaced by unapproved battery. Dispose of used batteries according to instructions.
Charging:
- Parent Unit: Charge for 16 hours initially. Battery life is 4 hours on a single charge. For longer use, keep plugged in. A low battery will charge enough for short use in about 30 minutes. Turn off Parent Unit for fastest charging.
- Baby Unit: Plug into a suitable electrical outlet.
Cleaning:
- Clean with a slightly damp or anti-static cloth.
- Do not use thinners, solvents, or chemicals.
- Keep away from hot, humid areas, strong sunlight, and moisture.
- Do not attempt repairs yourself; contact Customer Service.
- Always switch off and disconnect the power adapter before cleaning.
Troubleshooting:
- Power Indicator on Parent Unit does not come on: Check power, charge battery, connect to power supply.
- Parent Unit beeps repeatedly: Units may be out of range (reduce distance, but not closer than 3 feet). Baby Unit may be off. Parent Unit battery may be low.
- Battery icon on Parent Unit flashes: Battery pack is low; connect to power adapter.
- Parent Unit switches itself off: May be in standby mode; check video on timer setting.
- Cannot hear sound or baby crying: Volume too low; units out of range.
- Parent Unit image is not in color: Baby Unit in dark room, activating night vision (black and white).
- No transmission from Baby Unit: Check both units are on, re-pair Baby Unit, ensure free camera location.
- Parent Unit is in standby: Press ON/OFF button briefly to turn screen on.