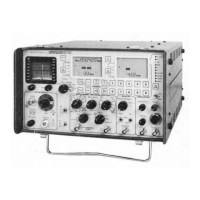
4.4.0 MONITOR OPERATION
4.4.1 SENS MON
The Service Monitor
is
capable
of
monitoring frequen-
cies of 3 MHz to 1
GHz
with 1.5 uV sensitivity.
The
monitor may be used to 1 MHz with reduced sensitivity.
1.
Connect
the
BNC
antenna
(TEKA-24A)
to the
antenna connector located
in
the
RF
section.
2.
Set the
FUNCTION
switch to SENS MON.
3.
Select the modulation type using the
MODE
switch.
4.
Enter
the frequency from the keyboard
EJ~000000EJ
5.
Adjust the squelch and volume.
6.
Move the left cursor
[.6.J
to Dev/%AM. Move the
right cursor
~~
to frequency error. Listen to re-
ceived audio from the internal speaker and view on
the oscilloscope.
NOTE: The antenna input
is
fuse protected against in-
advertent keyup into the antenna input. Consult the
maintenance portion of the manual for fuse replacement.
In either
PWR
MON
or
SENS
MON
functions the
BANDWIDTH
WIDE/NARROW
switch selects the IF
bandwidth.
Narrow
band
is ±
15
KHz
modulation
acceptance used for most 2-way radio communication
systems and wide band
is
±
75
KHz modulation accept-
ance used for commercial FM broadcast monitoring.
Mon 154.5500
lit
Ill
+4.5
KHz
ANTENNA
FIGURE
4-3-TEST
SET-UP FOR
OFF-
THE-AIR MONITORING
CAUTION:
Care should be taken
to
not exceed the .5 watt
max. input level
of
the "Antenna Input".
4.4.1.1 SENS MON
WITH
SPECTRUM ANALYZER
(R-2400
only)
1.
Connect the BNC antenna
to
the "Antenna" connec-
tor
located in the RF section.
2.
Set the Function switch
to
"Anlzr Sens Mon".
3. Adjust the Vertical
and
Horizontal Position controls
if
necessary (see 3.6.8).
4. Ensure
that
"Vert Vernier"
is
set for "Cal".
5.
Enter the RF frequency from the keyboard.
EJ~C!J00000EJ
4-3
6.
Adjust the squelch
and
volume.
7.
Adjust for desired dispersion
of
.01
Mhz/
div (see
3.6.3).
8.
Adjust the RF step attenuator to give the desired
signal level.
9. Check for the presence
of
images using the Image
Hi/Lo
switch (see 3.7.2).
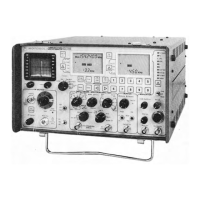
4.4.2
PWR
MON
For
high power signal monitoring (.5
to
125
watts)
1.
Connect the radio under test antenna out to the
RF
IN/OUT
connector on the Service Monitor.
2.
Set the
FUNCTION
switch to
PWR
MON.
3.
Enter
the frequency from keyboard.
4.
Move the right cursor to PWR.
5. Key the radio under test and read
output
power.
CAUTION: To prevent undue stress on the protected cir-
cuits
it
is
advisable to always switch the system to the
power monitor before applying power in excess of
200
mw.
Additional protection
is
also obtained
by
making
it
a
practice not to leave the step
attenuator
in
the 0 dB
position.
High-powered equipment in the
1-30 MHz range, which
have unusually fast carrier rise times, may damage the
service monitor with repeated activation
of
the protect
circuit. Ensure the
FUNCTION
switch
is
in
the
"PWR
MON" position (this enables the protect circuit) before
RF
power
is
applied to the equipment.
In either monitor mode, the displays can be selected
using vertical cursors to the left
of
each LCD to view
frequency, frequency error, modulation level, distortion
and power when in the
PWR
MON function for AM, FM
or
CW signals.
D
Mon xxx.xxxx
L._______,J
RF
IN/OUT
62.5w
TRANSMITTER
FIGURE
4-4-TEST
SET-UP FOR
POWER
MEASUREMENT
 Loading...