Additional Information
Internal Voice Operated Transmission (iVOX)/Voice Operated
Transmission (VOX)
The microphone detects if you are talking when using VOX. If you are talking,
the radio triggers transmission automatically.
• When iVOX is displayed, the radio uses the built-in microphone to detect your voice.
• When a VOX headset is connected to the radio, VOX is displayed and the headset
microphone is used to detect your voice.
You can turn off or select the following settings to select the sensitivity level.
Note: Pressing the PTT button cancels the VOX transmission.
L3
High Sensitivity for quiet environments. Speaking softly is
enough to trigger VOX transmission.
L2 Medium Sensitivity for most environments
L1
Low Sensitivity for noisy environments. You must speak up to
trigger VOX transmission.
Call Tone
When you send a Call Tone, the receiving radio sounds a tone similar to
phone ringing tone.
Scan
Radio scans for voice activity by cycling through the channels. When signals
are detected, the signal is sent to the speaker. This feature allows you to find
which channel is being used by other groups and have heavy traffic. This
helps you to avoid the busy channels when deciding which channel to use for
your group.
Monitor
You can hear everything including noise on your current radio channel. This
feature allows you to monitor a channel for weak signals.
Roger Tone
This feature adds a beep to mark the end of a transmission when you release
the PTT button. When the receiver hears the roger tone, it is a confirmation
that complete message has been received.
Weatherproof
This radio is weatherproof to IP54 standards. The radio is resistant to
occasional splash of water only when the battery and connector covers are
sealed. Do not expose the radio to water for extended period of time. Do not
submerge the radio in water.
1. High or Low Power
2. Transmit or Receive
3. Mute
4. Easy Pairing
5. VOX/iVOX
6. Call Tone
7. Battery
8. Scan
9. Roger Tone
10.Monitor
11.Code
12.Channel
Buttons Descriptions
Menu/Power
• Press to enter Menu and scroll through the menu screen.
• Press and hold for two seconds to turn on or off the radio.
and
• Press to adjust the volume level.
• Press to change the settings or trigger action in the menu screen.
PTT
• Press and hold to talk, release to stop transmission.
• Press to exit menu screen and return to home screen.
Easy Pairing
Copy channel and code settings from radio A to radio B.
1. Radio B–Hold the button until you hear a beep. The radio is ready to
be paired. Multiple radios can be paired simultaneously.
2. Radio A–Hold the button until you hear a double beep. The radio
broadcasts channel and code settings for other radios to pair.
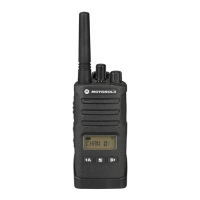
1. Getting to Know Your Radio
Battery Door Latch
(Slide to lock/unlock)
PTT Button
Microphone
USB Charging Port
Power/Menu
button
Headphone Jack
Easy Pairing
button
Installing and Charging the Battery
Inserting and Removing Belt Clip
Turning your Radio On and Off
To turn the radio on or off, hold the Power/Menu button until the display turns on or off.
Channel and Codes
• Set your radios with the same channel and code setting to enable communication
with other radios.
• The channel setting controls the radio frequency. To avoid jamming, select a
channel that is not used by others in your area. See table in Section 3, “Scan” for
more information on selecting unused channel.
• The code setting on the transmitting and receiving radios need to match, otherwise
the receiving radio blocks the received signal. This feature helps you to mute
unwanted voices from other radio users transmitting on your channel.
• When code is set to zero, radio does not block any signal and everything that is
picked up on the channel is sent to the speaker. Motorola Solutions recommends
setting your code to zero when using XT185 with radios that do not support the code
feature. See Section 3, “Navigating the Menu Pages” for detailed instructions on
how to change settings.
• Channel and code settings can be copied from one radio to multiple radios
simultaneously with a shortcut feature called Easy Pairing. See table in Section 1,
“Easy Pairing” for instruction on how to copy channel and code settings.
Transmission Power
• In some countries different powers are allowed for different channels. The H/L icon
indicates if the current channel is a High or Low power channel. Motorola Solutions
recommends you to use high power channels for more reliable communications.
Select low power channels only when your radios are not far from each other and
you want to maximize the battery life.
1. Observe the polarity before installing the battery.
2. Charge the battery using the desktop charger or USB. Charging is completed
when the battery icon on the radio stops blinking. Charging takes up to 8 hours.
Note: Connect the USB charger to a nearby and easily accessible wall power outlet.
Battery Information
The rated battery life is measured under industrial standard 5-5-90 duty cycle
under lab conditions. (5 % of the time transmitting, 5 % receiving with
speaker on, 90 % waiting for incoming call.)
Battery Capacity Maintenance
The XT185 radio comes equipped with a rechargeable Li-Ion battery. This
battery should be fully charged before initial use to ensure optimum capacity
and performance. Battery life is determined by several factors. Among the
more critical are the regular overcharge of batteries and the average depth of
discharge with each cycle. Typically, the greater the overcharge and the
deeper the average discharge, the fewer cycles a battery will last.
For example, a battery which is overcharged and discharged 100 % several
times a day, lasts fewer cycles than a battery that receives less of an over-
charge and is discharged to 50 % per day. Further, a battery which receives
minimal overcharging and averages only 25 % discharge, lasts even longer.
Turn off the radio while charging.
Push-to-Talk Time-out Timer
To avoid air-wave traffic congestion, transmission ends after one minute even
if the PTT button is still pressed. To reset the timer, release the PTT button
briefly.
Use the Menu button to scroll through the menu screen. Press PTT to exit
any screen and return to home screen.
Menu Screen
Use the or button to perform the
following actions:
Call Tone Start or stop Call Tone transmission.
Monitor
Start or stop monitoring the air-wave. You can
hear signals transmitted on the channel setting
of your radio. If there is no signal, you can hear
static.
Scan
Start or stop scanning the air-wave. Radio scans
all the channels one after another. When a signal
is detected, you hear the signal on the speaker
and the radio displays the channel of the
detected signal.
Adjust VOX
To change the Voice Operated Transmission
(VOX) setting, select OFF or L1 to L3.
L3 being the most sensitive, use it in quiet
environments.
Adjust Roger Tone Enable or disable the roger tone. Roger tone is a
beep tone that you hear when PTT is released.
Adjust Channel
(Channel number blinks)
Change the radio channel setting.
Adjust Code
(Code number blinks)
Change the radio code setting.
3. Navigating the Menu Pages
Home
Menu – CDOO TRQH
Menu – MRQLWRU
Menu – SFDQ
Menu – Adj Channel
Menu – Adj Code
Menu – Adj VOX
Menu – Adj Roger Tone
Menu
Menu
0HQX
0HQX
Menu
Menu
Menu
Menu
Channel and Frequencies
Channel
Frequency
(MHz)
Power
(W)
Channel
Frequency
(MHz)
Power
(W)
1 462.5625 1.0 12 467.6625 0.5
2 462.5875 1.0 13 467.6875 0.5
3 462.6125 1.0 14 467.7125 0.5
4 462.6375 1.0 15 462.5500 1.0
5 462.6625 1.0 16 462.5750 1.0
6 462.6875 1.0 17 462.6000 1.0
7 462.7125 1.0 18 462.6250 1.0
8 467.5625 0.5 19 467.6500 1.0
9 467.5875 0.5 20 462.6750 1.0
10 467.6125 0.5 21 462.7000 1.0
11 467.6375 0.5 22 462.7250 1.0
Talking/Transmitting
1. Press and hold the PTT button, then start talking into the microphone.
2. Release the PTT button to stop transmission.
Note: Do not press the PTT button when others are talking. When more
than one radio transmits on the same channel, the air-wave is
jammed and all transmissions are lost.
Listening/Receiving
• The radio speaker receives signal automatically if radio is set to the same channel and
code as the transmitting radio.
• Ensure the speaker volume is set to an appropriate level.
Adjusting Speaker Volume
1. Press or from the home screen.
Using Headsets
• When a headset is connected to the radio, radio speaker is disabled. You need to wear
headset to monitor and receive messages.
• If your headset has PTT button, you can use the button to make a transmission with
the microphone on the headset.
• You can still use the PTT button on the radio to make a transmission with the
microphone on the radio.
MOTOROLA ® TWO-WAY RADIO XT185
MOTOROLA, MOTO, MOTOROLA SOLUTIONS and the Stylized M logo are trademarks or
registered trademarks of Motorola Trademark Holdings, LLC and are used under license. All other
trademarks are the property of their respective owners.
© 2020 and 2021 Motorola Solutions, Inc. All rights reserved.
Printed in
*MN006043A01*
MN006043A01-AC
Additional Information
Internal Voice Operated Transmission (iVOX)/Voice Operated
Transmission (VOX)
The microphone detects if you are talking when using VOX. If you are talking,
the radio triggers transmission automatically.
• When iVOX is displayed, the radio uses the built-in microphone to detect your voice.
• When a VOX headset is connected to the radio, VOX is displayed and the headset
microphone is used to detect your voice.
You can turn off or select the following settings to select the sensitivity level.
Note: Pressing the PTT button cancels the VOX transmission.
L3
High Sensitivity for quiet environments. Speaking softly is
enough to trigger VOX transmission.
L2 Medium Sensitivity for most environments
L1
Low Sensitivity for noisy environments. You must speak up to
trigger VOX transmission.
Call Tone
When you send a Call Tone, the receiving radio sounds a tone similar to
phone ringing tone.
Scan
Radio scans for voice activity by cycling through the channels. When signals
are detected, the signal is sent to the speaker. This feature allows you to find
which channel is being used by other groups and have heavy traffic. This
helps you to avoid the busy channels when deciding which channel to use for
your group.
Monitor
You can hear everything including noise on your current radio channel. This
feature allows you to monitor a channel for weak signals.
Roger Tone
This feature adds a beep to mark the end of a transmission when you release
the PTT button. When the receiver hears the roger tone, it is a confirmation
that complete message has been received.
Weatherproof
This radio is weatherproof to IP54 standards. The radio is resistant to
occasional splash of water only when the battery and connector covers are
sealed. Do not expose the radio to water for extended period of time. Do not
submerge the radio in water.
1. High or Low Power
2. Transmit or Receive
3. Mute
4. Easy Pairing
5. VOX/iVOX
6. Call Tone
7. Battery
8. Scan
9. Roger Tone
10.Monitor
11.Code
12.Channel
Buttons Descriptions
Menu/Power
• Press to enter Menu and scroll through the menu screen.
• Press and hold for two seconds to turn on or off the radio.
and
• Press to adjust the volume level.
• Press to change the settings or trigger action in the menu screen.
PTT
• Press and hold to talk, release to stop transmission.
• Press to exit menu screen and return to home screen.
Easy Pairing
Copy channel and code settings from radio A to radio B.
1. Radio B–Hold the button until you hear a beep. The radio is ready to
be paired. Multiple radios can be paired simultaneously.
2. Radio A–Hold the button until you hear a double beep. The radio
broadcasts channel and code settings for other radios to pair.
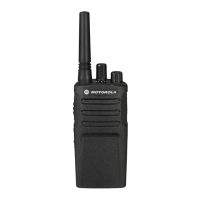
1. Getting to Know Your Radio
Battery Door Latch
(Slide to lock/unlock)
PTT Button
Microphone
USB Charging Port
Power/Menu
button
Headphone Jack
Easy Pairing
button
Installing and Charging the Battery
Inserting and Removing Belt Clip
Turning your Radio On and Off
To turn the radio on or off, hold the Power/Menu button until the display turns on or off.
Channel and Codes
• Set your radios with the same channel and code setting to enable communication
with other radios.
• The channel setting controls the radio frequency. To avoid jamming, select a
channel that is not used by others in your area. See table in Section 3, “Scan” for
more information on selecting unused channel.
• The code setting on the transmitting and receiving radios need to match, otherwise
the receiving radio blocks the received signal. This feature helps you to mute
unwanted voices from other radio users transmitting on your channel.
• When code is set to zero, radio does not block any signal and everything that is
picked up on the channel is sent to the speaker. Motorola Solutions recommends
setting your code to zero when using XT185 with radios that do not support the code
feature. See Section 3, “Navigating the Menu Pages” for detailed instructions on
how to change settings.
• Channel and code settings can be copied from one radio to multiple radios
simultaneously with a shortcut feature called Easy Pairing. See table in Section 1,
“Easy Pairing” for instruction on how to copy channel and code settings.
Transmission Power
• In some countries different powers are allowed for different channels. The H/L icon
indicates if the current channel is a High or Low power channel. Motorola Solutions
recommends you to use high power channels for more reliable communications.
Select low power channels only when your radios are not far from each other and
you want to maximize the battery life.
1. Observe the polarity before installing the battery.
2. Charge the battery using the desktop charger or USB. Charging is completed
when the battery icon on the radio stops blinking. Charging takes up to 8 hours.
Note: Connect the USB charger to a nearby and easily accessible wall power outlet.
Battery Information
The rated battery life is measured under industrial standard 5-5-90 duty cycle
under lab conditions. (5 % of the time transmitting, 5 % receiving with
speaker on, 90 % waiting for incoming call.)
Battery Capacity Maintenance
The XT185 radio comes equipped with a rechargeable Li-Ion battery. This
battery should be fully charged before initial use to ensure optimum capacity
and performance. Battery life is determined by several factors. Among the
more critical are the regular overcharge of batteries and the average depth of
discharge with each cycle. Typically, the greater the overcharge and the
deeper the average discharge, the fewer cycles a battery will last.
For example, a battery which is overcharged and discharged 100 % several
times a day, lasts fewer cycles than a battery that receives less of an over-
charge and is discharged to 50 % per day. Further, a battery which receives
minimal overcharging and averages only 25 % discharge, lasts even longer.
Turn off the radio while charging.
Push-to-Talk Time-out Timer
To avoid air-wave traffic congestion, transmission ends after one minute even
if the PTT button is still pressed. To reset the timer, release the PTT button
briefly.
Use the Menu button to scroll through the menu screen. Press PTT to exit
any screen and return to home screen.
Menu Screen
Use the or button to perform the
following actions:
Call Tone Start or stop Call Tone transmission.
Monitor
Start or stop monitoring the air-wave. You can
hear signals transmitted on the channel setting
of your radio. If there is no signal, you can hear
static.
Scan
Start or stop scanning the air-wave. Radio scans
all the channels one after another. When a signal
is detected, you hear the signal on the speaker
and the radio displays the channel of the
detected signal.
Adjust VOX
To change the Voice Operated Transmission
(VOX) setting, select OFF or L1 to L3.
L3 being the most sensitive, use it in quiet
environments.
Adjust Roger Tone Enable or disable the roger tone. Roger tone is a
beep tone that you hear when PTT is released.
Adjust Channel
(Channel number blinks)
Change the radio channel setting.
Adjust Code
(Code number blinks)
Change the radio code setting.
3. Navigating the Menu Pages
Home
Menu – CDOO TRQH
Menu – MRQLWRU
Menu – SFDQ
Menu – Adj Channel
Menu – Adj Code
Menu – Adj VOX
Menu – Adj Roger Tone
Menu
Menu
0HQX
0HQX
Menu
Menu
Menu
Menu
Channel and Frequencies
Channel
Frequency
(MHz)
Power
(W)
Channel
Frequency
(MHz)
Power
(W)
1 462.5625 1.0 12 467.6625 0.5
2 462.5875 1.0 13 467.6875 0.5
3 462.6125 1.0 14 467.7125 0.5
4 462.6375 1.0 15 462.5500 1.0
5 462.6625 1.0 16 462.5750 1.0
6 462.6875 1.0 17 462.6000 1.0
7 462.7125 1.0 18 462.6250 1.0
8 467.5625 0.5 19 467.6500 1.0
9 467.5875 0.5 20 462.6750 1.0
10 467.6125 0.5 21 462.7000 1.0
11 467.6375 0.5 22 462.7250 1.0
Talking/Transmitting
1. Press and hold the PTT button, then start talking into the microphone.
2. Release the PTT button to stop transmission.
Note: Do not press the PTT button when others are talking. When more
than one radio transmits on the same channel, the air-wave is
jammed and all transmissions are lost.
Listening/Receiving
• The radio speaker receives signal automatically if radio is set to the same channel and
code as the transmitting radio.
• Ensure the speaker volume is set to an appropriate level.
Adjusting Speaker Volume
1. Press or from the home screen.
Using Headsets
• When a headset is connected to the radio, radio speaker is disabled. You need to wear
headset to monitor and receive messages.
• If your headset has PTT button, you can use the button to make a transmission with
the microphone on the headset.
• You can still use the PTT button on the radio to make a transmission with the
microphone on the radio.
MOTOROLA ® TWO-WAY RADIO XT185
MOTOROLA, MOTO, MOTOROLA SOLUTIONS and the Stylized M logo are trademarks or
registered trademarks of Motorola Trademark Holdings, LLC and are used under license. All other
trademarks are the property of their respective owners.
© 2020 and 2021 Motorola Solutions, Inc. All rights reserved.
Printed in
*MN006043A01*
MN006043A01-AC