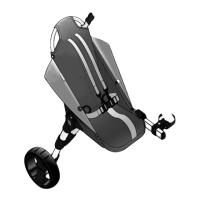
Components
2
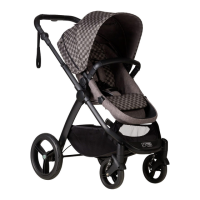
Wheel (a), Buggypod® frame(b), connector bar (c), connector
bar adaptor* (d), mounting brackets & friction sleeve (e),
mounting bosses (g), allen key x 2 (h), end plugs (i), secondary
axle (
j), mounting blocks (k).
*
y
ou will need a screwdriver
*
Connector bar adaptor available separately from
support@revelo.co.uk if you live in the UK or contact your
national distributor if outside UK
(see bug
gypod.com for list).
I
Main Components
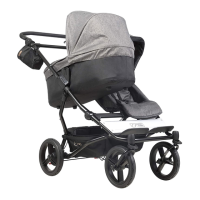
Axle holding strap (m), backrest (n), safety latch (l), leash (o),
footrest (s) axle (q), main hinges (p), securing clip (r)
For your convenience, the Buggypod® is supplied
partly pre-assembled.
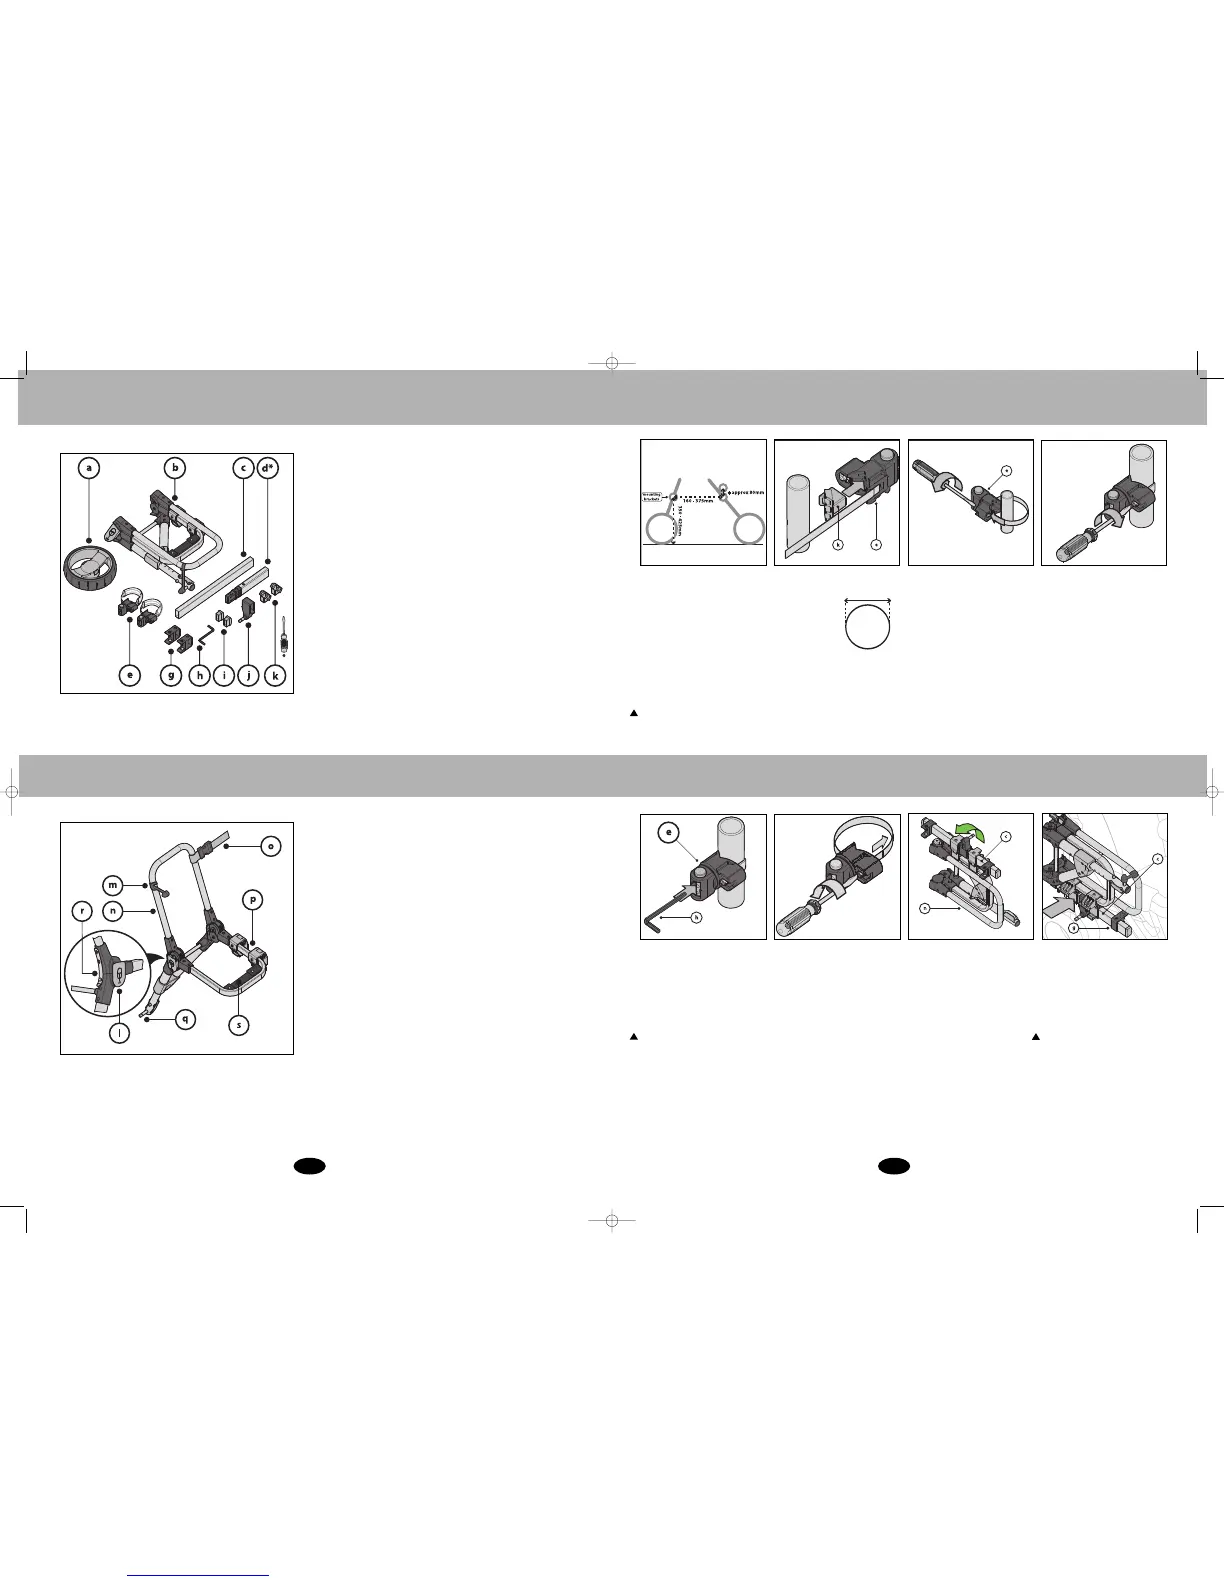
Step1. Placement of
mounting bracket
Step 2. Attaching mounting brackets
to the pushchair
The mounting brackets should be
fitted to two major frame bars on
the r
ight hand side of the pushchair,
betw
een 16 -37.5cm apart, and
betw
een 35- 43cm from the floor.
The front bracket can be fitted up to
approx. 8 cm higher than the rear
br
acket if it helps achieve a good
connection.
As a result, the
Buggypod® seat tilts back slightly
and you may prefer that.
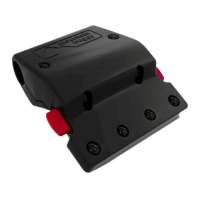
WHEN TO USE MOUNTING BLOCKS:
The mounting
bloc
ks (k) should
be used w
hen
f
itting the
mounting brackets
(e) to thin square
frames or thin
round frames less than 18mm in
diameter. They can also be
used to clear folding mechanisms.
W
hen fitting to a square frame,
let the br
acket point diagonally
to the rear or front.
If you want to make any changes
to the position of the mounting
br
ac
k
et, loosen the band screw
with a scr
ewdriver as shown.
Reposition the mounting bracket
and r
e-tighten.
Y
ou will need to
r
eposition the mounting br
ac
k
ets
if they interfere with the braking
system or folding mechanism of
your pushchair.
See
www
.bug
g
ypod.com
f
or photos
of fittings to particular pushchair
models.
Then turn the red button head so that
it is vertical (or perpendicular to the
connector bar (c) if fr
ont br
ac
ket is
attac
hed higher than rear bracket).
Tighten the red button head with the
supplied allen k
e
y (h) in the hole in
the middle w
her
e sho
wn.
Affix mounting bracket (e) pre-fitted
with the fr
iction sleeve to pushchair
b
y wr
apping the steel band around
the pushc
hair frame and feeding the
end back into the band screw
housing
. You can cut the friction
sleeve to size to avoid it interfering
with the bracket sides.
T
he mounting brackets (e) and the
Buggypod® (b) must not interfere
w
ith the br
aking system or folding
mec
hanism of your pushchair.
You must tighten the red button head
before using he Buggypod®
.
18mm
T
ighten the band screw with a
screwdriver as shown.
Step 3. Attaching the Buggypod®
Hold the Buggypod® vertically
against the mounting brackets on
the host pushchair. (Note the
mounting bosses (g) slide loosely
along the connector bar (c) as they
are supplied un-tightened).
Take the Buggypod® (b) and fold
open the connector bar(c) by
90º(quar
ter turn).
The connector bar must run parallel with
the cen
treline of the pushchair. If the
angle of your pushchair frame prevents
this,
please use the connector bar
ada
ptor (see page 6).
BuggyPodSmorph_May10 5/5/10 20:44 Page 4