16
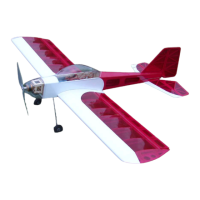
9. Insert the rest of the 3/32” balsa ribs onto the spar, making sure all of the ribs are pressed
fully in place.
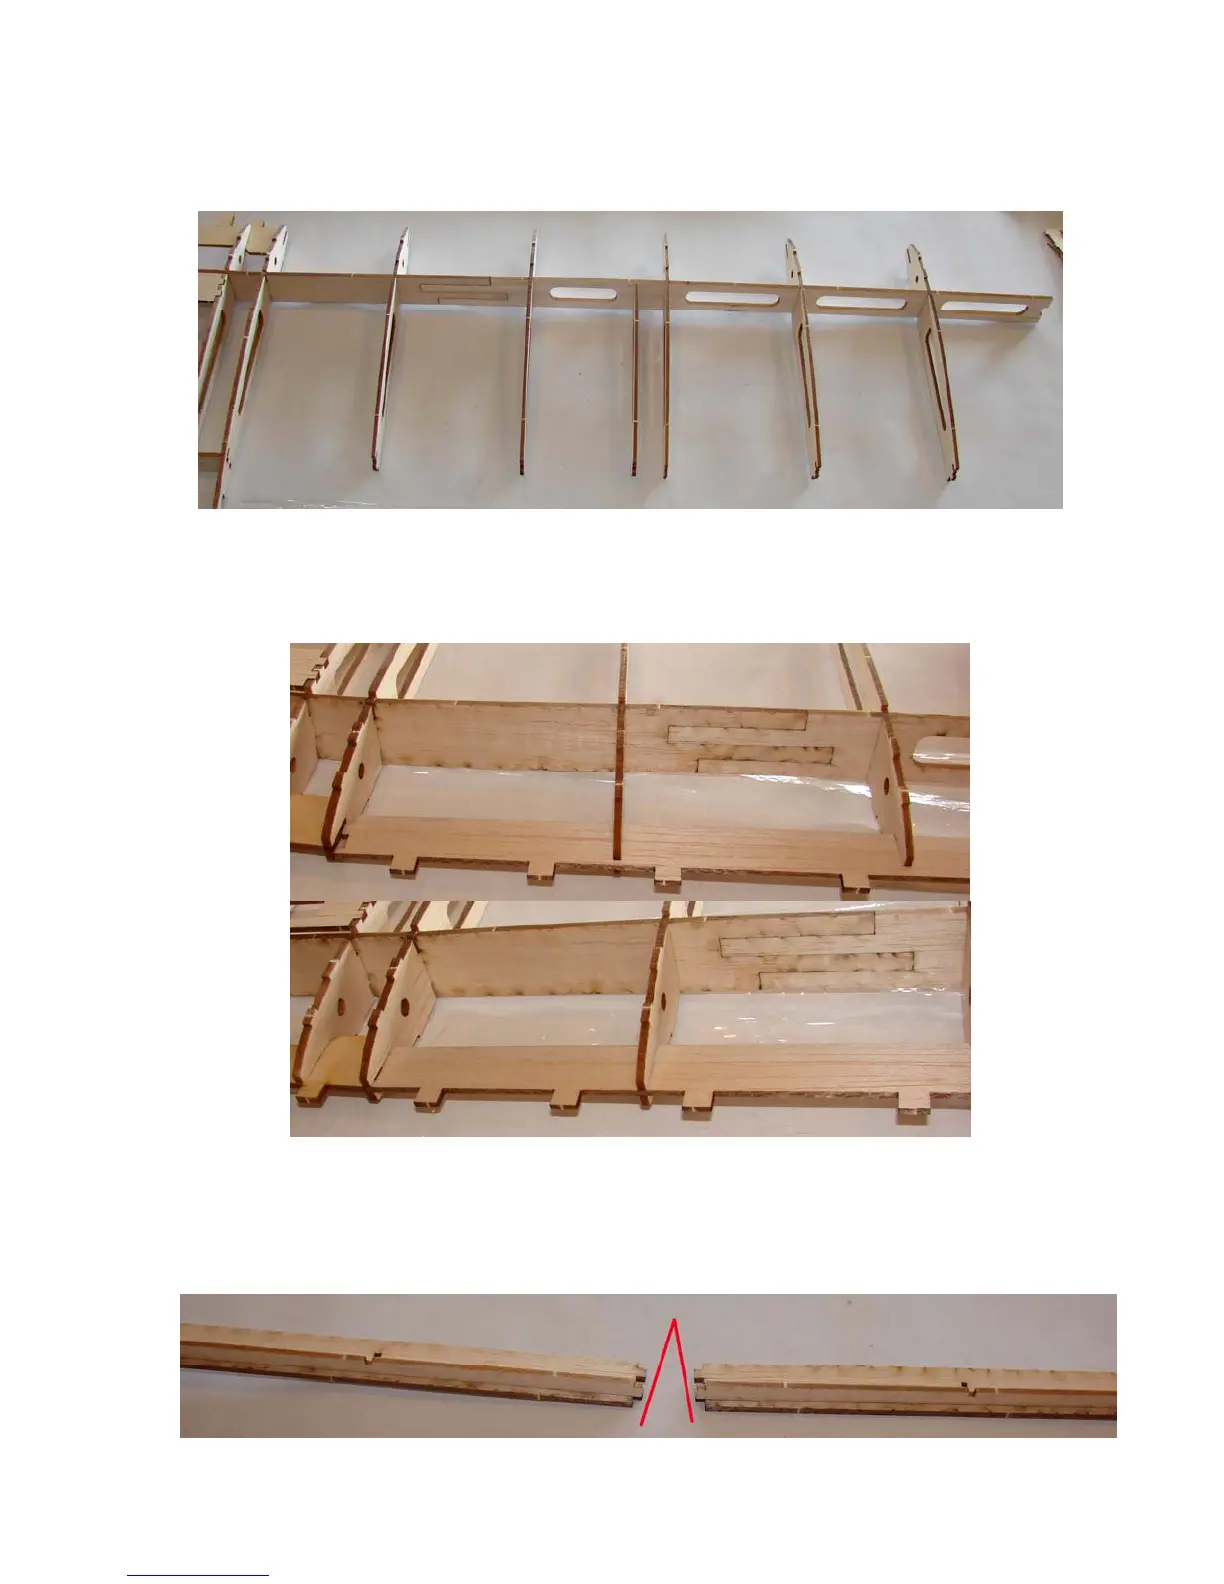
10. Sand Slide the 3/32” balsa leading edge support into place on the ribs on one side of the wing.
MAKE SURE you install it in the right direction. The side with 2 tabs goes toward the center of
the wing. Work a little bit at a time, pressing it just into the ribs along the wing, then start at
the center working out, pressing in further. Repeat until it is fully pressed into place.
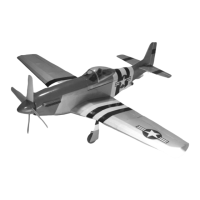
11. Press the 3/32” balsa T.E. supports into the 1/8” trailing edge as shown below. The 3/32”
parts were next to the leading edges used in step 10. LOOK AT THE PARTS! One end has an
angle on the 1/8” parts, which goes toward the center section of the wing. Set them next to
each other so you make a LEFT and RIGHT side. The end of the 3/32” parts with the shorter
tab also goes toward the center section. Lightly tack these parts together with thin CA.