07
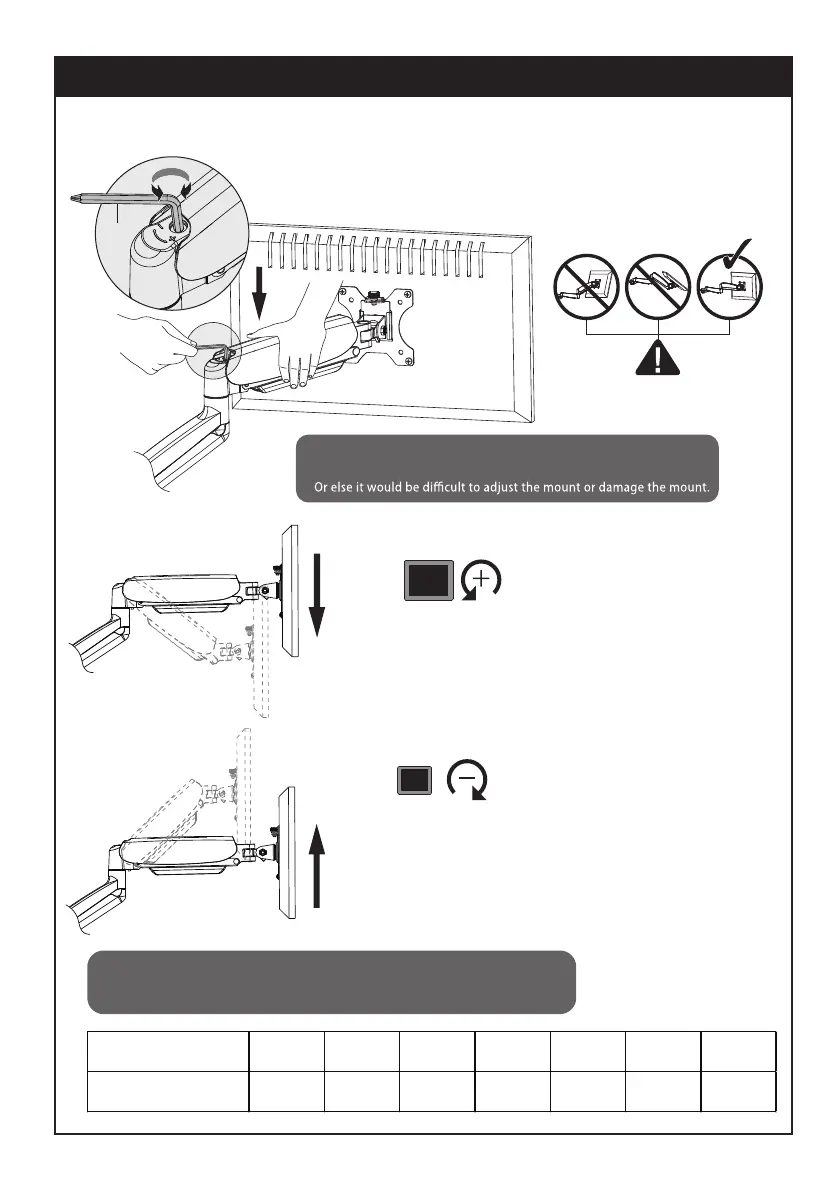
STEP 6: Adjust Tension
P
Note1:
Be sure to keep the arm in horizontal position during adjustment.
Falls down
After being attached to the arm, the monitor falls down
and can not stay at the desired height by itself.
Turn counter-clockwise(“+”direction) to increase gas
spring tension until the monitor can stay at the desired
height by itself.
After being attached to the arm, the monitor rises up and
can not stay at the desired height by itself.
Turn clockwise(“-”direction) to reduce gas spring tension
until the monitor can stay at the desired height by itself.
Rises up
CAUTION
Monitor Weight 2kg 3kg 4kg 5kg 6kg 7kg 8kg
Circles (AT LEAST)
As for how many circles the screw should be turned, the table below is for reference.
Note2:
For proper functioning of this mount, depending on dierent weight of monitor you might need to adjust
tension in upper arm (A) using 6 mm allen key (P).
1 4 8 11 14 17
min