EasyManuals Logo

Moxa Technologies ioThinx 4510 Series Quick Installation Guide

Moxa Technologies ioThinx 4510 Series
12 pages
To Next Page IconTo Next Page
To Previous Page IconTo Previous Page
Page #5 background imageLoading...
Page #5 background image
- 5 -
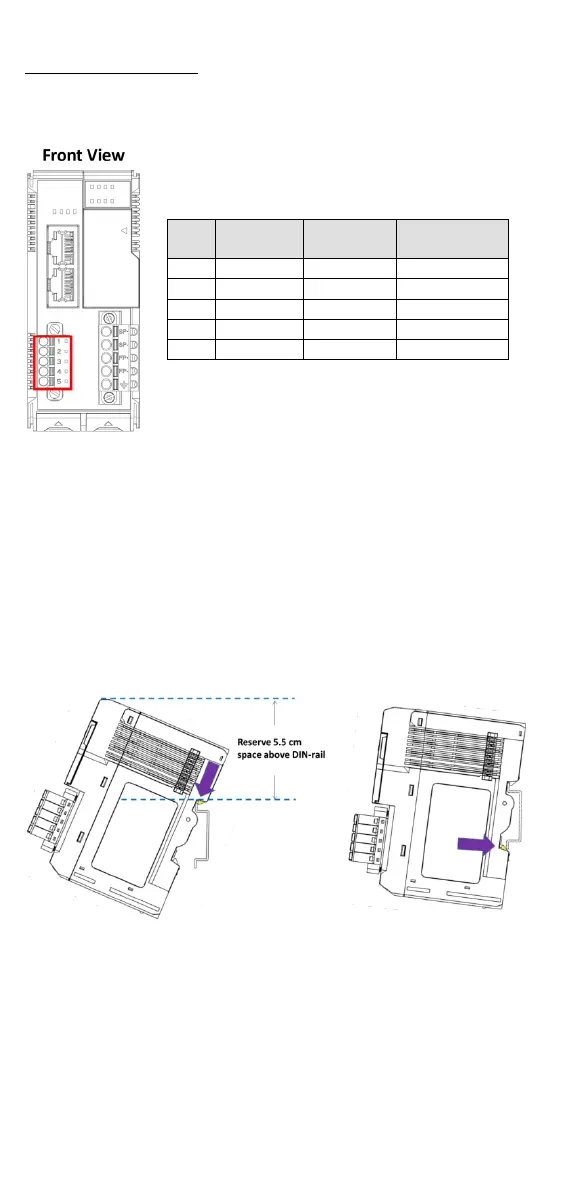
Serial Communication
The ioThinx 4510 is equipped with a 3-in-1 serial interface, which
supports 1 RS-232 port, or 1 RS-422 port, or 2 RS-485 ports. Refer to
the pin assignment table below to set up serial connections to the unit.
PIN
RS-232
(P1)
RS-422
(P1)
RS-485
(P1/P2)
1
TXD
TXD+
DATA 1+
2
RXD
TXD-
DATA 1-
3
RTS
RXD+
DATA 2+
4
CTS
RXD-
DATA 2-
5
GND
GND
GND
Wire Range: AWG 16 to 28 (ferrule diameter: 1.291 to 0.321 mm),
Wire Strip Length: 10 mm
45M Module Wiring
For detailed 45M module wiring, refer to the ioThinx 4510 User’s
Manual on Moxa’s official website.
Installing the System on a DIN Rail
Step 1: Hook the mounting clip of the unit onto the DIN rail and lower
the clip onto the DIN rail. Reserve at least 5.5 cm of space above the
DIN rail to ensure that there is enough room to install the unit.

Other manuals for Moxa Technologies ioThinx 4510 Series

Questions and Answers:

Question and Answer IconNeed help?

Do you have a question about the Moxa Technologies ioThinx 4510 Series and is the answer not in the manual?

Moxa Technologies ioThinx 4510 Series Specifications

General IconGeneral
BrandMoxa Technologies
ModelioThinx 4510 Series
CategoryController
LanguageEnglish