USER MANUAL
MANUEL D’UTILISATION
MANUAL DEL USUARIO
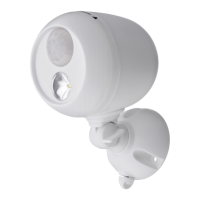
MB360XT
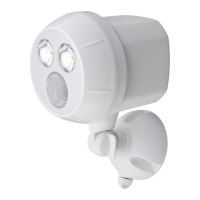
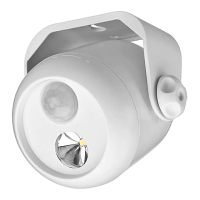
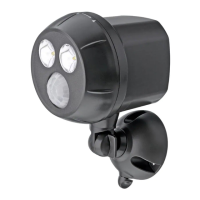
LED SPOTLIGHT | PROJECTEUR À DEL | PROYECTOR DE LUZ LED
Customer Service | Service à la clientèle | Servicio de atención al cliente
9 am - 5 pm EST | 877.298.9082 | customerservice@mrbeams.com
Mailing Address | Adresse postale | Dirección postal
Mr Beams U.S. - 600 Beta Drive, Unit 100, Mayeld Village, OH 44143
www.mrbeams.com
1. A) Remove the mounting base by turning the thumbscrew
counterclockwise.
B) Lift the light out of the base and set aside.
A) Retirez le socle de xation en tournant la vis à serrage à
main dans le sens inverse des aiguilles d’une montre.
Retirez la lampe de la base et mettez-la de côté.
A) Haga girar el tornillo de mariposa en sentido contrario a
las agujas del reloj para retirar la base de montaje.
B) Levante la lámpara para quitarla de la base y colóquela
por separado.
3. Drill the screws through the holes on mounting base.
Insert the stem back into mounting base and tighten the
thumbscrew.
Insérez les vis dans les trous de la base de xation à l’aide
de la perceuse. Réinsérez la tige dans la base de xation et
serrez la vis à serrage à main.
Inserte los tornillos con el taladro por los agujeros en la
base de montaje. Inserte el vástago nuevamente en la base
de montaje y ajuste el tornillo de mariposa.
4. Loosen the knuckle screw located on the stem of the light to
point the light in desired direction. Then tighten the screw to
secure position.
Desserrez les vis à rotule se trouvant sur la tige de la lampe
pour orienter la lumière dans la direction souhaitée. Ensuite,
serrez la vis pour maintenir la position.
Aoje el tornillo de la articulación ubicado en el vástago
de la lámpara para orientar la luz en la dirección deseada.
Luego, ajuste el tornillo para jar la posición.
3. Line up arrows then turn the face of the light clockwise.
Make sure the unit is closed by twisting until the arrow
symbol is pointing past the lock symbol, to ensure
weatherproof seal is tight.
Alignez les èches et tournez ensuite le devant du
projecteur dans le sens des aiguilles d’une montre.
Vériez que l’unité est fermée en tournant jusqu’à ce
que le symbole de èche soit orienté après le symbole
de verrouillage an de garantir une étanchéité aux
intempéries.
Alinee las echas y luego gire la parte frontal de la
lámpara en sentido de las agujas del reloj. Asegúrese de
que la unidad esté cerrada girando hasta que el símbolo
de echa quede en un punto en el que haya pasado
el símbolo de bloqueo a n de garantizar que el sello
hermético esté ajustado.
BATTERY INSTALLATION |
INSTALLATION DES PILES |
INSTALACIÓN DE LAS PILAS
LIGHT INSTALLATION |
INSTALLATION DE LA LAMPE |
INSTALACIÓN DE LAS LÁMPARAS
1. Remove the front cover of the spotlight by rotating the face
counterclockwise. Pull the face out from the housing to
reveal battery holder.
Retirez le couvercle avant du projecteur en tournant le
devant dans le sens inverse des aiguilles d’une montre.
Retirez le devant du boîtier pour accéder au compartiment à
piles.
Retire la cubierta delantera del proyector de luz girando
la parte frontal en sentido contrario a las agujas del reloj.
Extraiga la parte frontal del armazón para dejar a la vista el
portapilas.
2. A) To release the door on the battery compartment, use
your thumb to press the tab into the light and lift the door o
the light.
B) Insert 3 D-cell batteries into the light. Ensure the
batteries are inserted so that the at ends are making
contact with the springs. Attach the battery door by
matching the tabs to the rectangular holes and then push
down on the door until it clicks into place.
A) Pour ouvrir le couvercle du compartiment à piles, utilisez
votre pouce pour appuyer sur la languette dans la lampe et
le retirer.
B) Insérez 3 piles D dans la lampe. Assurez-vous que les
piles sont insérées de sorte à ce que les extrémités plates
soient en contact avec les ressorts. Fixez le couvercle
du compartiment en faisant correspondre les languettes
aux trous rectangulaires, puis appuyez jusqu’à ce que le
couvercle émette un clic.
A) Para liberar la tapa del compartimento de las pilas, use el
pulgar para presionar la lengüeta hacia la lámpara y levante
la cubierta para quitar la lámpara.
B) Inserte 3 pilas de celdas D en la lámpara. Asegúrese
de que las pilas estén colocadas de manera tal que los
extremos lisos hagan contacto con los resortes. Coloque la
tapa de las pilas haciendo que las lengüetas coincidan con
los agujeros rectangulares y luego empuje hacia abajo la
tapa hasta que haga un sonido de clic al quedar en su lugar.
2. Determine the mounting location and mark the pilot holes.
Use a 1/16” drill bit to create the pilot holes (if mounting to
drywall, use the plastic anchors included with the screws).
Use a hammer to tap the plastic anchors into the pilot holes
before screwing in the mounting base.
Déterminez l’emplacement de xation et marquez les avant-
trous. Utilisez un foret de 1/16 po pour créer les avant-trous
(pour montage sur cloison sèche, utilisez les chevilles en
plastique inclus avec les vis). Utilisez un marteau pour insérer
les chevilles en plastique dans les avant-trous avant de visser
le socle de xation.
Determine la ubicación de montaje y marque los agujeros
guía. Utilice una broca de 1/16 in para realizar los agujeros
guía (si el montaje se hará en una pared de yeso, use los
tacos de jación de plástico incluidos con los tornillos). Use
un martillo para insertar con golpes suaves los tacos de
jación de plástico dentro de los agujeros guía, antes de
atornillar la base de montaje.
B)
B)
A)
A)