Page 5
Assembly Instructions
Read the ENTIRE IMPORTANT SAFETY INFORMATION section at the beginning of this document including all
text under subheadings therein before set up or use of this product.
Inspect tool before use, looking for damaged, loose, and missing parts. If any problems are found, do not use tool
until repaired.
Components of this Shop Press are heavy. You will need a helper to safely assemble this product.
Using the Components photo (Page 4) and the Parts List (Page 9) and Assembly Diagram n ear the end of the
manual, lay out and identify all pieces before assembly.
1. Put on safety glasses and heavy leather boots.
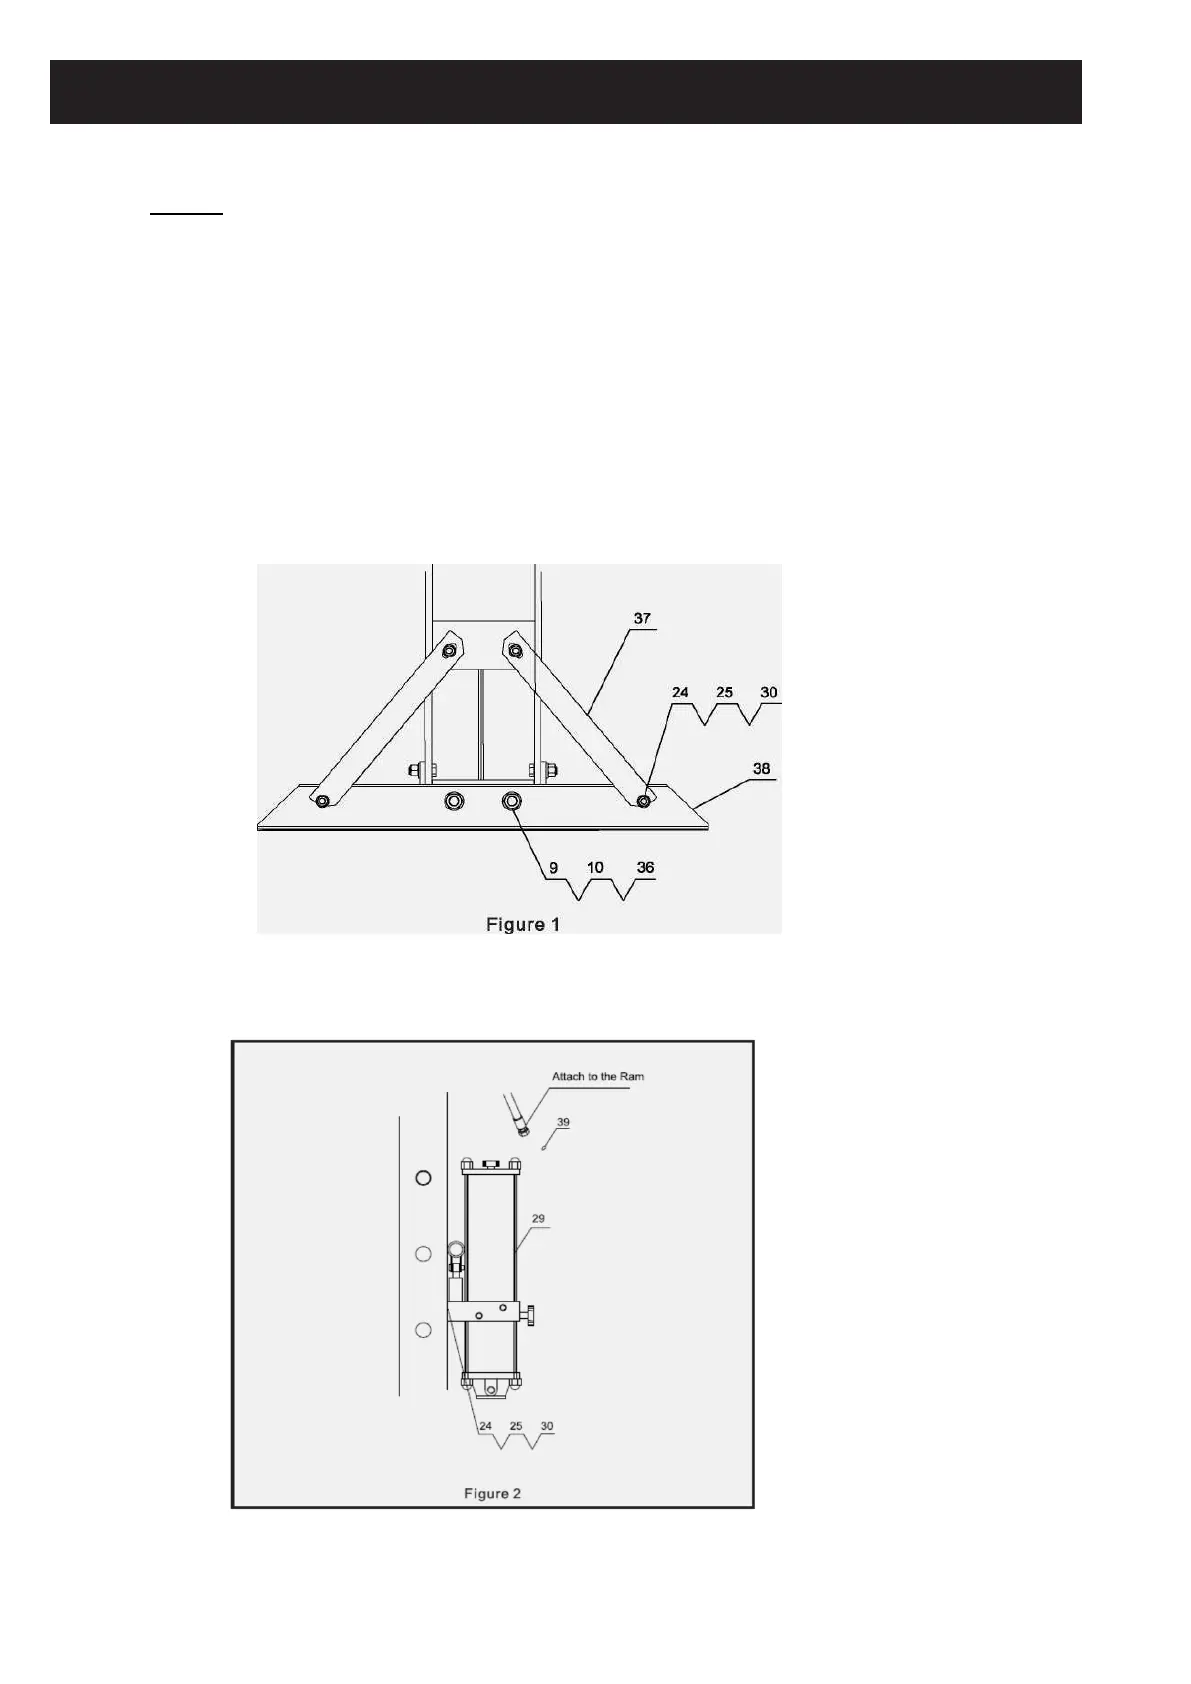
2. Slide each Base Support (38) under the Frame Posts. Line up the bolt holes and insert the Bolts (36) through
the Frame Posts, Base Sections, then secure in place with the Washers (9) and Nuts (10). Attach the Base Side
Supports (37) to the Frame Posts and Base Support using the Bolts (30), Washers (24), and Nuts (25).
See Figure 1
3. Attach the Pump (29) to the Right Frame Post using the Bolts (30), Washers (24), and Nuts (25). Attach the
Hose to the Ram with O-Ring (39).
See Figure 2.