3-7
MS-AE32
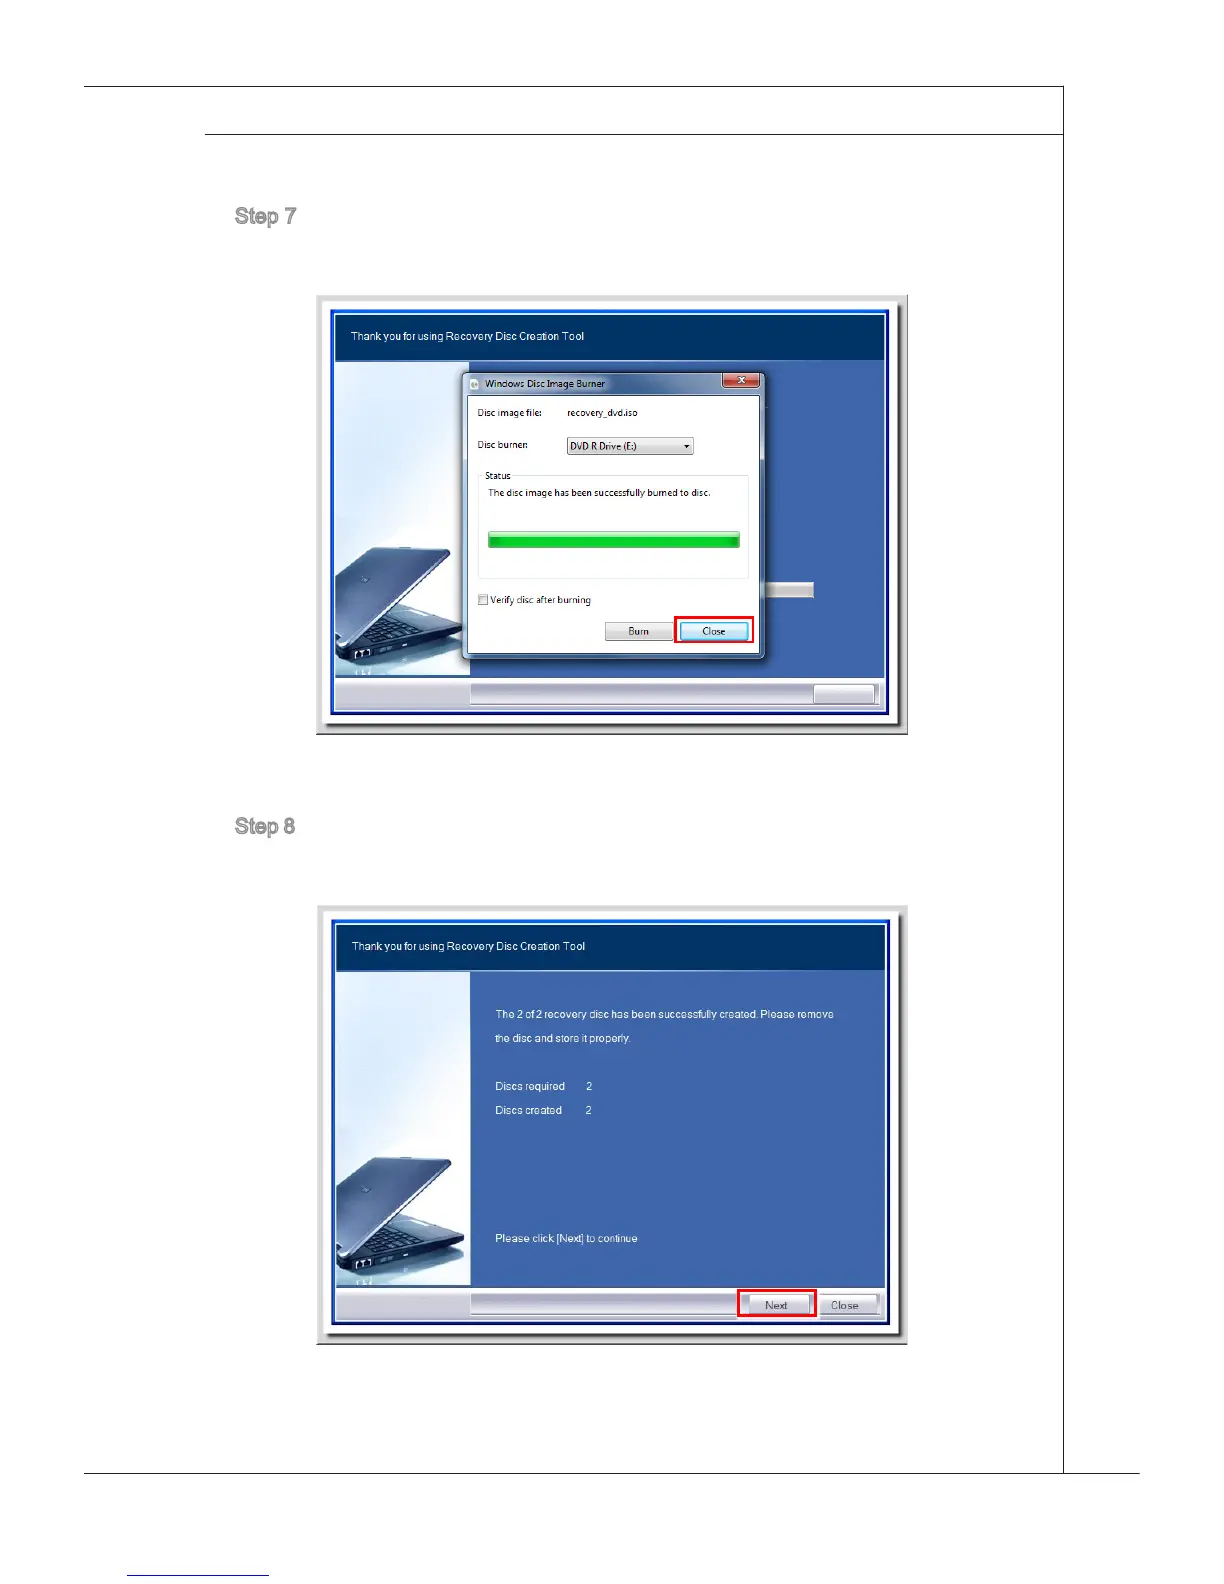
Step 6. The Windows Disc Image Burner pops up. Click [Burn] to start the burn-
ing progress. It takes a while to nish the processing.
Step 7. On completion of the disk creation, click [Close] to exit and take out the
disk. Follow the on-screen instructions to create all recovery disks.
Step 8. All recovery disks have been successfully created. Please store the disks
carefully and click [Next] to continue.