Do you have a question about the MSI B250I PRO and is the answer not in the manual?
Details on supported Intel processors for Socket LGA1151.
Information about the Intel B250 Chipset.
Specifications for DDR4 memory slots, capacity, and speed support.
List of all connectors available on the rear I/O panel.
Instructions and important notes for installing the CPU into the socket.
Instructions and important notes for installing memory modules.
Pin definitions for connecting ATX power supply connectors.
Methods to enter the BIOS setup utility during boot.
Procedures for resetting BIOS settings to default values.
Instructions for updating the BIOS using M-FLASH or Live Update 6.
Step-by-step guide for installing Windows operating systems.
Instructions for installing essential hardware drivers from the included disc.
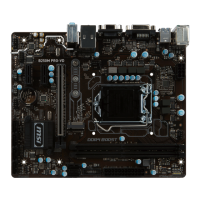
This document describes the MSI B250I PRO motherboard, providing comprehensive information for its installation, setup, and maintenance. It is designed to guide users through the process of building and configuring a computer system using this specific motherboard.
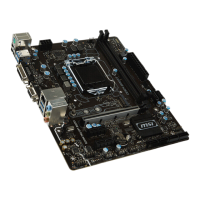
The motherboard serves as the central hub for a computer system, connecting and allowing communication between all other components. Its primary function is to provide the necessary infrastructure for the CPU, memory, storage devices, expansion cards, and various peripherals to operate cohesively. The B250I PRO is a Mini-ITX form factor motherboard, making it suitable for compact and small form factor PC builds.
The motherboard supports 7th and 6th Gen Intel Core i3/i5/i7, Pentium, and Celeron processors for Socket LGA1151, offering flexibility in CPU choice. It features two DDR4 memory slots, supporting up to 32GB of RAM in a dual-channel architecture. This allows for efficient multitasking and demanding applications. The memory slots also support Intel Extreme Memory Profile (XMP), which can optimize memory performance.
For graphics, the motherboard includes onboard graphics capabilities with an HDMI™ port and a DVI-D port. The HDMI™ port supports high resolutions up to 4096x2160 at 30Hz (with 7th Gen CPU) or 24Hz (with 6th Gen CPU), and 2560x1600 at 60Hz. The DVI-D port supports a maximum resolution of 1920x1200 at 60Hz.
Storage options are robust, with four SATA 6Gb/s ports for traditional hard drives and SSDs. Additionally, it includes one M.2 slot (Key M) located on the bottom of the motherboard, supporting PCIe 3.0 x4 and SATA 6Gb/s storage devices. This M.2 slot is compatible with 2242, 2260, and 2280 form factor storage devices and is Intel Optane™ Memory Ready, offering high-speed storage solutions. A notable feature is that the SATA1 connector becomes unavailable when an M.2 SATA SSD module is installed in the M.2_2 slot, which is important for users to consider during setup.
Connectivity is extensive, with six USB 3.1 Gen1 (SuperSpeed USB) ports, including four on the back panel and two available through an internal USB connector. It also provides four USB 2.0 (High-speed USB) ports, with two on the back panel and two available through an internal USB connector. These ports allow for a wide range of peripheral connections.
Audio is handled by a Realtek ALC887 Codec, providing 7.1-Channel High Definition Audio. The manual details how to configure 7.1-channel audio by connecting a front audio I/O module to the JAUD1 connector and adjusting settings in the Realtek HD Audio Manager. This includes options to mute the rear output device when headphones are plugged in and to playback two different audio streams simultaneously from front and rear outputs.
Network connectivity is provided by a Realtek RTL8111H Gigabit LAN controller. The manual includes a LAN Port LED Status Table to help users understand the network connection status and speed.
Expansion capabilities include one PCIe 3.0 x16 slot for graphics cards or other expansion cards, and one M.2 Wi-Fi/Bluetooth® module vertical slot (Key E) for wireless connectivity.
The motherboard features various internal connectors for front panel audio, front panel switches and LEDs, a TPM module, chassis intrusion, and a serial port. It also includes fan connectors (CPU_FAN1, SYS_FAN1) that can operate in PWM (Pulse Width Modulation) or DC mode, allowing users to adjust fan speeds based on CPU temperature for optimal cooling and noise control. The EZ Debug LED feature provides quick diagnostics for CPU, DRAM, VGA, and BOOT status, helping users troubleshoot issues during startup.
The manual emphasizes several safety precautions crucial for handling and maintaining the motherboard. It advises users to always unplug the power cord before installing or removing components to prevent electrostatic discharge (ESD) damage. Wearing an ESD wrist strap or discharging static electricity by touching a metal object is recommended. The motherboard should be held by its edges to avoid touching sensitive components and stored in an electrostatic shielding container when not installed.
Proper CPU installation is highlighted, including the importance of installing a CPU heatsink to prevent overheating and ensuring it forms a tight seal with the CPU. Users are reminded to retain the CPU protective cap for RMA requests and to protect CPU socket pins when the CPU is not installed.
For memory installation, it's crucial to insert the memory module into DIMM1 first for successful system boot. The manual also advises on the maximum addressable memory for 32-bit Windows OS and recommends 64-bit Windows OS for more than 4GB of RAM.
The BIOS Setup section details how to enter the BIOS, reset it to default values, and update it. Users can enter BIOS setup by pressing the Delete key during POST or by using the MSI FAST BOOT application. Resetting BIOS to default values can be done by pressing F6 in BIOS or by shorting the Clear CMOS jumper (JBAT1) on the motherboard. The manual provides step-by-step instructions for updating the BIOS using M-FLASH (via USB flash drive) or Live Update 6 (via internet).
The chassis intrusion connector (JCI1) allows users to connect a chassis intrusion switch/sensor. If enabled in BIOS, a warning message will be displayed if the chassis cover is opened, enhancing security. The manual explains how to enable, reset, and clear this warning.
Software installation is also covered, with instructions for installing Windows 7/8.1/10, drivers, and utilities from the MSI Driver Disc. For Windows 7 installation, it notes chipset limitations regarding USB optical drives and pen drives and suggests using MSI Smart Tool.
Overall, the MSI B250I PRO motherboard is designed for users seeking a compact yet capable platform for their PC builds, offering a balance of performance, connectivity, and user-friendly features for installation and maintenance.
| Form Factor | Mini-ITX |
|---|---|
| Chipset | Intel B250 |
| Socket | LGA 1151 |
| Memory Type | DDR4 |
| Memory Slots | 2 |
| Max Memory | 32GB |
| Memory Speed | 2400/2133 MHz |
| PCIe Slots | 1 x PCIe 3.0 x16 |
| SATA 6Gb/s | 4 |
| M.2 Slots | 1 |
| Video Outputs | 1 x HDMI, 1 x DisplayPort |
| Audio | Realtek ALC887 |
| LAN | 1 x Gigabit Ethernet |
| RAID Support | 0/1/5/10 |